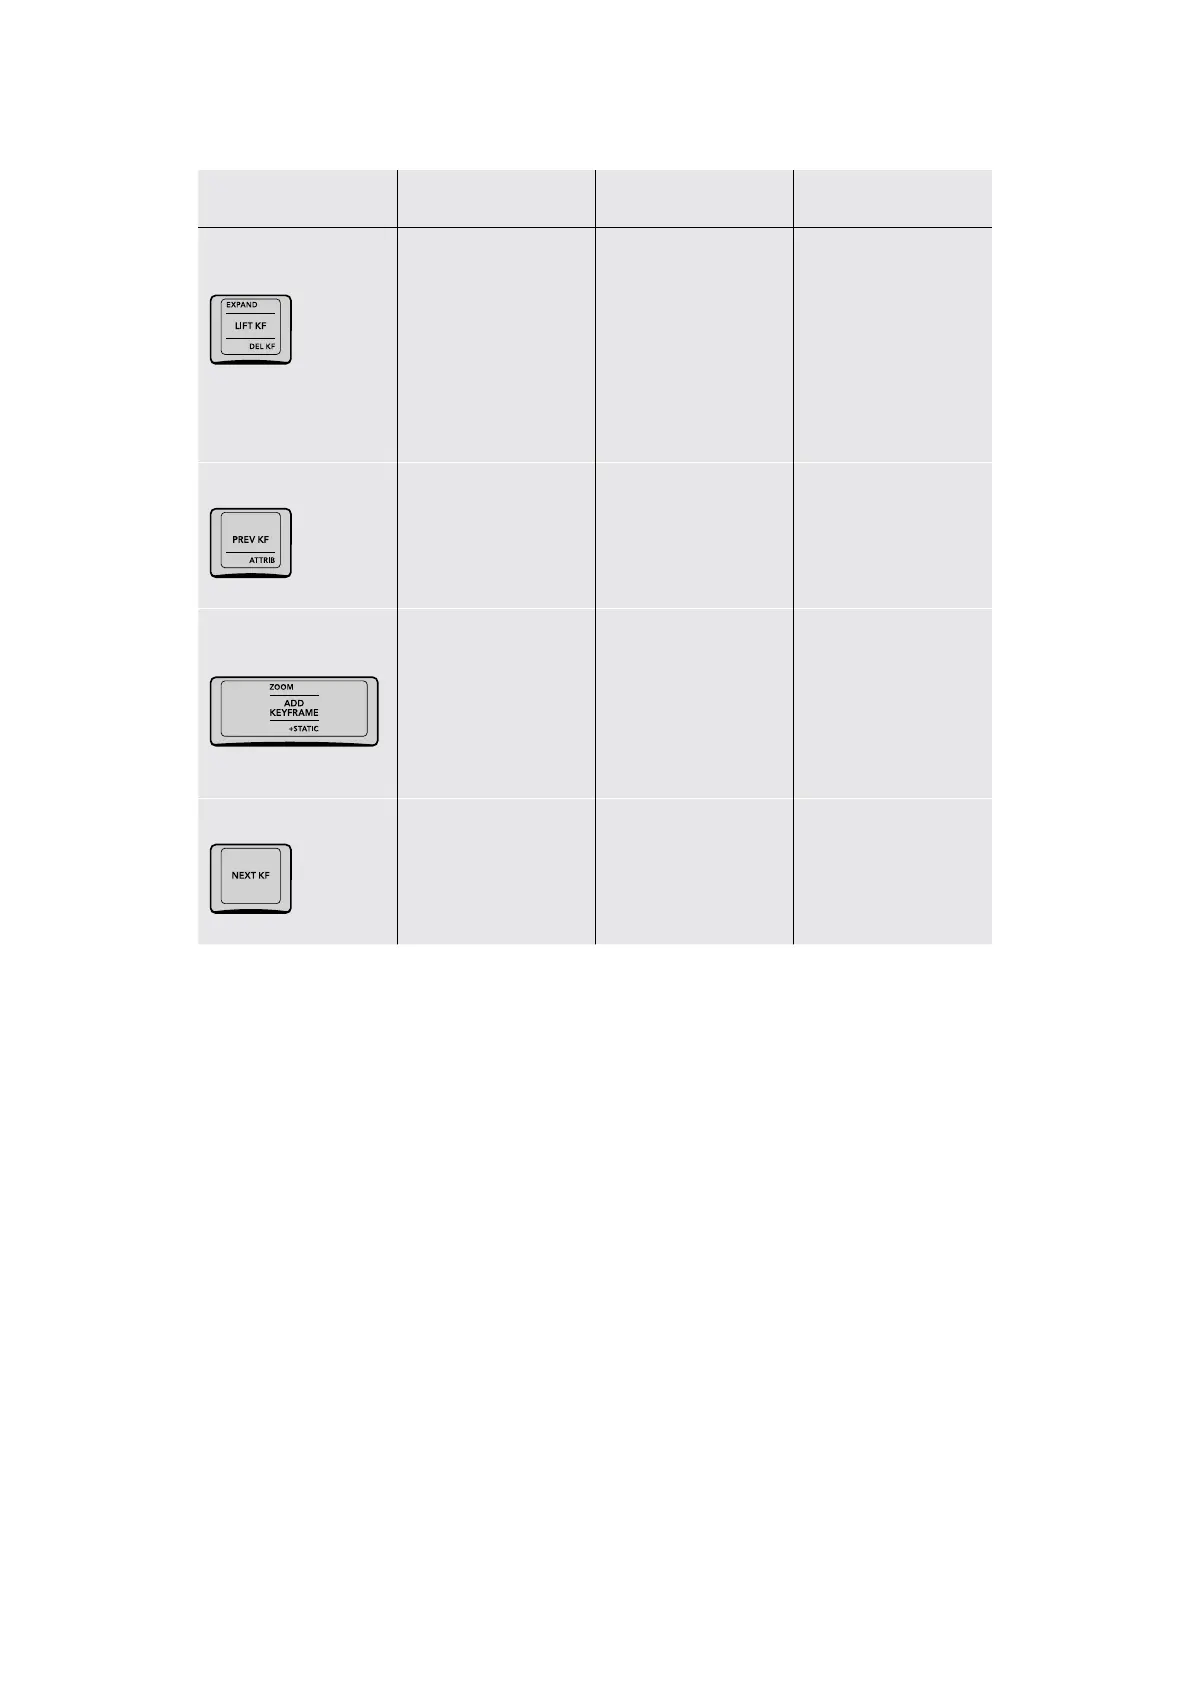
Key Shift Up Primary Function Shift Down
EXPAND/LIFT KF/
DELKF
(EXPAND) Toggles
the height of the
Keyframe Editor while
in Color or Sizing
modes to show or hide
all internal Corrector
node keyframing
tracks. Doesn’t work
in All mode.
(LIFT KF) Moves
a keyframe to
another location.
(DEL KF) Deletes
any and all keyframes
at the playhead
–/PREV KF/ATTRIB
– (PREV KF) Moves the
playhead to the next
previous keyframe in the
Node Editor
(ATTRIB) Opens the
Dissolve Type window
that lets you add easing
to a selected keyframe
ZOOM/ADD
KEYFRAME/+STATIC
(ZOOM) Zooms into the
Keyframe Editor; not yet
implemented at the time
of this writing
(ADD KEYFRAME) Adds
a dynamic keyframe to
the currently selected
corrector node, for
creating a gradual
animated change
to a grade
(+STATIC) Adds a
static keyframe to the
currently selected
corrector node, for
creating an abrupt one‑
frame change to a grade
NEXT KF
– (NEXT KF) Moves
the playhead to the
next keyframe in the
Node Editor
–
Auto Color Using the DaVinci Resolve
Advanced Panel
To make an automatic correction to a clip, you can simply press SHIFT UP and then AUTO/
MODE/SEARCH on the T‑bar panel. This will use the advanced algorithms of the DaVinci Neural
Engine to automatically analyze the image and adjust color balance and contrast to produce a
nice, neutral starting point.
However, if you crave a bit more control over how the automatic color adjustment is made,
and you have a DaVinci control panel, you can use the cursor to choose which color values to
sample when making an automatic color balancing and contrast adjustment. It’s like a cross
between the Auto Color control and the White and Black Point controls found in the GUI. This
additional bit of guidance can make the results a lot more predictable.
49Auto Color Using the DaVinci Resolve Advanced Panel