34
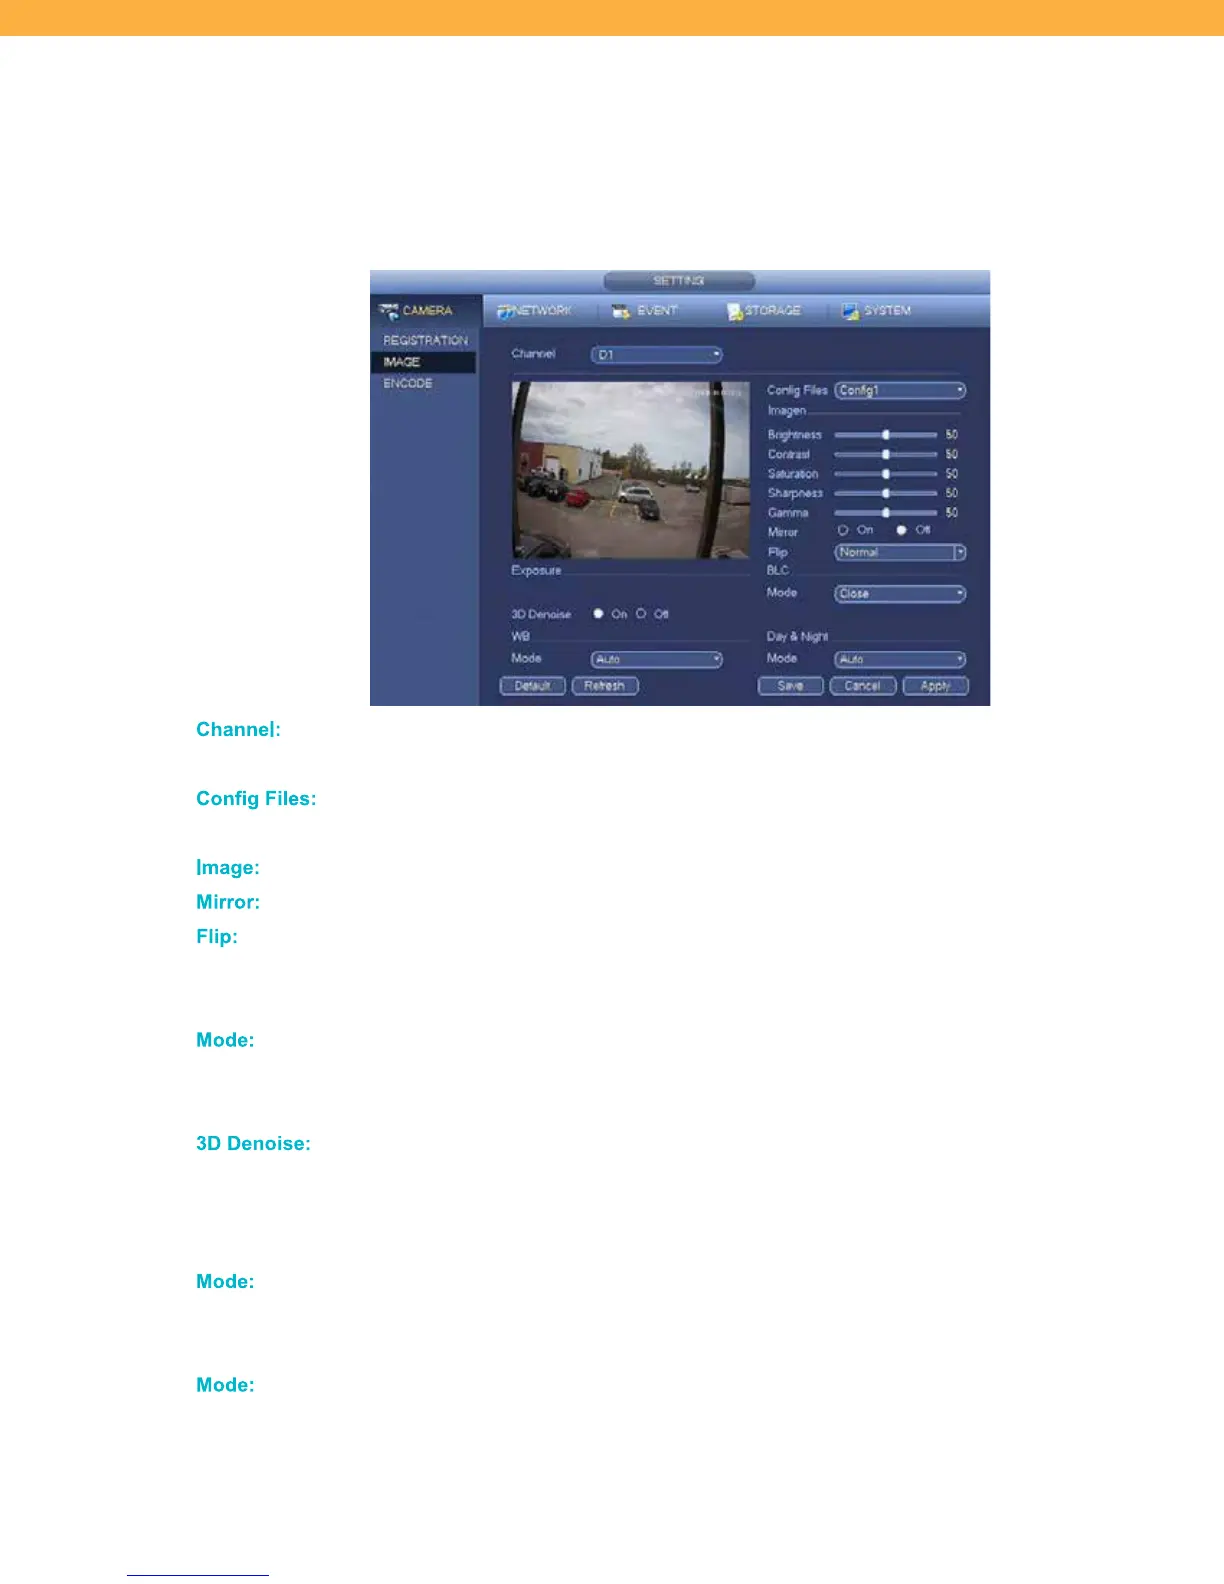
10.3 Setting Menu
CAMERA
Add remote device, set or query IP camera configuration.
The REGISTRATION section is covered in the Setup Wizard – see section 9.2 for details.
IMAGE
Ch anne l:
Click the drop down to select a Channel (Camera). The camera view will appear on
the screen to show your setting changes.
Config F iles:
Click the drop down to select a pre-set setting from the list. The values on the screen
will changes based on your selection.
Im age:
Manual adjust the image settings using the sliders for each image feature.
Mir ror:
Select to flip the image so that a mirror image can be seen.
Flip :
Click the drop down to select from the options: Normal, Flip 180
0
, Clockwise 90
0
,
Counter Clockwise 90
0
. This can be useful if your camera installation results in an
image that is upside down or sideways.
Mode :
Click the drop down to select from the BLC (Backlight Compression) options to
balance/adjust for bright or dark areas: Close, Light, WDR (Wide Dynamic Range)
or HLC (Highlight Compression).
3D De noi se:
Select to turn this on or off. The default is off. When enabled this feature enhances
the image quality of the camera and saves bandwidth by reducing image noise. 3D-
DNR removes the grainy/fuzzy appearances of light images and can handle moving
objects without leaving light trails.
Mode :
Click the drop down to select from the WB (White Balance) options to adjust the
camera’s color sensitivity: Auto, Outdoor, Natural, Street Lamp, Manual or
Customized Zone.
Mode :
Click the drop down to select from the image effect options for the Camera. Auto
(adjusts the color effect), Colorful or B&W (grey scale).