30
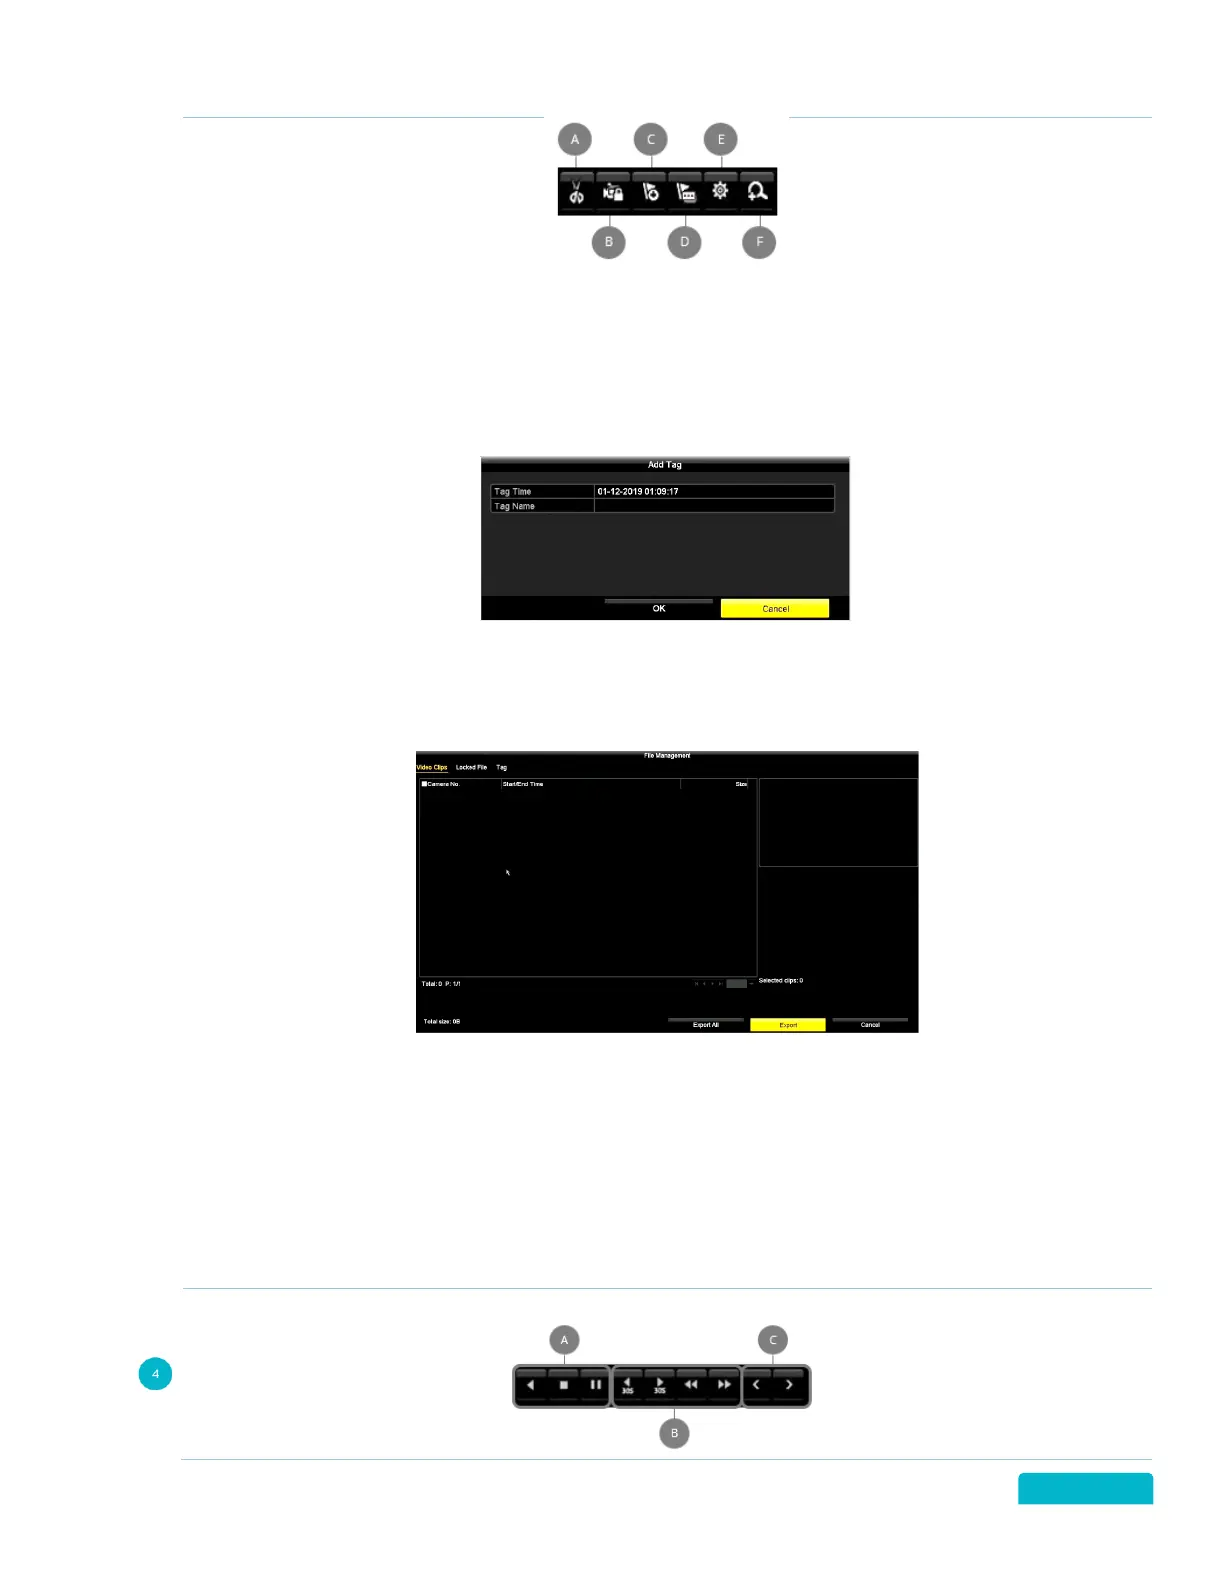
A. Clip (Start/Stop): Create a Clip of part of the recorded footage. While playing the footage click the
button to start creating a clip and again to stop.
B. Lock File: Click to Lock the file so that it cannot be overwritten or recorded over.
C. Add Default Tag: Click to assign a default tag to the footage. Tags make searching for footage
easier. When selected the footage will be named TAG.
D. Add Customized Tag: Click to enter a custom tag to give the footage a name of your choice.
• Click the Tag Name field to enter the tag and click OK to save. You can add multiple tags to a
video file
E. File Management: Click to Export files to an external storage device.
To Export files, you will
need to insert a USB flash drive into the USB port on the DVR. The files will export to this device.
• Use the Tabs on the top of the screen to select the type of files to export (Videos, Locked files
or Tagged files)
• Select the Footage listed on the screen by clicking the checkbox
• Select Export All to export all files listed
• Select Export to export only the selected files
• Select Cancel to exit the File Management screen without exporting files
F. Zoom IN: Click to zoom in on the footage. Click and drag to select an area of the screen to zoom in
on.