35
Main Menu
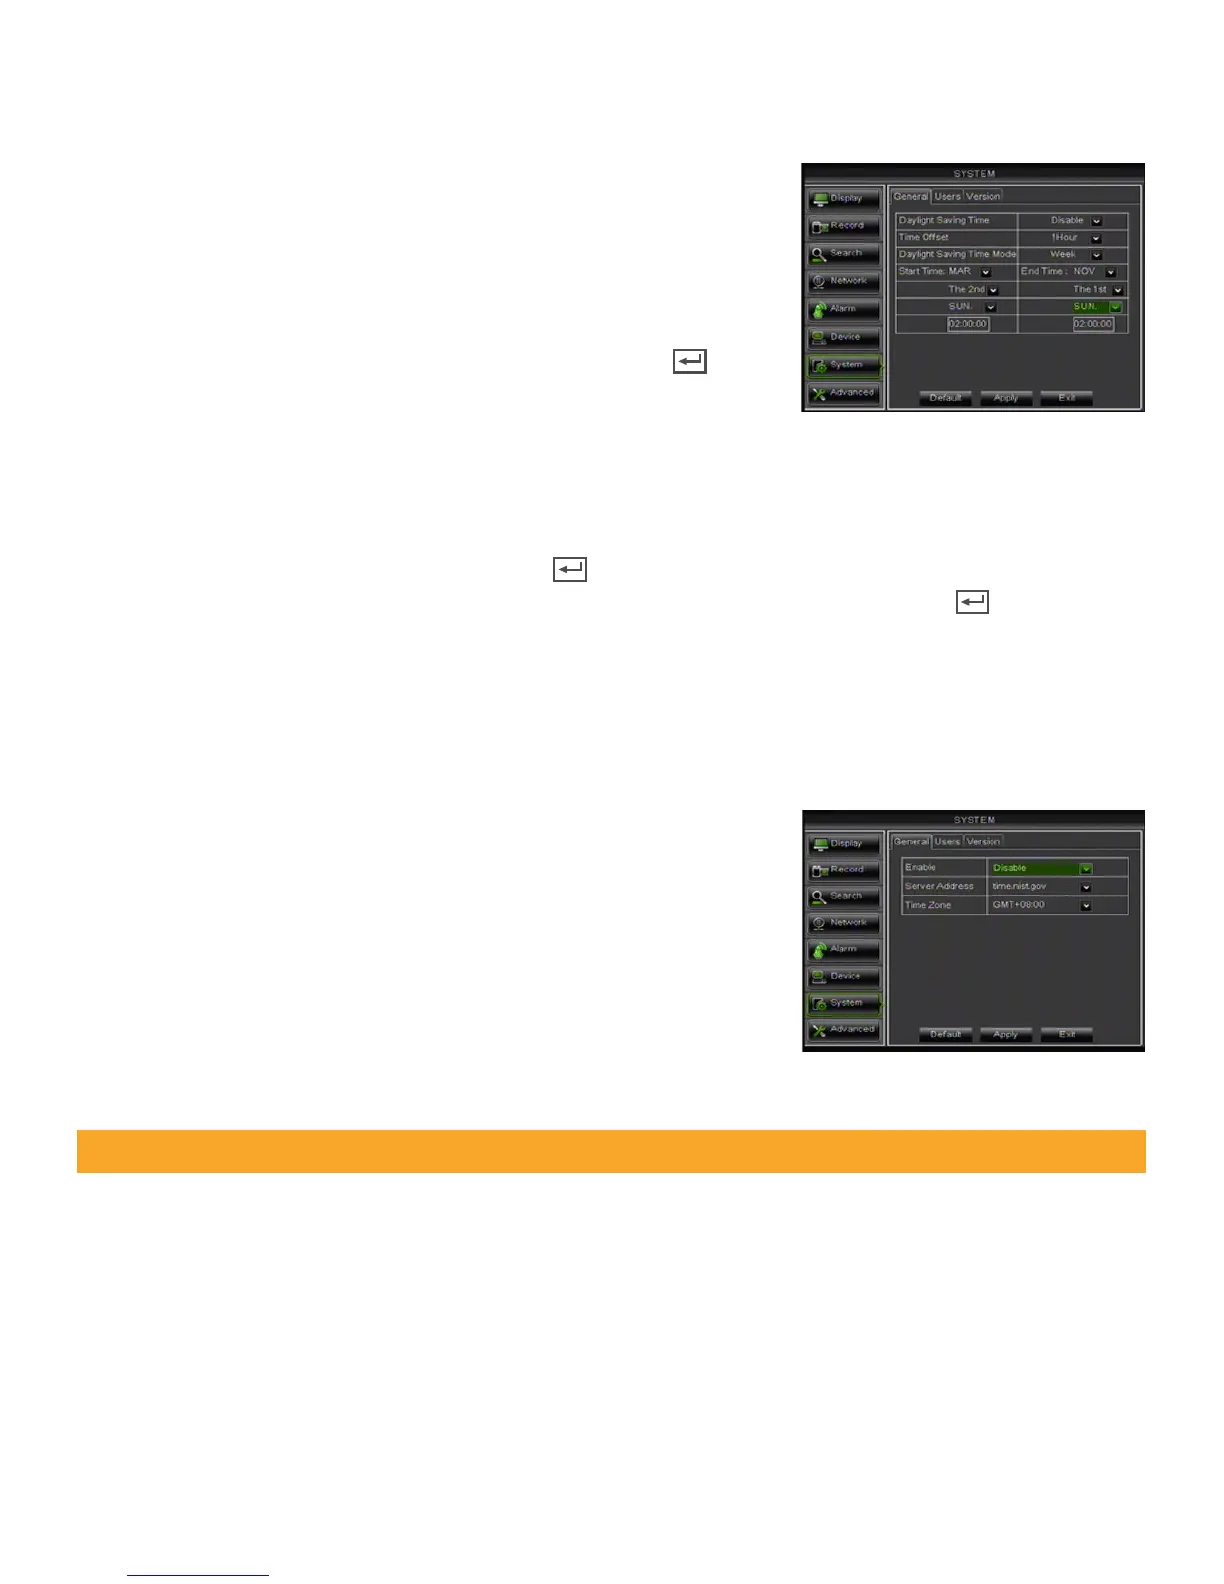
By Week
1. Select the DAYLIGHT SAVING TIME drop down list and choose WEEK.
2. Select the START TIME drop down list and choose the month.
3. Select the drop down box below and select the week.
4. Select the drop down box below and select the weekday.
5. Left click in the box below and the keyboard will open.
6. Enter the time for DST to take effect then click the ENTER key .
7. Repeat steps above for End Time.
8. Click APPLY at the bottom of the screen to save your changes.
By Date
1. Select the DAYLIGHT SAVING TIME drop down list and choose DATE.
2. Left click in the box next to Start Time and a keyboard will appear.
3. Enter the specific date then click the ENTER key
4. Left click in the box below and input the time for DST to take effect then click the ENTER key .
5. Repeat steps above for End Time.
6. Click APPLY at the bottom of the screen to save your changes.
NTP (Network Time Protocol)
You have the option of setting your DVR to sync its time to various web servers. This ensures your DVR is set to the
correct time. It will also automatically adjust to Daylight Saving Time.
Setting the DVR to sync with an NTP time server:
1. Click the NTP SETUP box next to NTP.
2. Select the ENABLE drop down list (in the GENERAL tab) and
choose ENABLE.
3. Select the SERVER ADDRESS drop down list and choose one of three
time servers.
4. Select the TIME ZONE drop down list and choose your time zone.
5. Click APPLY at the bottom of the screen to save your changes.
6. Click EXIT at the bottom of the screen to return to the main
GENERAL tab.
Language
You can set the DVR to display many different languages such as English, French, Russian, Italian, Portuguese,
Spanish, and Romanian.
Changing the DVR LANGUAGE:
1. Select the LANGUAGE drop down list and choose your desired language.
2. Click APPLY at the bottom of the screen to save your changes.
3. The system will restart and open with your chosen language settings.
Note: You must be connected to the internet to synchronize your NTP settings to web servers.