57
Online Software
Record
The RECORD option allows you to record from your computer. Here you can set which channel to record as well as
set up a recording schedule and recording resolutions.
Rec. Parameters
Adjusting the DVR record parameters:
1. Select the REC PARAMETERS tab.
2. Left click the CHANNEL drop down list and selct a channel.
3. Click SAVE in the upper right corner to save your changes.
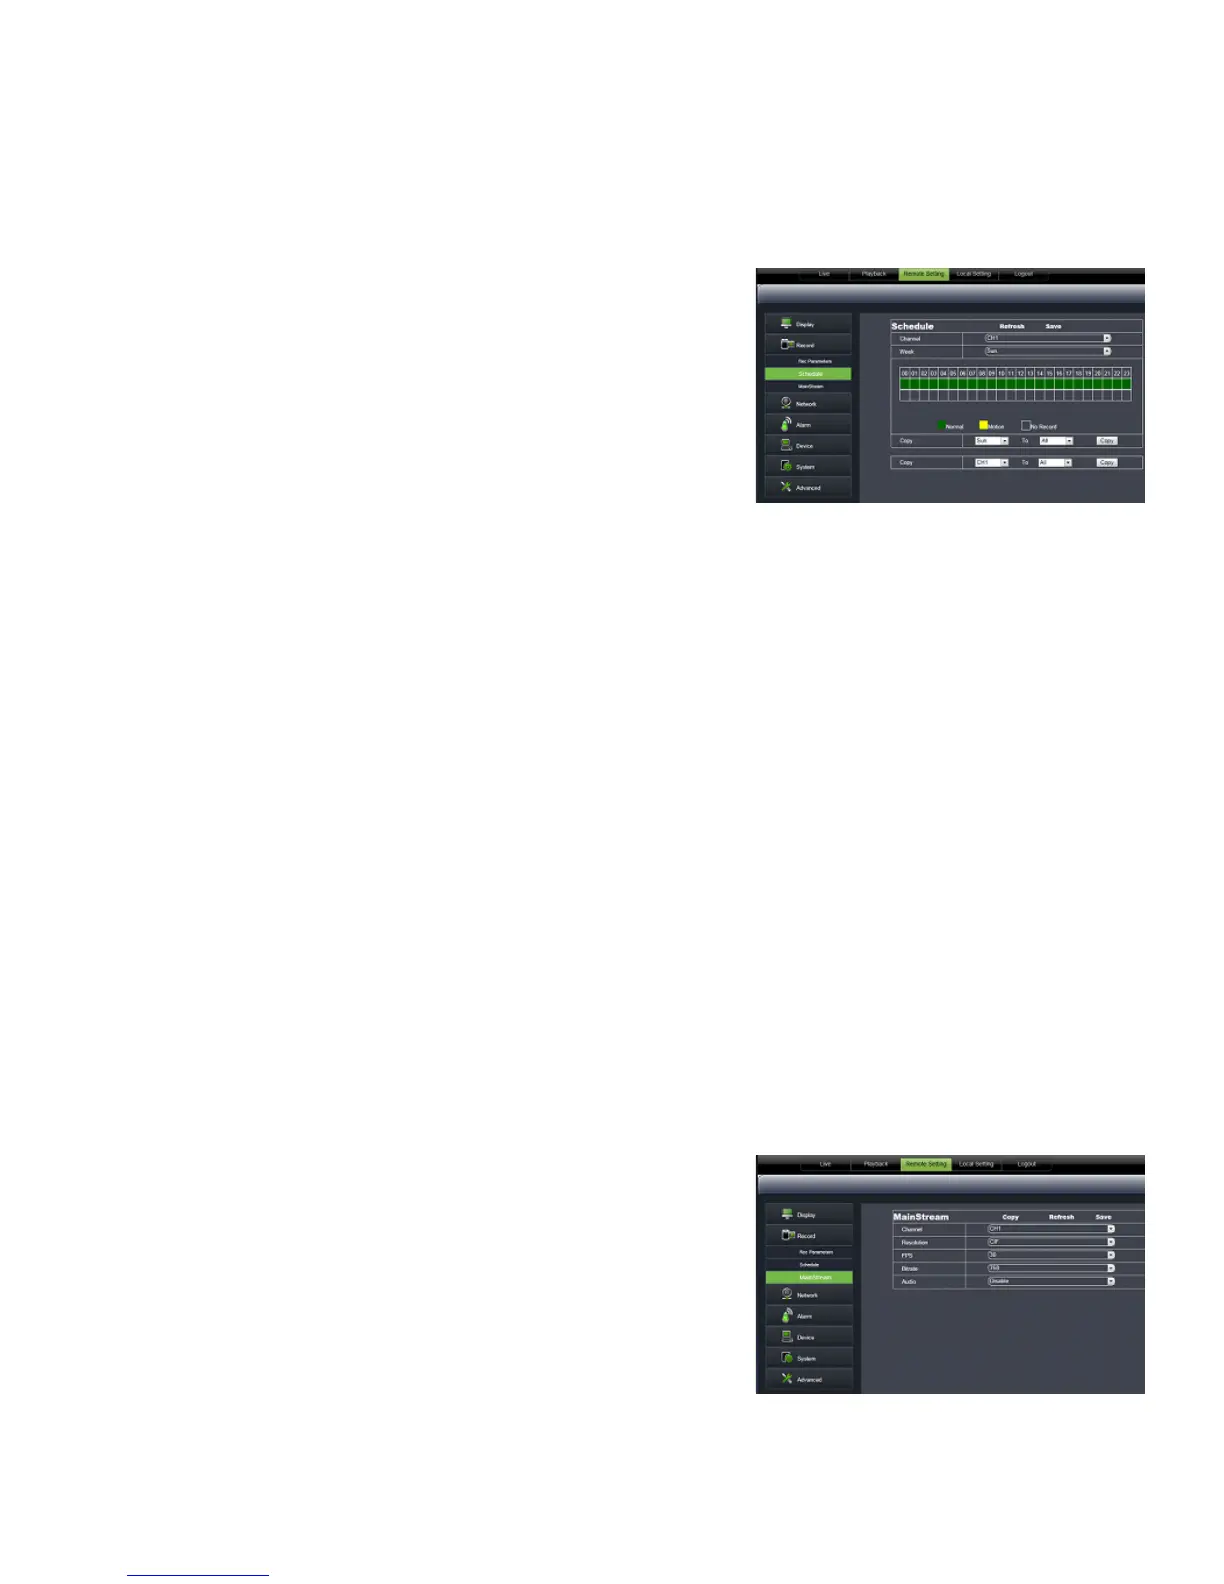
Schedule
Setting your RECORD SCHEDULE:
1. Select the SCHEDULE tab.
2. The top row represents SCHEDULED RECORDING. The bottom row
represents MOTION RECORDING.
3. Select the DAY of the week on which you want to schedule a recording.
4. Each box corresponds to an hour. Click the boxes for the times that you wish to record in the row that
corresponds to the type of recording that you have selected.
5. Click SAVE in the upper right corner to save your changes.
COPY settings from one day to other cameras:
1. Select the COPY drop down list and highlight the day you want copied.
2. Select the TO drop down list to select a specific day or ALL.
3. Press the COPY button and the copied schedule will appear in the selected days.
4. Click SAVE in the upper right corner to save your changes.
COPY settings from one camera to other cameras:
1. Select the COPY drop down list and choose a camera number.
2. Select the TO drop down list to select a camera number or ALL cameras.
3. Click the COPY button. The settings will now be copied to your
specified camera(s).
4. Click SAVE in the upper right corner to save your changes.
Mainstream
Adjusing the recording RESOLUTION parameters:
1. Select the MAINSTREAM tab.
2. Select the drop down lists and choose the frame rate, video quality,
and resolution values.
3. Click SAVE in the upper right corner to save your changes.