l
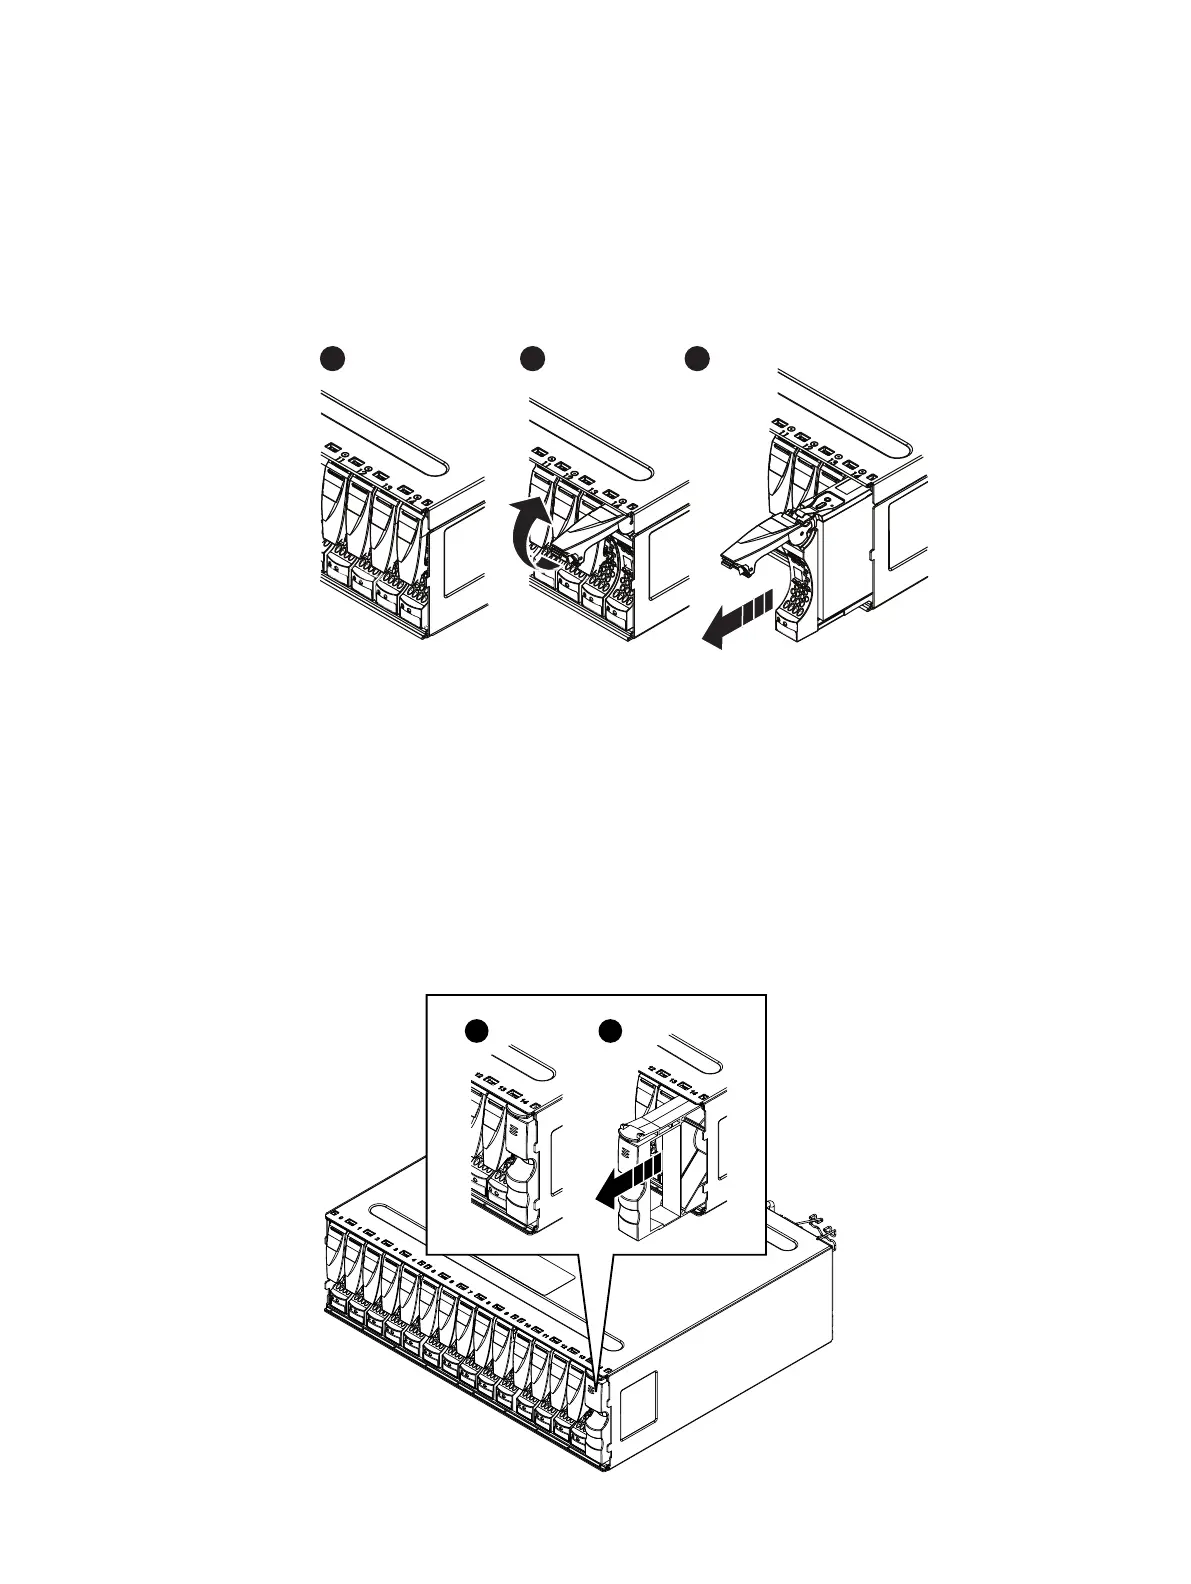
If the disk’s fault LED is on steadily, slowly pull the disk about 1 inch (3 centimeters) from
its slot and wait 30 seconds for the disk to stop spinning before pulling the disk
completely out of the slot.
l
If the disk’s fault LED is off or mostly off, slowly pull the disk completely out of the slot.
4.
Place the disk on a static-free surface.
Figure 20 Removing a disk
Removing a disk filler module
About this task
Refer to Figure 21 on page 33 while performing the procedure that follows.
Procedure
1.
Locate the slot where you want to install the disk.
2. Grasp the disk filler with you thumb in the cutout on the front of the filler and your finger on
the top of the filler and pull the module from the slot.
Figure 21 Removing a disk filler module
Removing and replacing FRUs
Dell EMC ES40 Expansion Shelf Guide Field Replacement Unit Guide 33