Verify the operation of the new disk drive
Procedure
1. Rescan all of the disks by entering the disk rescan command
Note: This command does not generate any output. The amount of time it takes to
complete depends on how many disks are attached.
2. After the rescan completes, enter the disk show state command to verify the state of
all drives. This command checks that the drive is recognized.
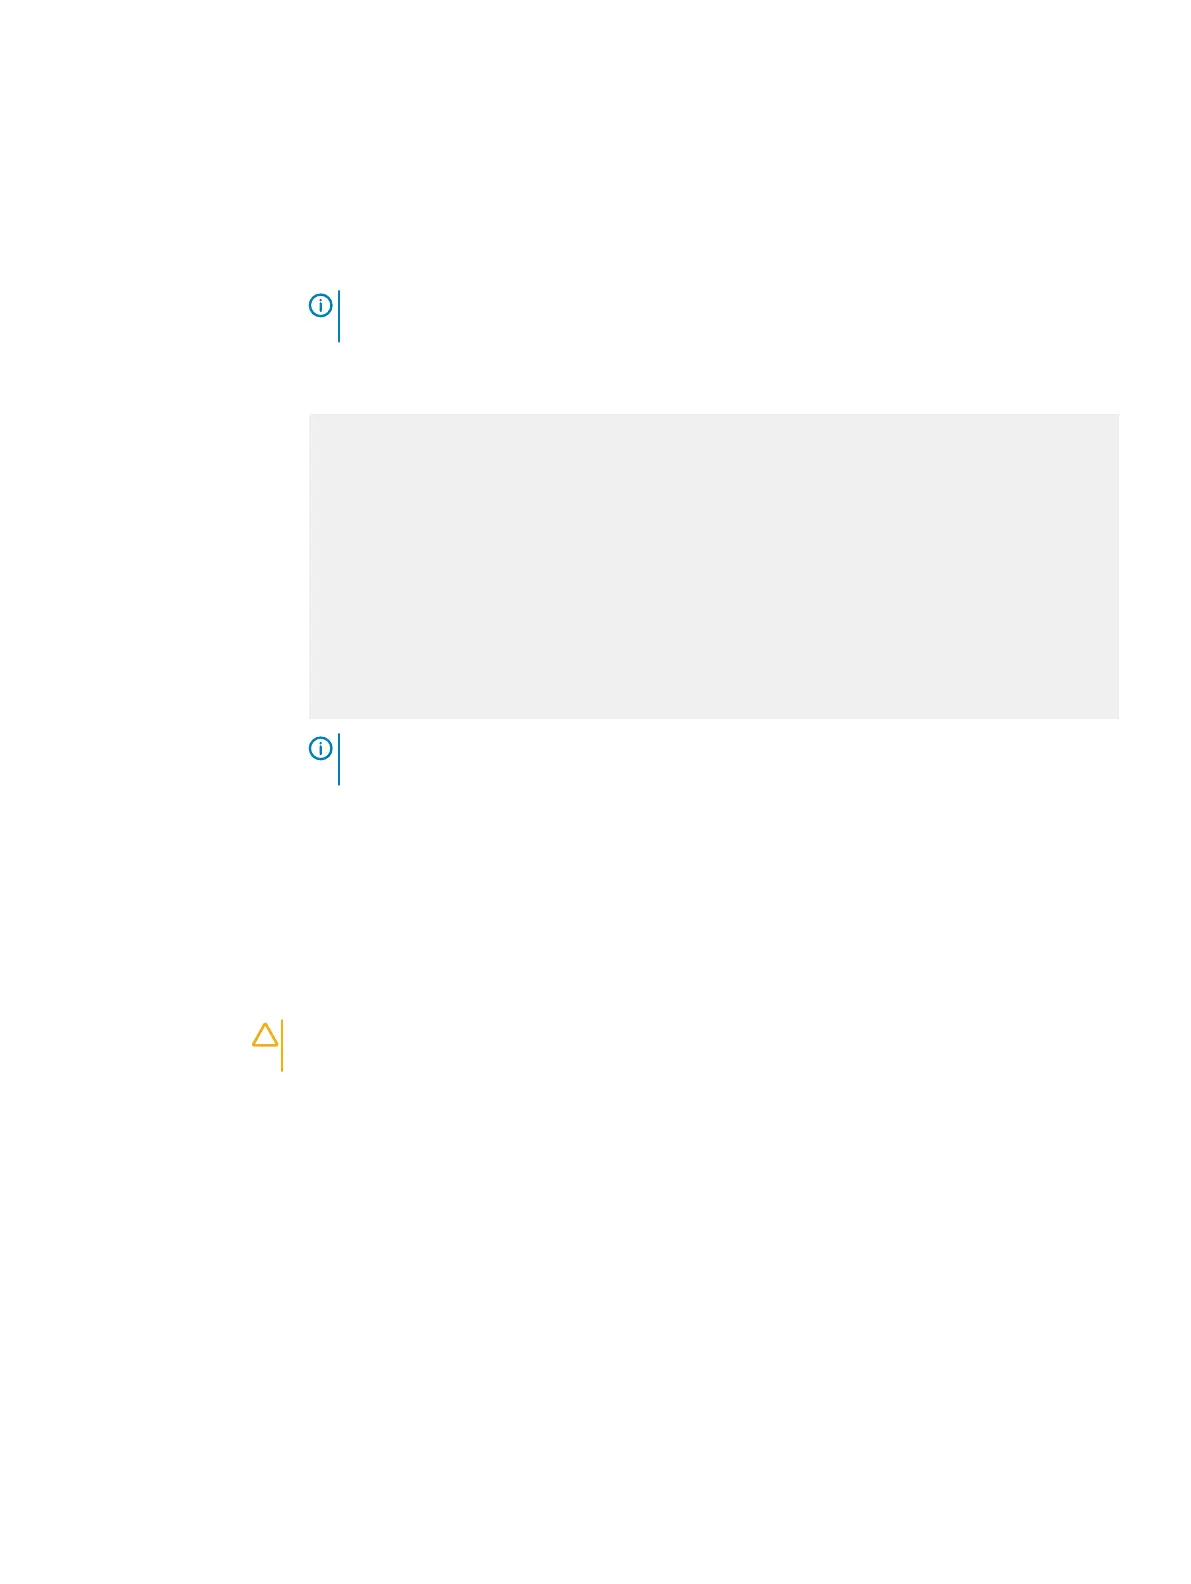
# disk show state
Enclosure Disk
1 2 3 4 5 6 7 8 9 10 11 12 13 14 15
--------- --------------------------------------------
1 . . . .
2 s R . . . . . . . . . . . . .
--------- --------------------------------------------
Legend State Count
------ ---------------------------- -----
. In Use Disks 17
s Spare Disks 1
R Rebuilding Disks 1
------ ---------------------------- -----
Total 19 disks
Note: When the amber fault light has turned off on the front panel of the shelf, all the
disk are in good state.
3. After the rescan, if the output of the disk show state command displays any disks in
the Unkown, Failed, or Absent states, run the disk unfail <enclosure-id>.<disk-
id> command to unfail the disk. For example, to unfail enclosure 2, disk 2, type disk
unfail 2.2.
Installing and locking the front bezel
Before you begin
CAUTION You must remove the protective plastic strip from the front of the bezel before
placing the system into operation. Failure to do this will cause the system to overheat.
About this task
Refer to Figure 23 on page 36 while performing the procedure that follows.
Procedure
1.
If present, remove the protective plastic strip from the front of the bezel.
2. Align the bezel with the enclosure.
3. Gently push the bezel into place until it latches.
4. Secure the bezel by turning the key in the lock.
Removing and replacing FRUs
Dell EMC ES40 Expansion Shelf Guide Field Replacement Unit Guide 35