3. Secure the rail to the rear channel loosely with two screws to allow for adjustment when you
install the enclosure.
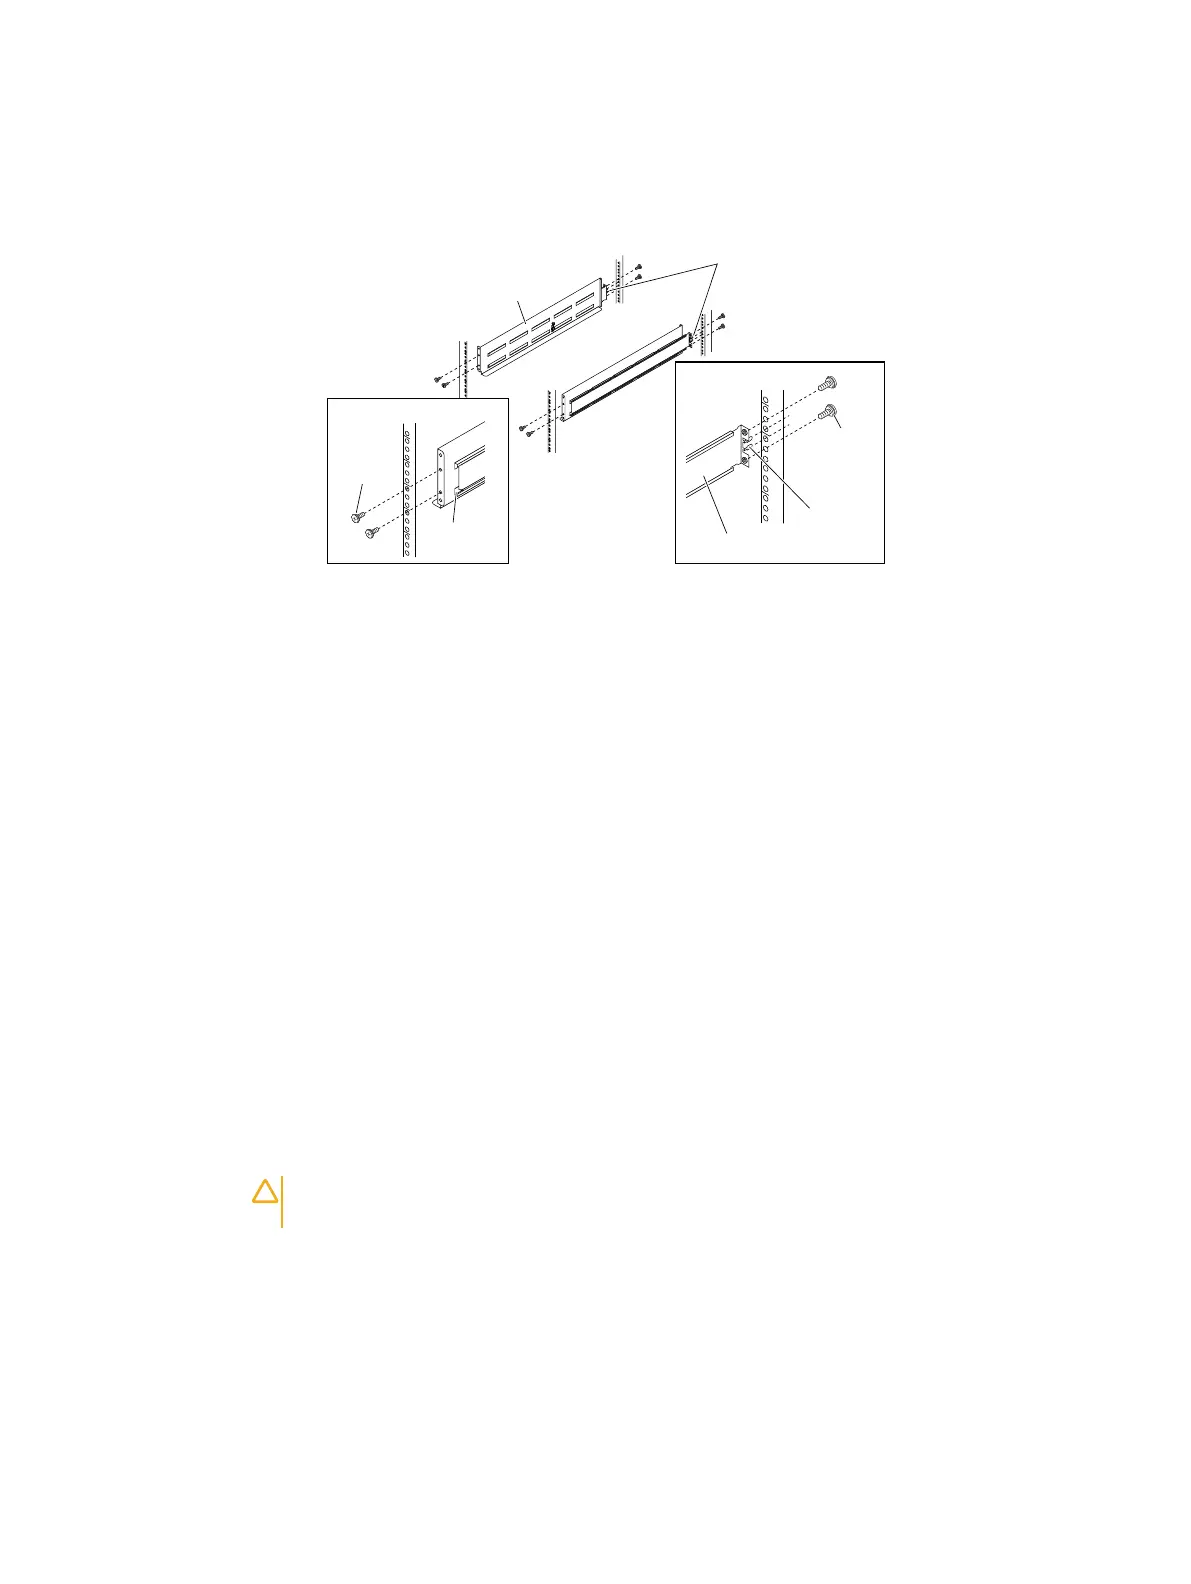
Figure 58 Installing the rails
EMC3452
Right rear
Screw (2)
Alignment
pin (2)
Mounting rail
Alignment pins
Adjustable rail
Right front
Mounting rail
Screw (2)
Adjusting for various rack types
The standard rail components can accommodate racks with square or untapped round holes with a
depth of 24 inches to 34 inches.
Using the rail adapter hardware, the following additional rack mounting types and depths can be
accommodated:
l
Racks with depths of 34 inches to 36 inches
l
Racks with tapped holes, M6 or 12/24
l
Racks with tapped holes, M5 or 10/32
Installing the rails using the adapter hardware
About this task
Only use this procedure if the rack is 34 inches to 36 inches deep and/or the rack has tapped holes
that are M5, M6, 10/32, or 12/24.
The front edge of each rail is stamped L or R for left and right sides, when facing the front of the
rack. Since the brackets cover these markings, make a note as to which rack is L and which rack is
R.
Use a #2 Phillips screwdriver with a shank diameter less than 7.0 mm and the wrench that was
included in the kit to tighten the nuts.
CAUTION The adapter kit is only for static applications where the rack will not be moved. If
the rack is to be moved, remove the shelves before moving the rack.
Procedure
1.
Attach a long bracket to the front of each rail using four M5 screws into the first (top),
second, fourth, and sixth holes.
Removing and replacing FRUs
62 Dell EMC ES40 Expansion Shelf Guide Field Replacement Unit Guide
 Loading...