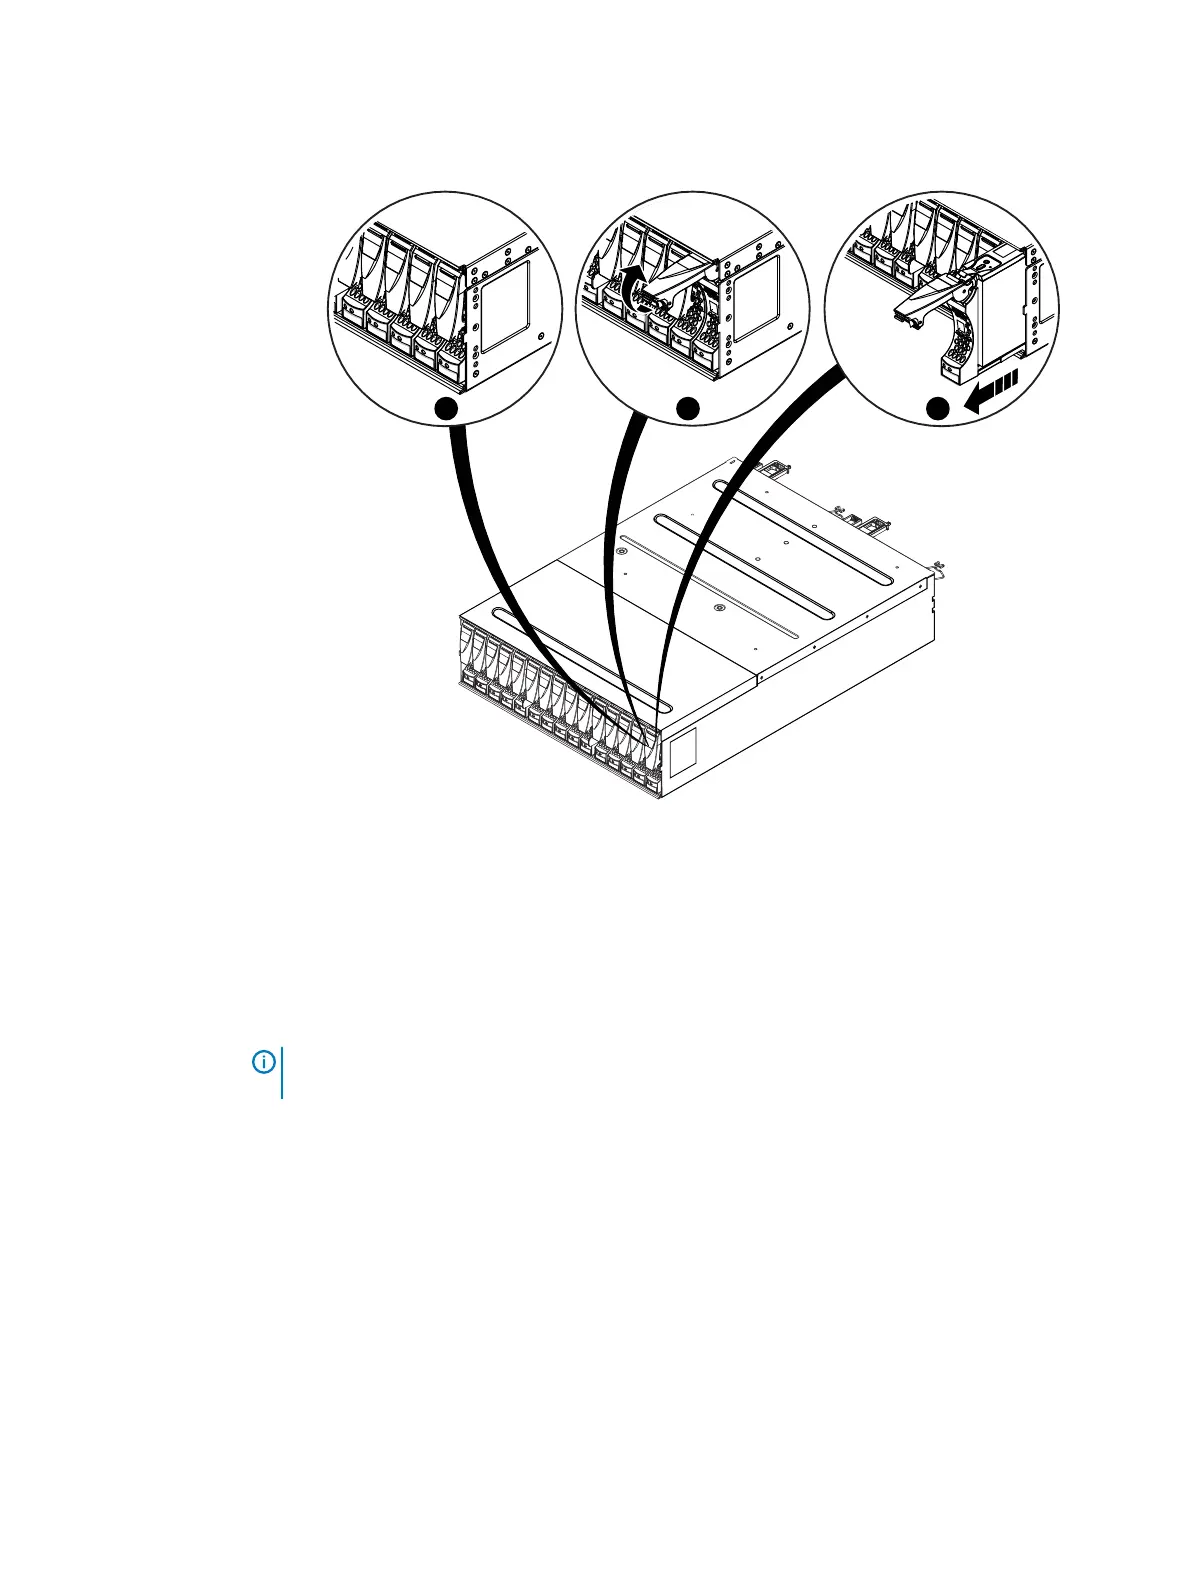
Figure 38 Removing a disk
Installing a new or replacement disk
Before you begin
Use ESD gloves or attach an ESD wristband to your wrist and the enclosure in which you are
installing the disk.
About this task
Refer to Figure 39 on page 48 while performing the procedure that follows.
NOTICE If you are installing multiple disks in a storage system that is powered up, wait at least
10 seconds before sliding the next disk module into position.
Procedure
1.
Align the disk with the guides in the slot.
2. With the disk latch fully open, gently push the disk into the slot.
The disk latch begins to rotate downward when its tabs meet the enclosure.
3. The disk latch begins to rotate downward when its tabs meet the enclosure.
4. After the latch is engaged, push firmly on the bottom of the disk to verify that the disk is
properly seated.
Removing and replacing FRUs
Dell EMC ES40 Expansion Shelf Guide Field Replacement Unit Guide 47