The top-most mounting hole for a particular rack unit (RU) mounting position is typically
identified by a mark or hole. Racks may also be screen-printed to show the positions of the
rack units.
Note: Two people may be required to attach the rail/bracket assembly to the rack.
5. Attach the first rail to the rack as follows:
a. Hold the rail against the inside of the rack, with the rear bracket aligned with the rear of
the rack.
b. Pull the front of the rail until it is aligned with the inside of the rack front.
c. Attach the front of the rail/bracket assembly to the front of the rack.
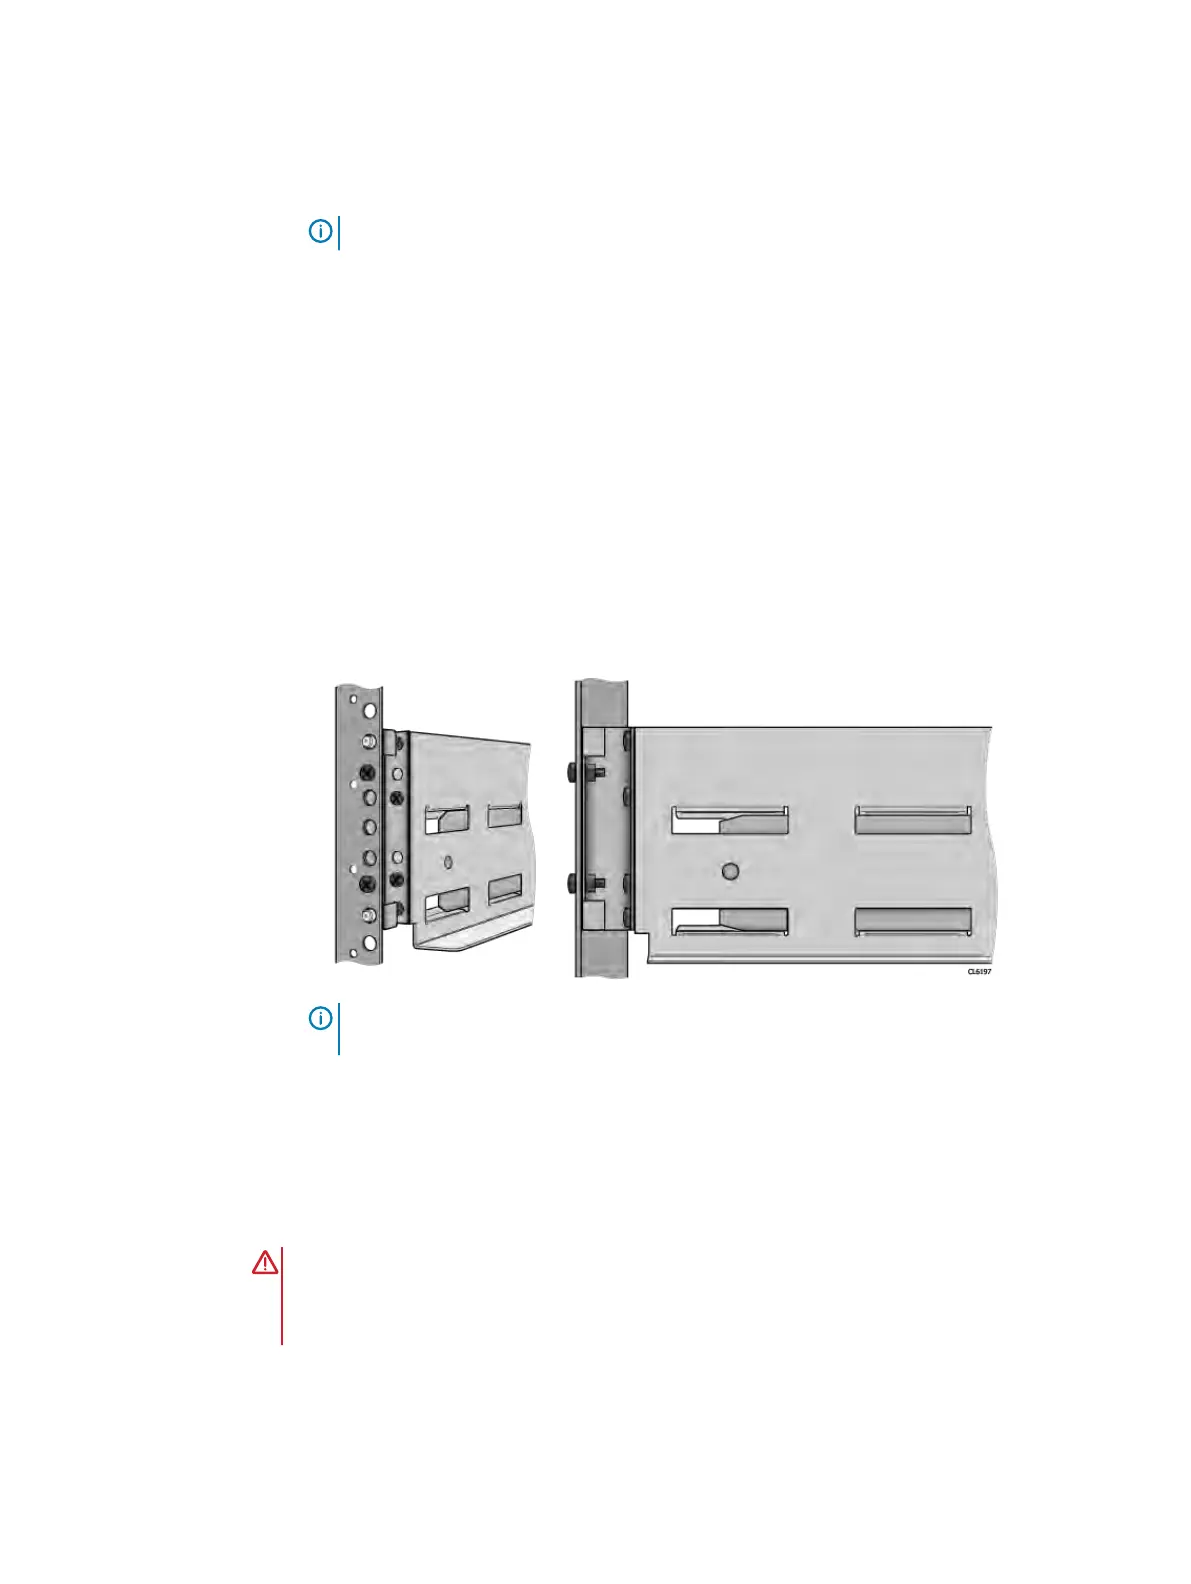
For M6 or 12/24 tapped rack holes: insert M5 screws through the rack hole positions as
shown in Figure 59 on page 64. Secure the screws using the furnished nuts.
For M5 or 10/32 tapped rack holes: partially screw in the screws into the rack hole positions
as shown in Figure 59 on page 64. Slide the rail kit over the exposed threads. These
threads temporarily hold the rail kit in position while the kit length is being adjusted. Once
the rail kit is set to the correct length, thread the mating nuts onto the exposed screws and
tighten with a wrench.
Figure 59 Attaching the rail to the rack
Note: To secure the rail adapter hardware nuts, you may need to use the supplied
wrench or pliers to tighten the nuts.
6. Repeat step 5 for the second rail.
7.
After installing both rails, ensure that they are level with one another.
Installing the shelf on the rails
About this task
WARNING
The enclosure is heavy and should be installed into or removed from a rack by two people. To
avoid personal injury and/or damage to the equipment, do not attempt to lift and install the
enclosure into a rack without a mechanical lift and/or help from another person.
Procedure
1.
With help from another person, lift the enclosure and, from the front of the cabinet/rack,
slide the enclosure onto the rails (Figure 60 on page 65).
Removing and replacing FRUs
64 Dell EMC ES40 Expansion Shelf Guide Field Replacement Unit Guide