26 Preparing Your Multi-Function Printer
6
Enter a one, two or three-digit speed dial number you want to assign to the group and press
Select
().
Or select the location by pressing
Scroll
( or ) and then press
Select
( ).
7
At the Add Another? prompt, press
Select
( ) to enter other speed dial numbers into the group.
Or press
Scroll
( or ) to display
No
and press
Select
( ) when you have entered all of the
desired numbers.
8
If you want to assign another group, repeat from step 3.
OR
Press
Cancel
( ) to return to Standby mode.
Preparing Networking
A print server is any designated computer that centrally manages all client print jobs. If you are sharing
your printer in a small workgroup environment and want to control all print jobs on the network, follow
these instructions to attach the printer to a print server.
NOTE: For additional network set-up configurations, see the
User’s Guide
.
Attaching Cables
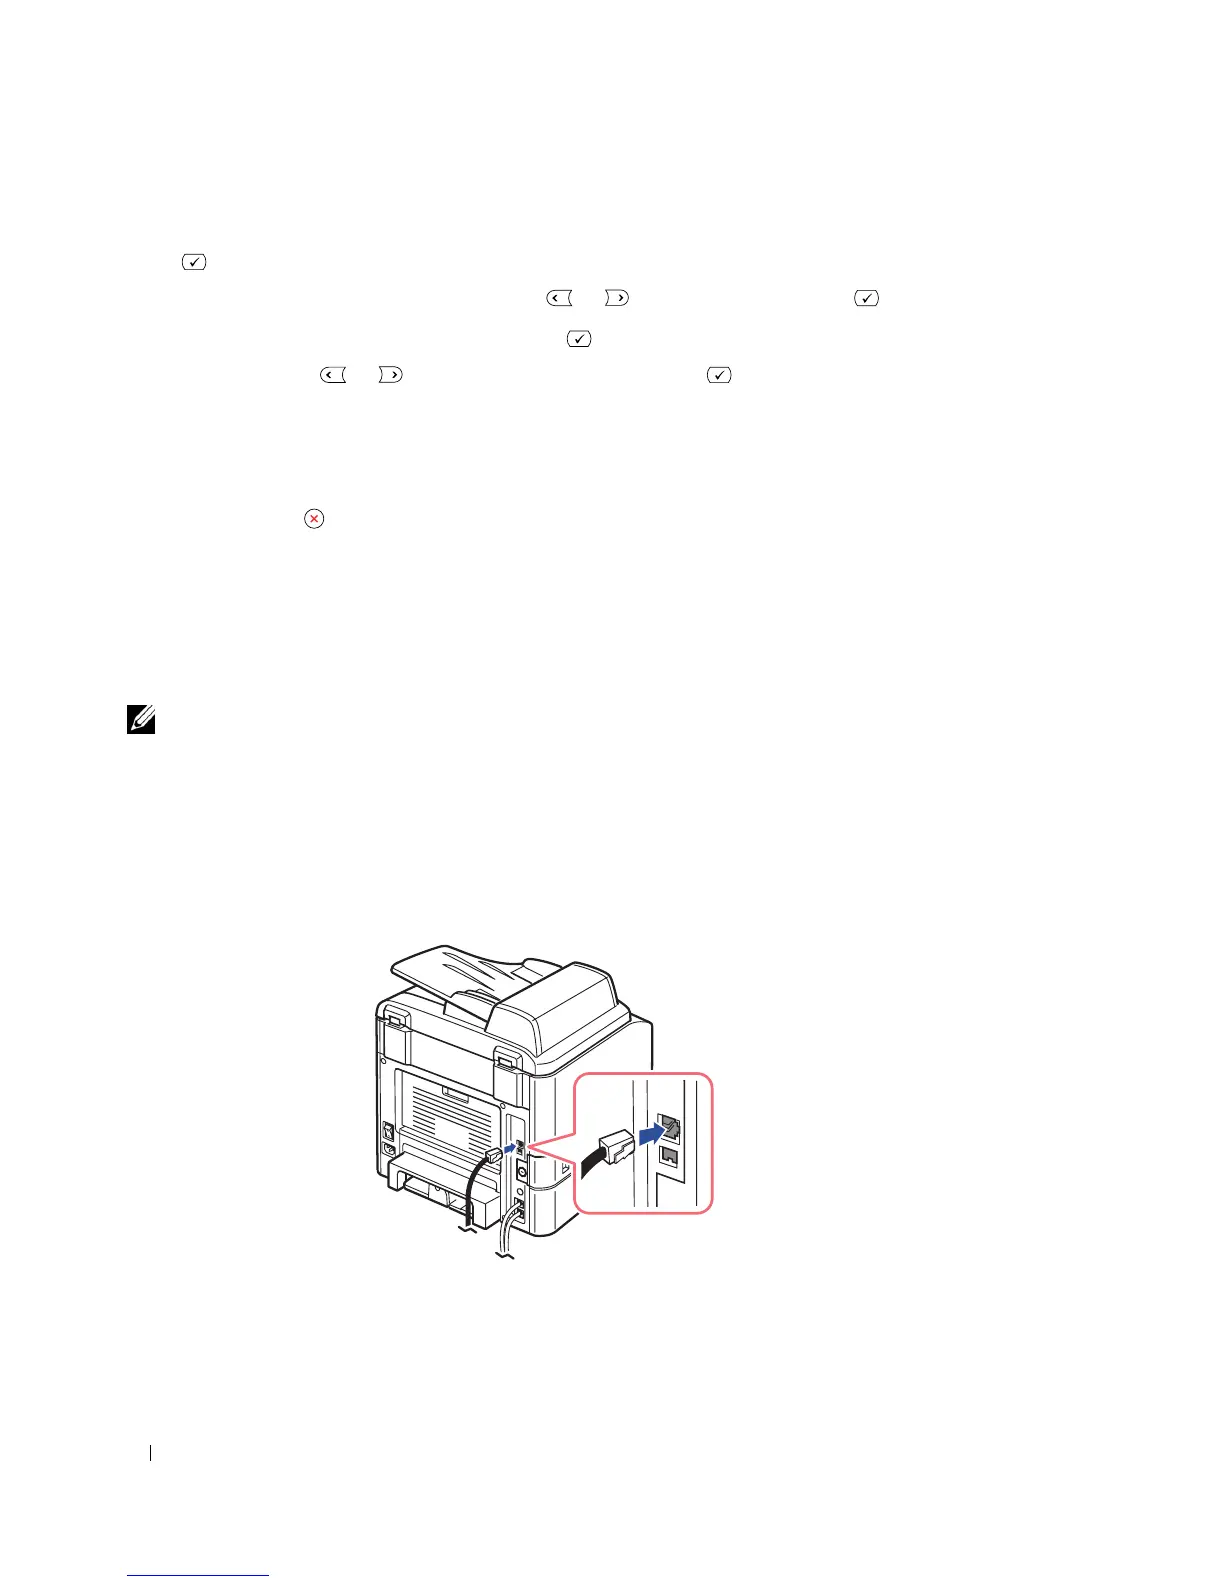
1
Make sure the printer is powered off and unplugged.
2
Connect one end of a standard category 5 Unshielded Twisted Pair (UTP) network cable into a LAN
drop or hub, and the other end into the Ethernet network port on the back of the printer. The printer
automatically adjusts the network speed.
 Loading...


