Installing the audio board
CAUTION: The information in this installation section is intended for authorized service technicians only.
Prerequisites
If you are replacing a component, remove the existing component before performing the installation process.
About this task
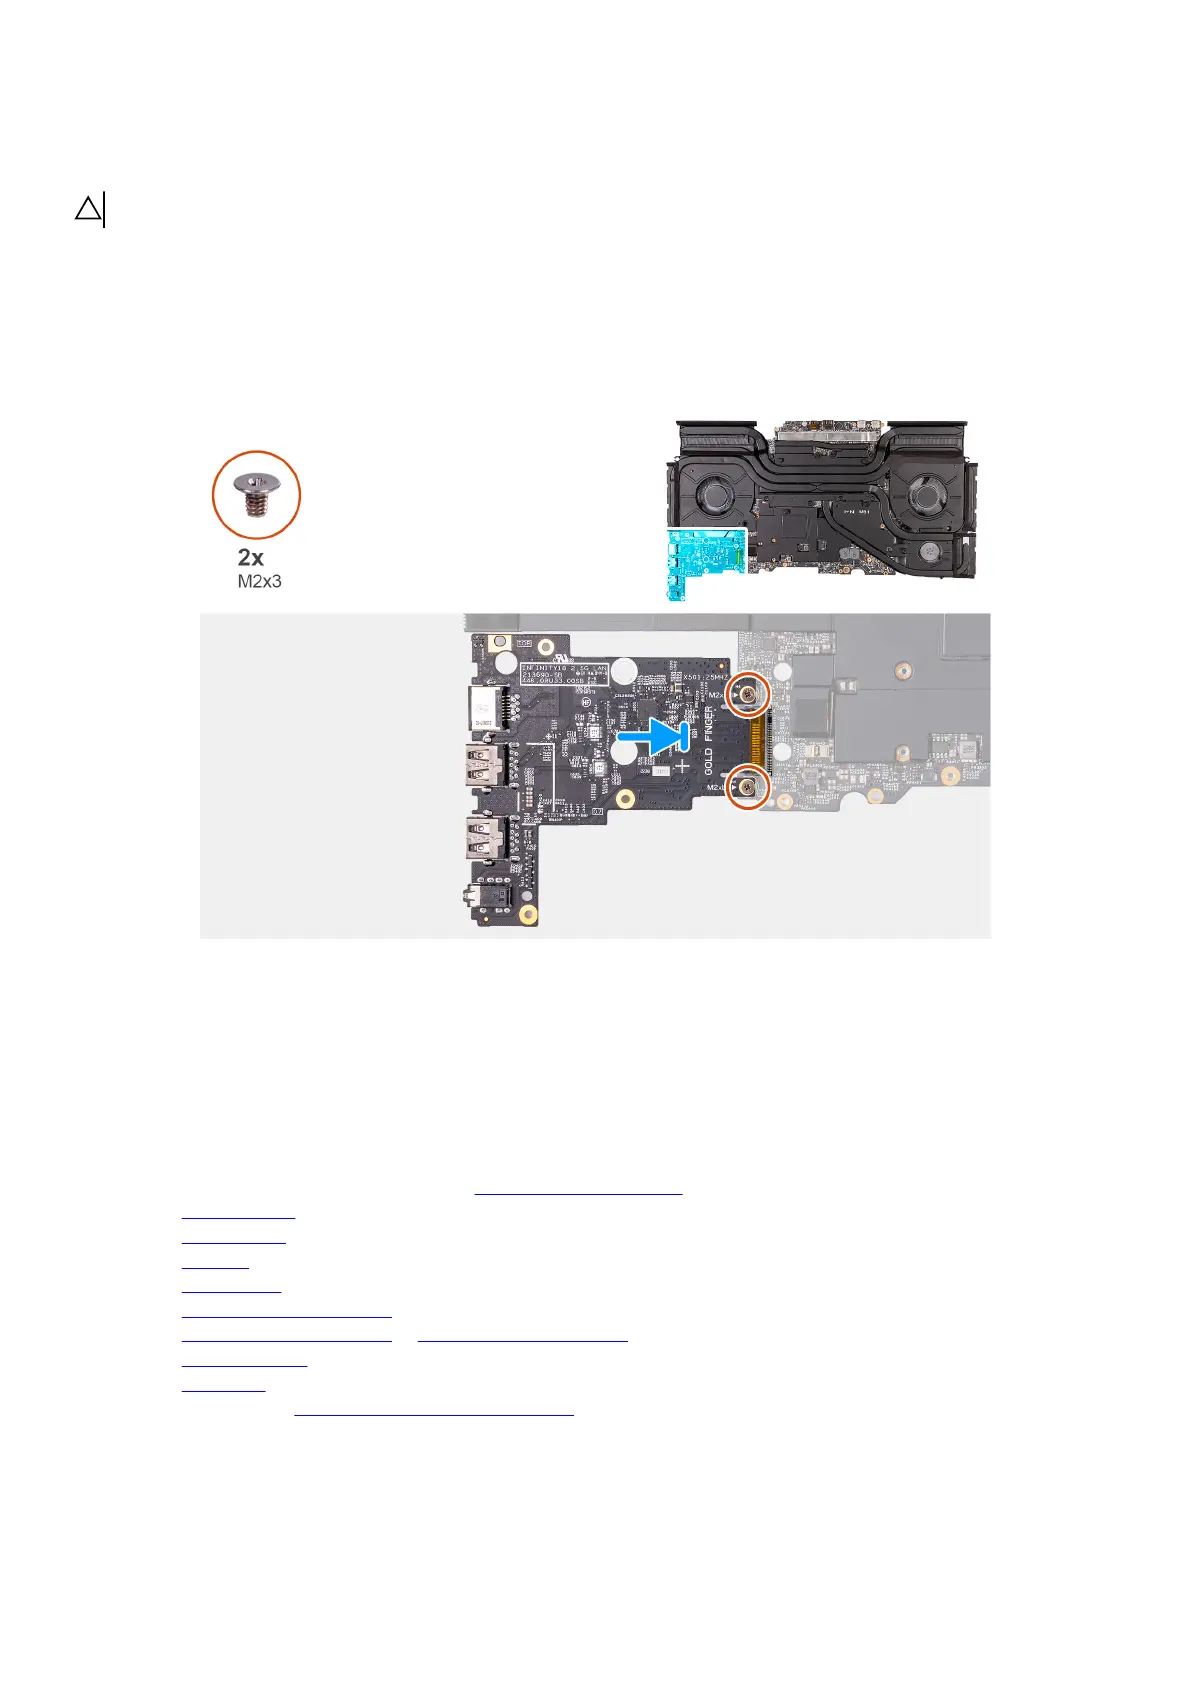
The following image indicates the location of the audio board and provides a visual representation of the installation procedure.
Steps
1. Connect the audio board to the system-board assembly.
2. Align the screw holes on the audio board with the screw holes on the system-board assembly.
3. Replace the two screws (M2x3) that secure the audio board to the system-board assembly.
4. Turn the system-board assembly over.
Next steps
1. Follow the procedure from step 5 to step 25 in
Installing the system board.
2. Install the rear I/O cover.
3. Install the top heat-sink.
4. Install the small fan.
5. Install the wireless card.
6. Install the M.2 2230 solid-state drive in slot three and four, if applicable.
7. Install the M.2 2280 solid-state drive or M.2 2230 solid-state drive in slot one and two, whichever is applicable.
8. Install the memory module.
9. Install the
base cover.
10.Follow the procedure in After working inside your computer.
95