EasyManuals Logo

Dell Latitude 7310 Service Manual

Dell Latitude 7310
63 pages
To Next Page IconTo Next Page
To Previous Page IconTo Previous Page
Page #12 background imageLoading...
Page #12 background image
Steps
1. Loosen the eight captive screws that secure the base cover to the palmrest assembly.
2. Starting from the top-left corner, use a plastic scribe to pry the base cover outwards to release the base cover from the palm-rest
assembly.
3. Pry the base cover and remove it from the palm-rest and keyboard assembly.
CAUTION: Do not slide the scribe through the edge of the top side of the base cover as it damages the latches inside
the base cover.
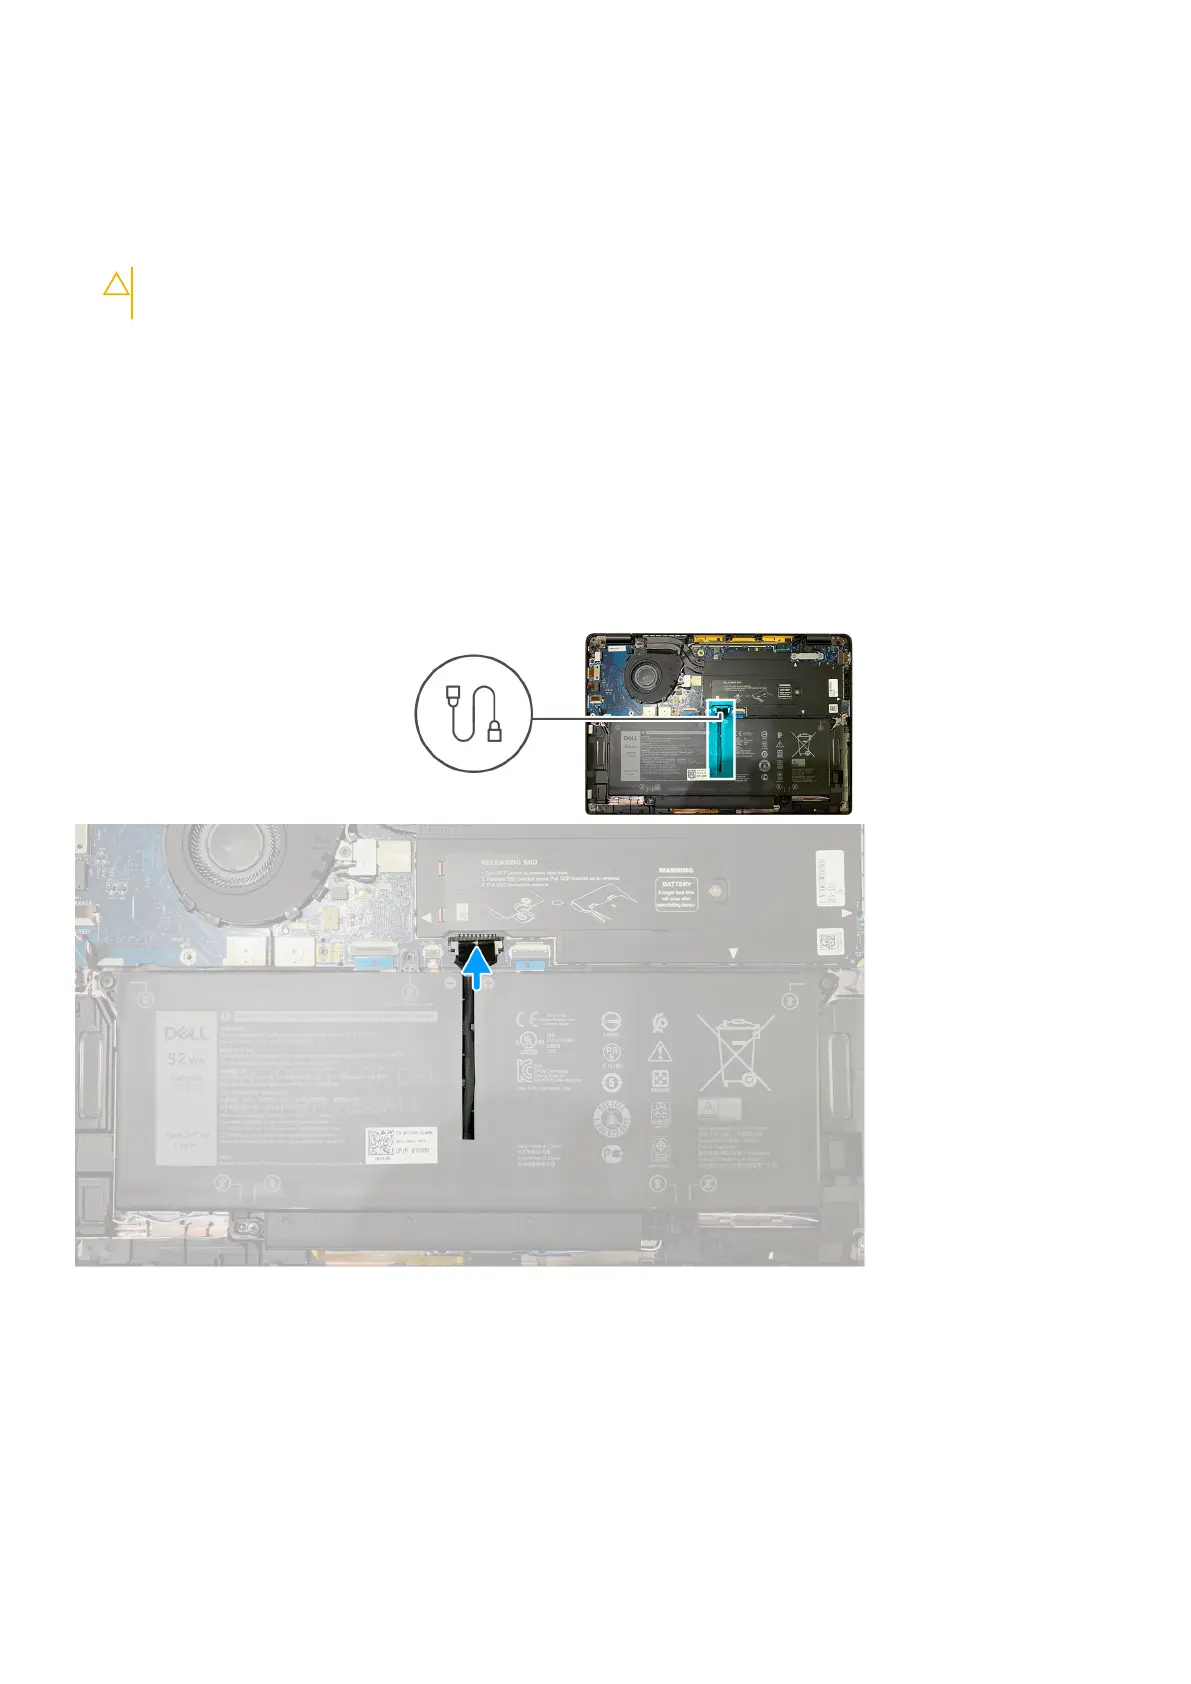
4. Use the pull-tab and disconnect the battery from the system board.
Installing the base cover
Prerequisites
If you are replacing a component, remove the existing component before performing the installation procedure.
About this task
The following images indicate the location of the base cover and provide a visual representation of the installation procedure.
12 Removing and installing components

Table of Contents

Other manuals for Dell Latitude 7310

Questions and Answers:

Question and Answer IconNeed help?

Do you have a question about the Dell Latitude 7310 and is the answer not in the manual?

Dell Latitude 7310 Specifications

General IconGeneral
GraphicsIntel UHD Graphics
Operating SystemWindows 10 Pro
WirelessIntel Wi-Fi 6 AX201, Bluetooth 5.1
SecurityFingerprint Reader, Smart Card Reader, TPM 2.0
Processor10th Generation Intel Core i5/i7
Display13.3-inch FHD (1920 x 1080)
MemoryUp to 32GB DDR4
StorageUp to 1TB PCIe NVMe SSD
Weight2.7 lbs (1.22 kg)
Ports1 x microSD card reader, 1 x Universal Audio Jack
Battery4-Cell 60 WHr ExpressCharge Capable Battery

Related product manuals