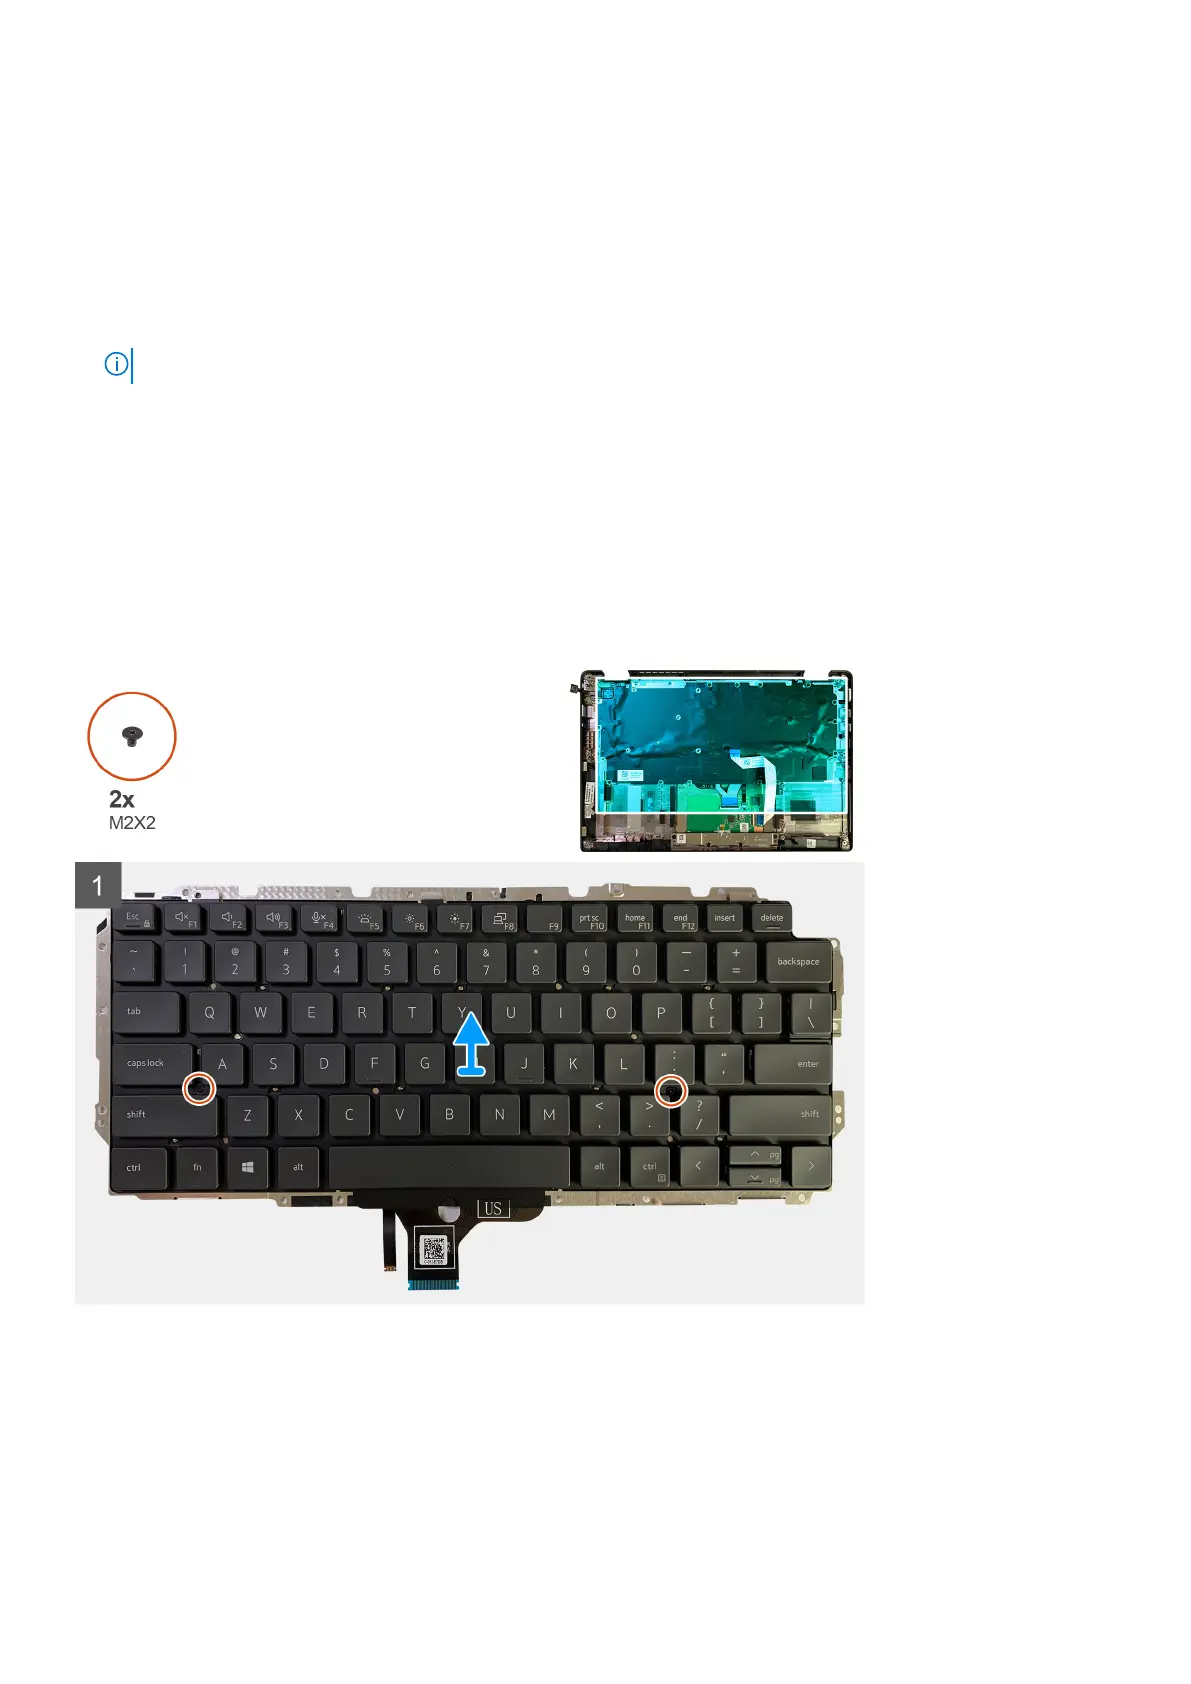
Steps
1. Remove all the M1.6x2 screws securing the keyboard to the palmrest assembly.
Depending on the configuration the number of screws vary :
• Aluminum palmrest: 21
• Carbon Fiber palmrest: 17
2. Disconnect the keyboard and backlight cable from the touchpad module.
3. Remove the two M2x2 screws securing the keyboard to the keyboard plate.
NOTE: Screws are located below Colon & Semi-colon key and between Capslock, A and Shift keys.
Installing the keyboard
Prerequisites
If you are replacing a component, remove the existing component before performing the installation procedure.
About this task
The following images indicate the location of the keyboard and provide a visual representation of the installation procedure.
Removing and installing components 45

 Loading...