Steps
1. Remove the two M2x2.5 screws securing the power button with fingerprint reader to the palmrest assembly.
2. Remove the power button with fingerprint reader from its slot in the palmrest assembly.
Installing the power button with fingerprint reader
Prerequisites
If you are replacing a component, remove the existing component before performing the installation procedure.
About this task
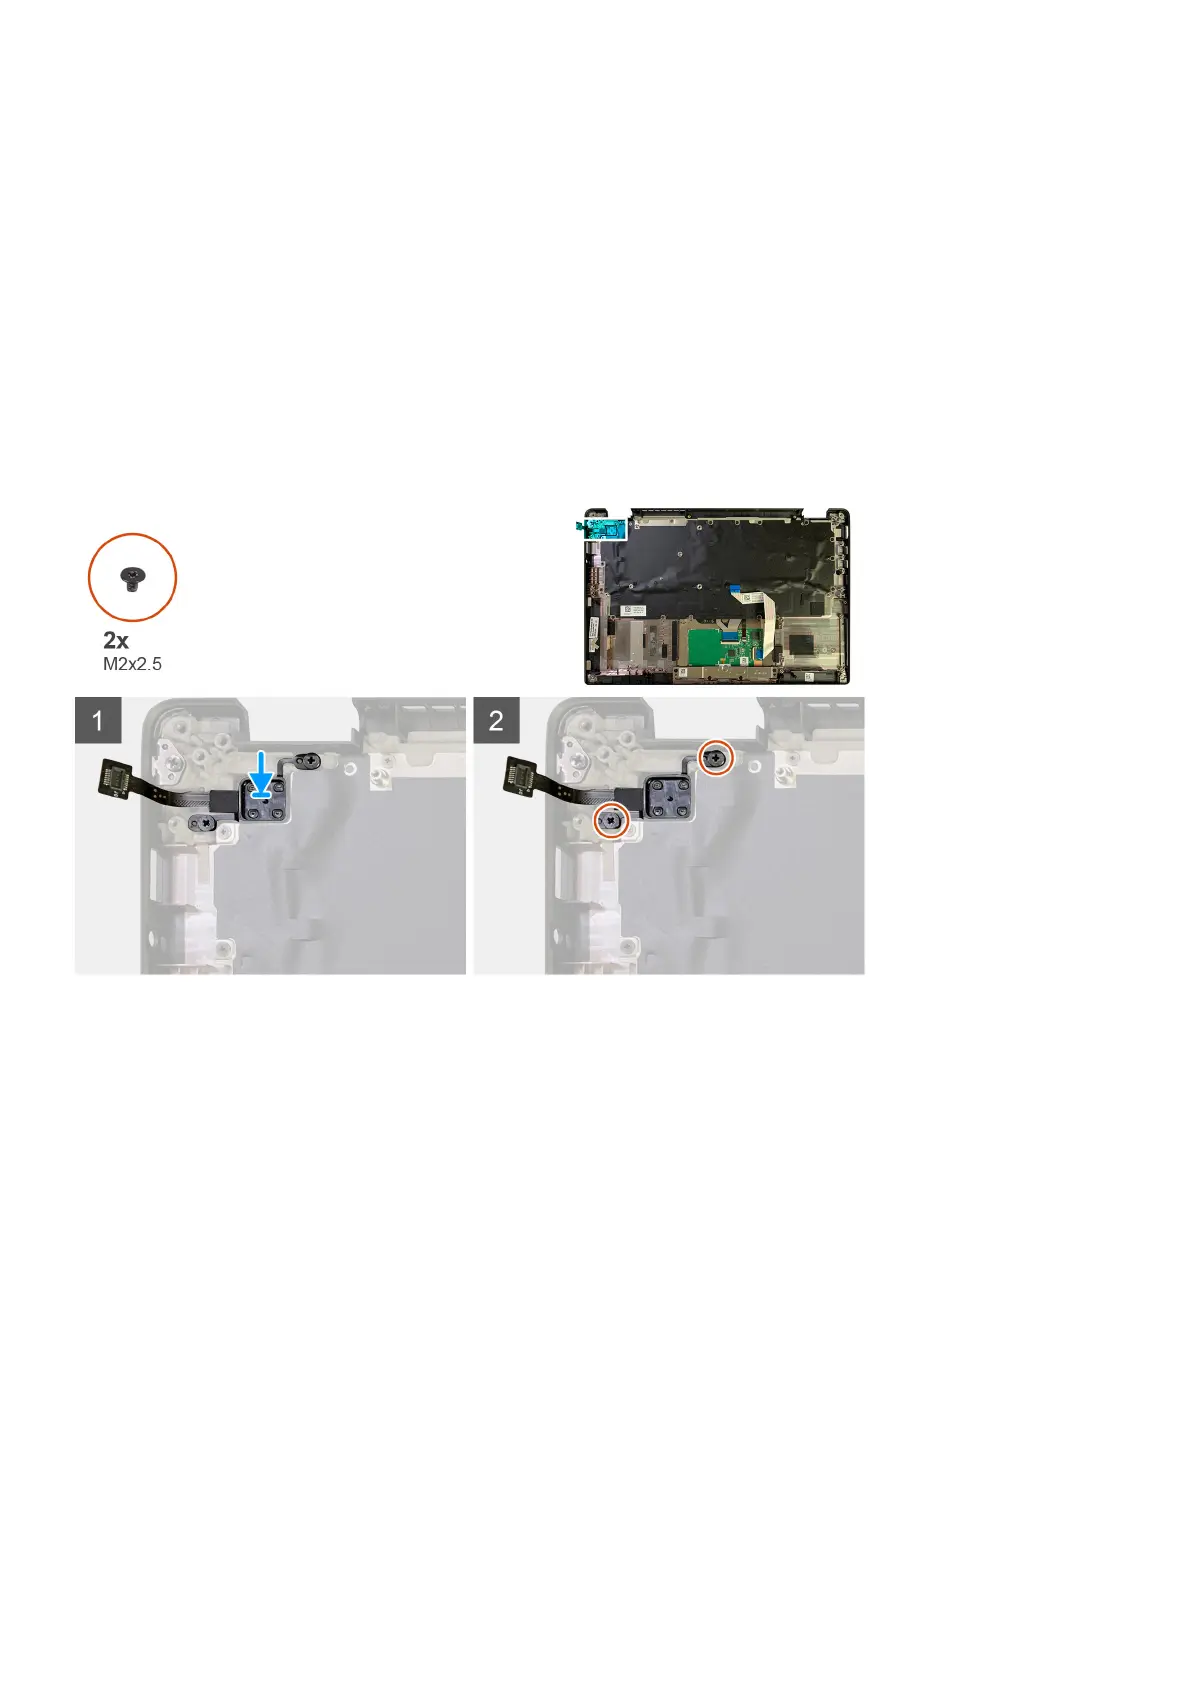
The following images indicate the location of the power button with fingerprint reader and provide a visual representation of the
installation procedure.
Steps
1. Replace the power button with fingerprint reader into its slot in the palmrest assembly.
2. Replace the two M2x2.5 screws securing power button with fingerprint reader to the palmrest assembly.
Next steps
1. Install the:
a. I/O board
b. WLAN antennae bracket
c. WWAN card
d. SSD thermal shield
e. Battery
f. Base cover
2. Follow the procedure in After working inside your computer.
40
Removing and installing components

 Loading...