Steps
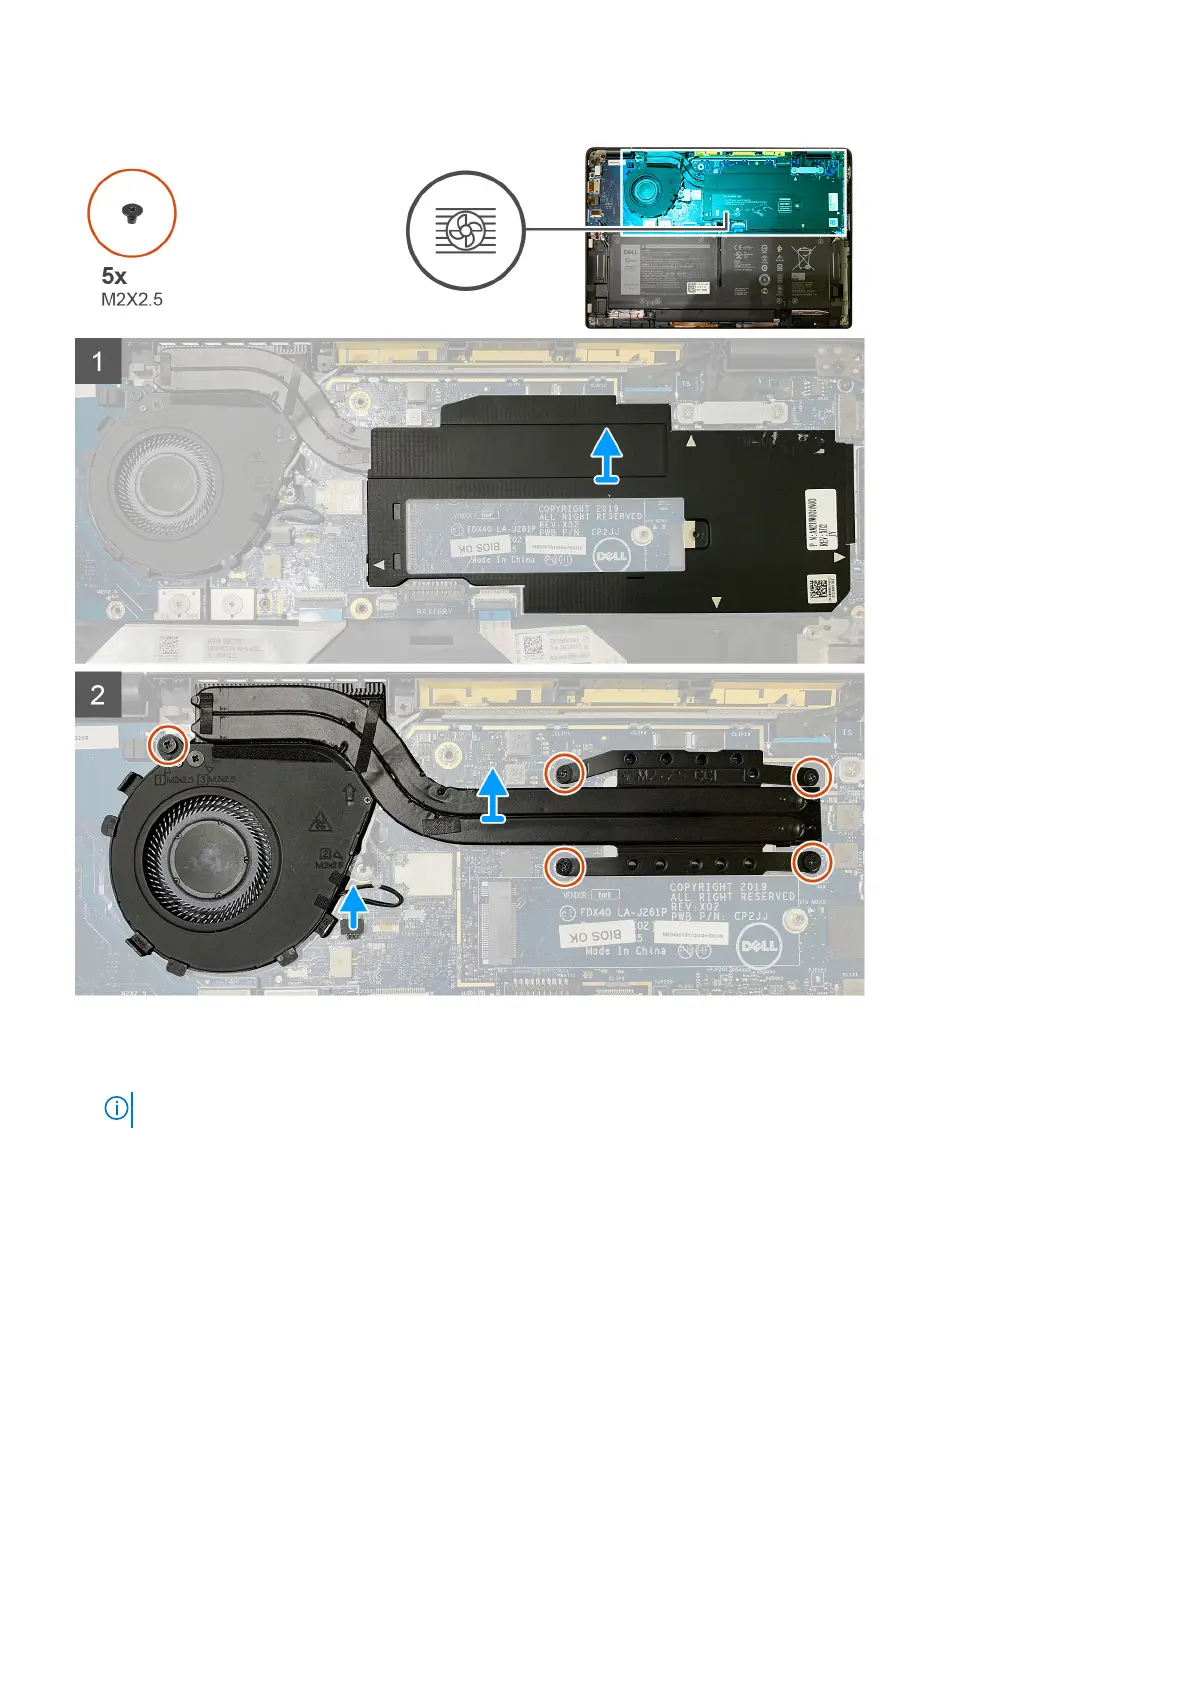
1. Pry and remove the system board shield from over the heatsink assembly.
NOTE: The white triangles (△) symbol highlights the prying points on the system board shield.
2. Remove the single M2x2.5 screw from the fan case and four M2x2.5 screws in reverse sequence (4>3>2>1).
3. Disconnect the fan connector from the system board.
4. Lift and remove the heatsink assembly from the system board.
Installing the heatsink assembly
Prerequisites
If you are replacing a component, remove the existing component before performing the installation procedure.
About this task
The following images indicate the location of the heatsink assembly and provide a visual representation of the installation procedure.
Removing and installing components
29

 Loading...