Adding and Replacing Parts 143
FILE LOCATION: C:\Projects\Spears\SpearsHTML\parts.fm
DELL CONFIDENTIAL – PRELIMINARY 7/18/07 - FOR PROOF ONLY
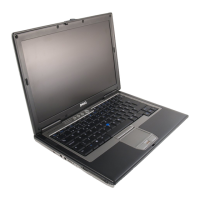
Removing the Keyboard
1
Follow the procedures in "Before You Begin" on page 135.
2
Remove the hinge cover (see "Hinge Cover" on page 141).
3
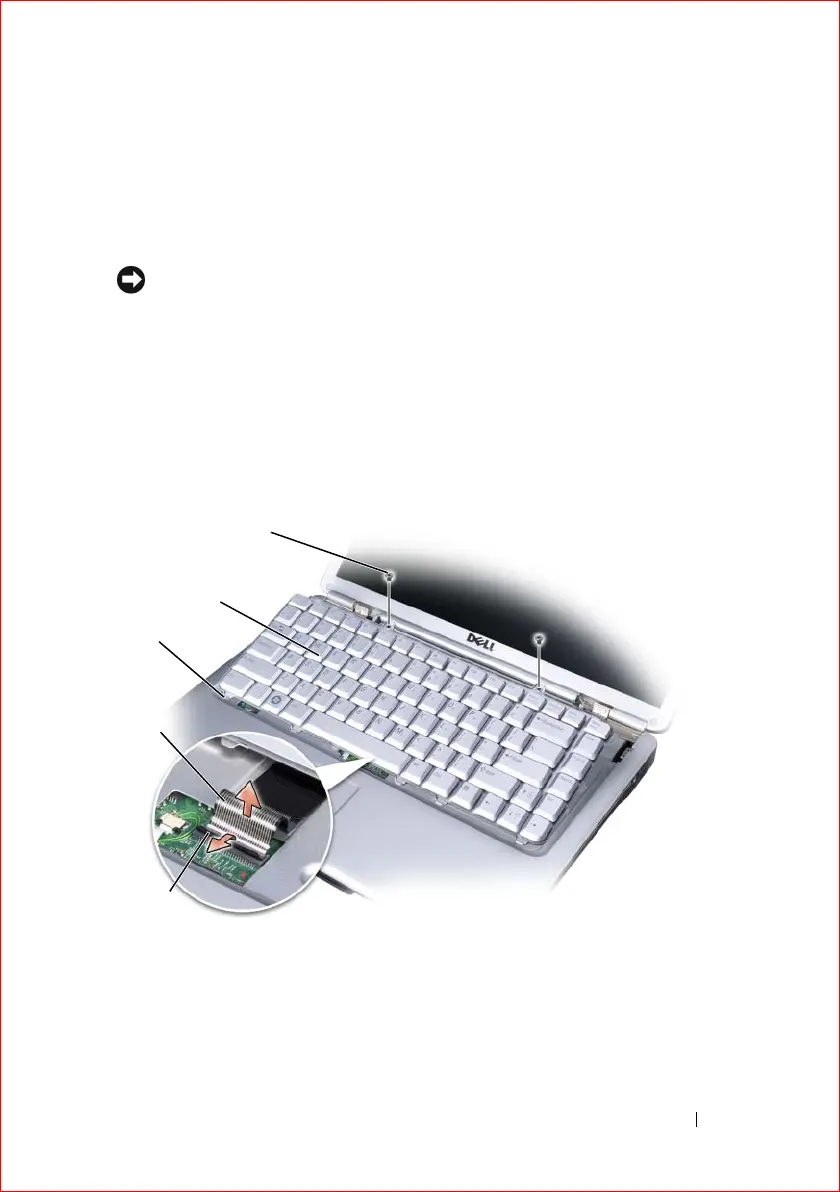
Remove the two screws at the top of the keyboard.
NOTICE: The key caps on the keyboard are fragile, easily dislodged, and time-
consuming to replace. Be careful when removing and handling the keyboard.
4
Lift the keyboard and hold it up and slightly forward to access to the
keyboard connector.
5
To disconnect the keyboard cable from the keyboard connector on the
system board, rotate the keyboard connector latch toward the front of the
computer.
6
Slide the keyboard cable out of the keyboard connector.
1 screws (2) 2 keyboard
3 keyboard tabs (5) 4 keyboard cable
5 keyboard connector
latch
1
2
4
3
5