Back to Contents Page
System Board
DellPrecision™Workstation490User'sGuide
Removing the System Board
Replacing the System Board
Removing the System Board
1. Follow the procedures in Before You Begin.
2. Remove the computer cover (see Removing the Computer Cover).
3. Rotate the hard-drive carrier out of the computer (see Rotating the Hard-Drive Carrier Out of the Computer).
4. Remove the processor access door assembly:
a. Remove the green screw that attaches the processor access door assembly to the system board and to the computer chassis.
b. Lift to remove the processor access door assembly from the computer.
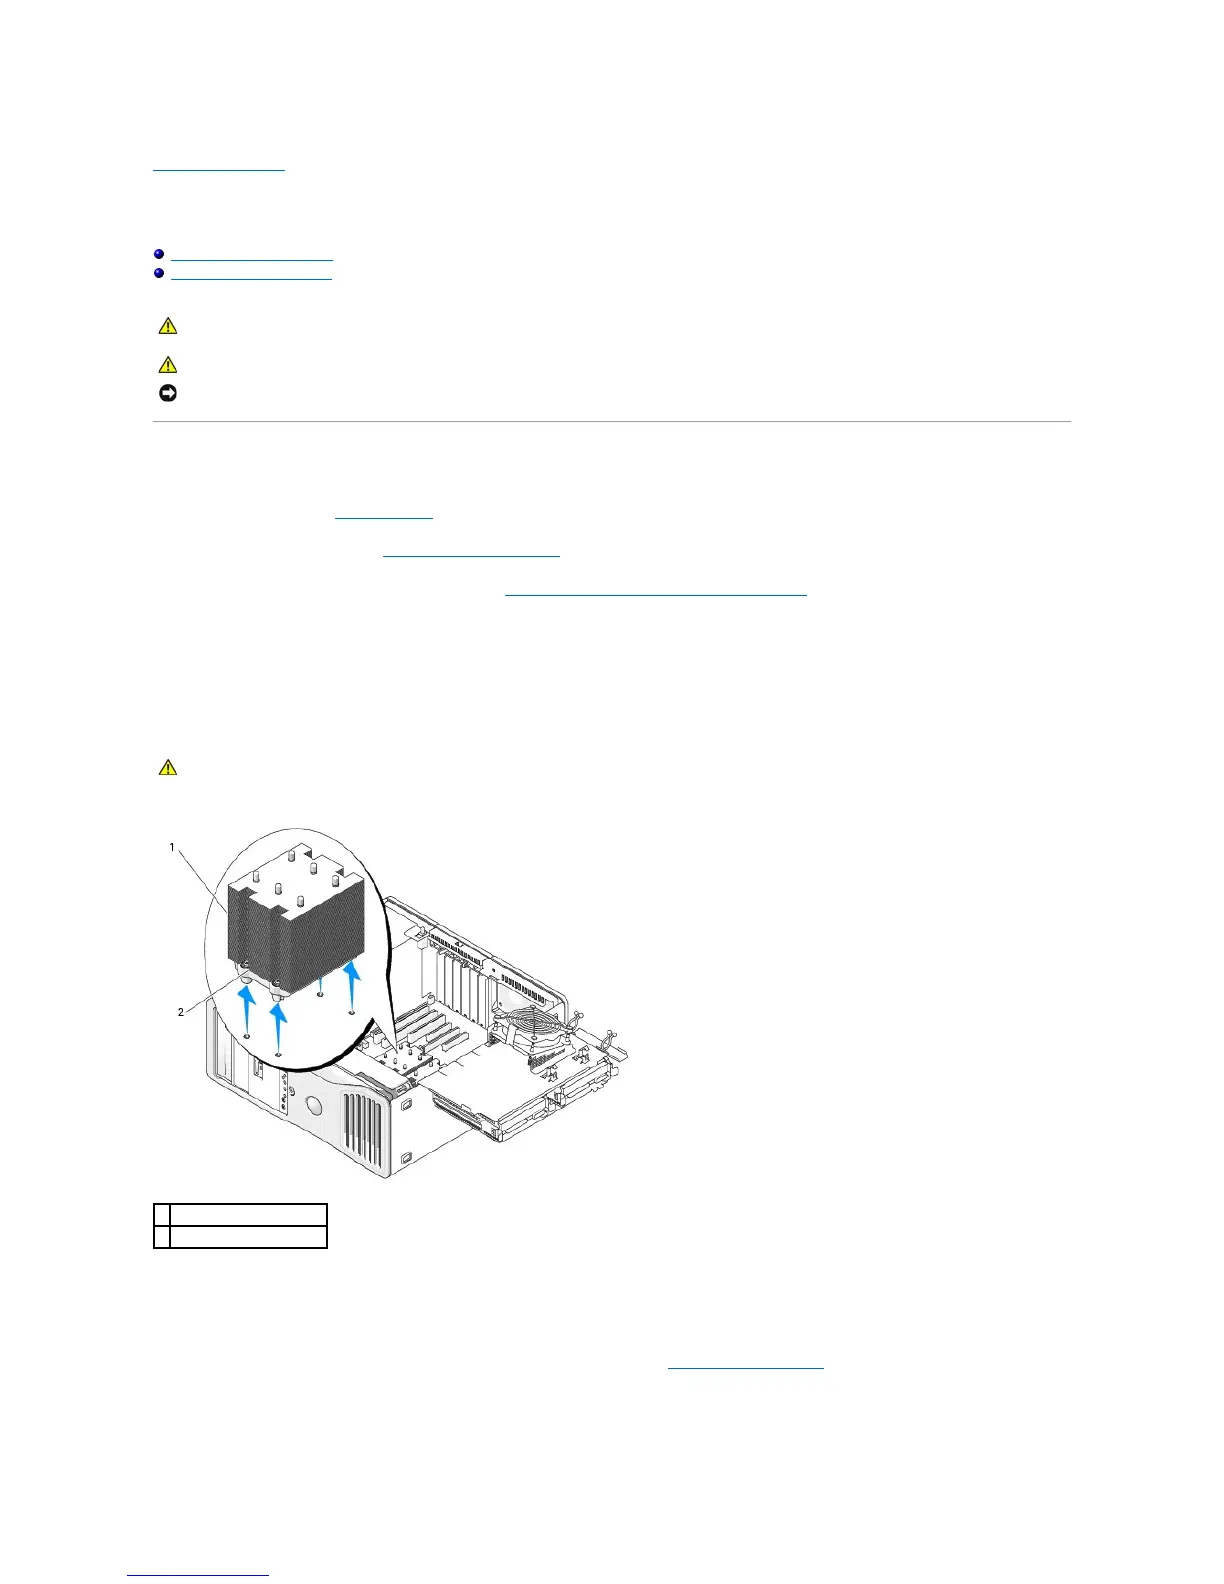
5. Use a long Phillips screwdriver to loosen the four captive screws on the sides of the heat-sink assembly.
6. Lift to remove the heat-sink assembly from the computer.
7. Disconnect the optional speaker connector (if installed) from the system board.
8. Disconnect the card fan from the system board connector labeled FAN_CCAG. (See System Board Components.)
NOTICE: To prevent static damage to components inside your computer, discharge static electricity from your body before you touch any of your
computer's electronic components. You can do so by touching an unpainted metal surface on the computer.