EasyManuals Logo

Dell Precision 490 Desktop User Manual

Dell Precision 490 Desktop
170 pages
To Next Page IconTo Next Page
To Previous Page IconTo Previous Page
Page #66 background imageLoading...
Page #66 background image
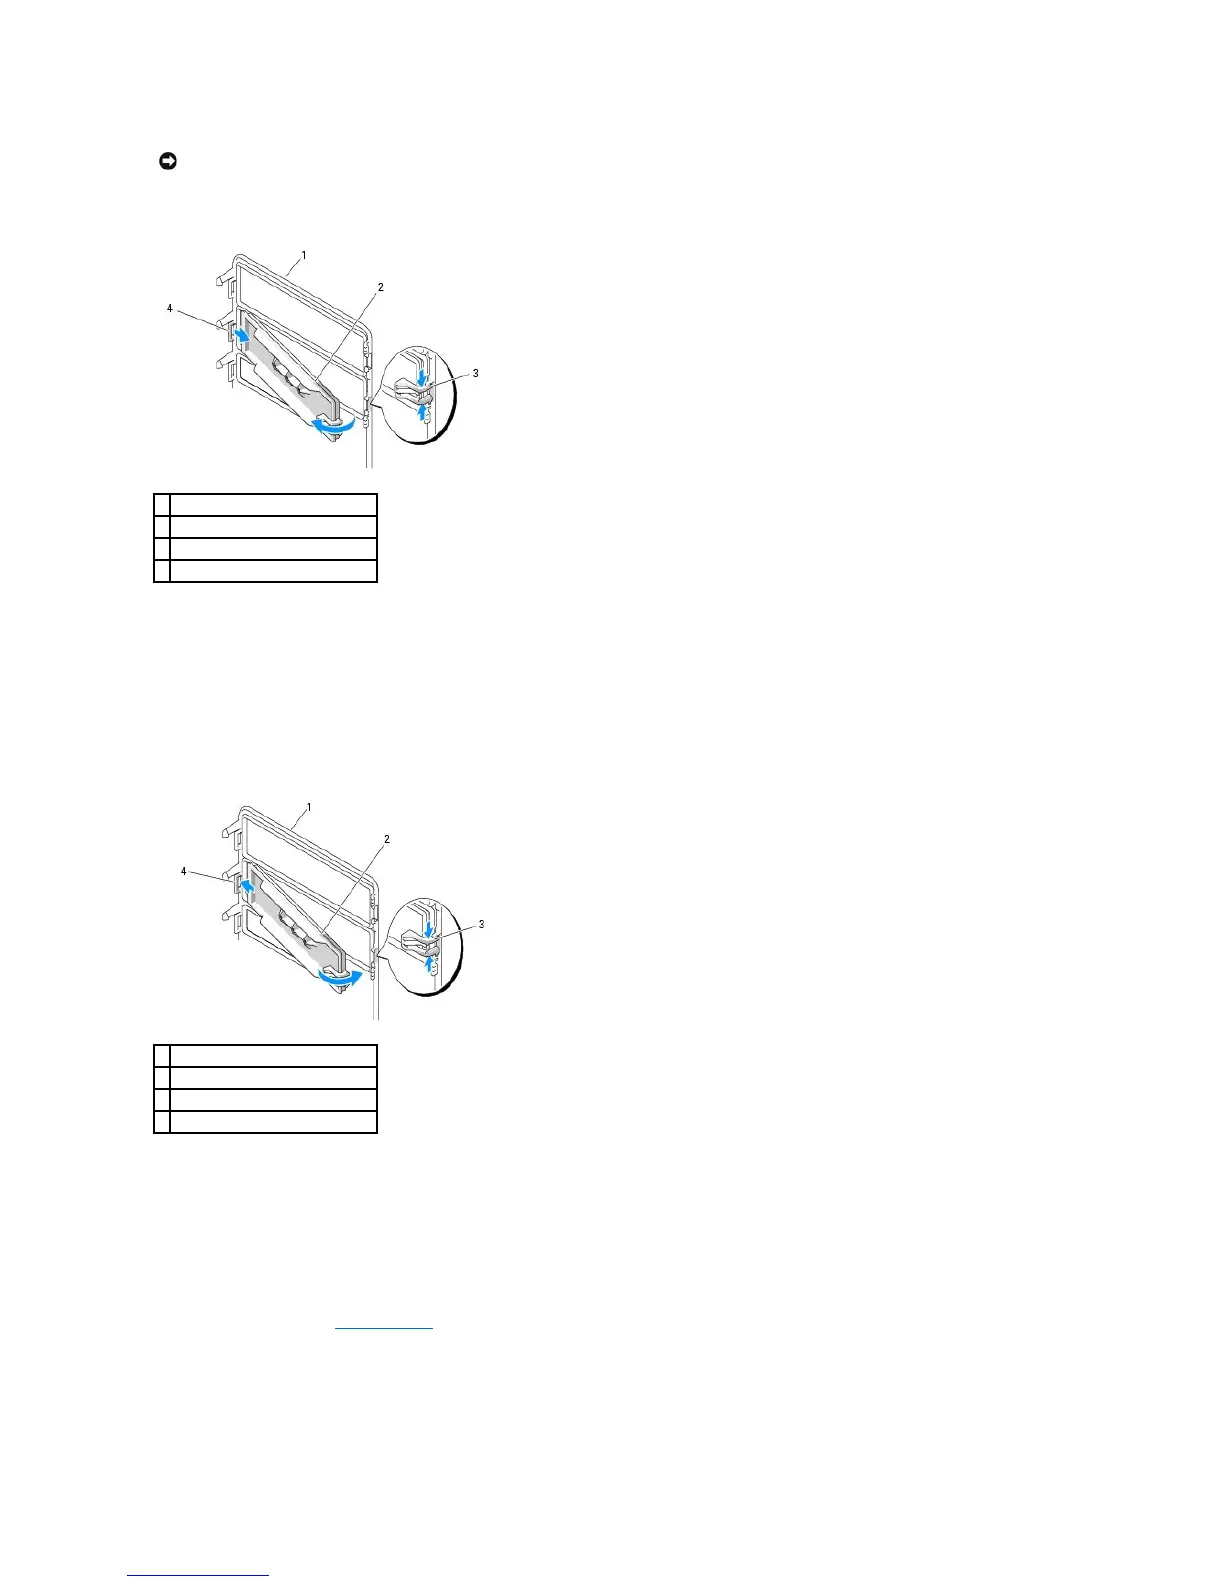
4. Pinch the drive-panel insert release tabs and rotate the insert just enough to free the release tabs.
5. Slide the drive-panel insert tab out from the tab slot
6. Set the drive-panel insert aside in a secure location.
Replacing a Drive-Panel Insert
1. Slide the drive-panel insert tab into the drive-panel slot.
2. Pinch the drive-panel insert release tabs together and rotate the drive-panel insert into place.
3. Ensure that the drive-panel insert is correctly seated in the drive panel.
Replacing the Drive Panel
1. Follow the procedures in Before You Begin.
NOTICE: To avoid breaking the drive-panelinserttab,donotpulltheinsertmorethanapproximately1cm(½inch)awayfromthedrivepanelbefore
sliding the tab out of the slot.
1
drive panel
2
drive-panel insert
3
drive-panel insert release tabs (2)
4
drive-panel insert tab in tab slot
1
drive panel
2
drive-panel insert
3
drive-panel insert release tabs (2)
4
drive-panel insert tab in tab slot

Table of Contents

Questions and Answers:

Question and Answer IconNeed help?

Do you have a question about the Dell Precision 490 Desktop and is the answer not in the manual?

Dell Precision 490 Desktop Specifications

General IconGeneral
BrandDell
ModelPrecision 490 Desktop
CategoryDesktop
LanguageEnglish

Related product manuals