9. Set the drive aside in a secure location.
10. If you are not installing another drive in the drive bay,
If metal shields are present in your computer (see About the Metal Shields Present in Some Drive Configurations):
reinstall the vented metal insert over the FlexBay and the empty space beneath it.
a. Insert the metal insert's two upper screws and its two lower screws into the corresponding slots inside the FlexBay.
b. Push the vented metal insert until it clicks into place and its metal tabs rest flush against the chassis surface.
Install a drive-panel insert (see Replacing a Drive-Panel Insert).
11. Reinstall the drive panel (see Replacing the Drive Panel).
12. Ensure that all connectors are properly cabled and firmly seated.
13. Replace the computer cover (see Replacing the Computer Cover).
14. Connect the computer and devices to electrical outlets, and turn them on.
Installing an Optional Third Hard Drive (Tower Computer Only)
1. If you are installing a new drive, unpack the drive and prepare it for installation.
Check the documentation for the drive to verify that it is configured for your computer.
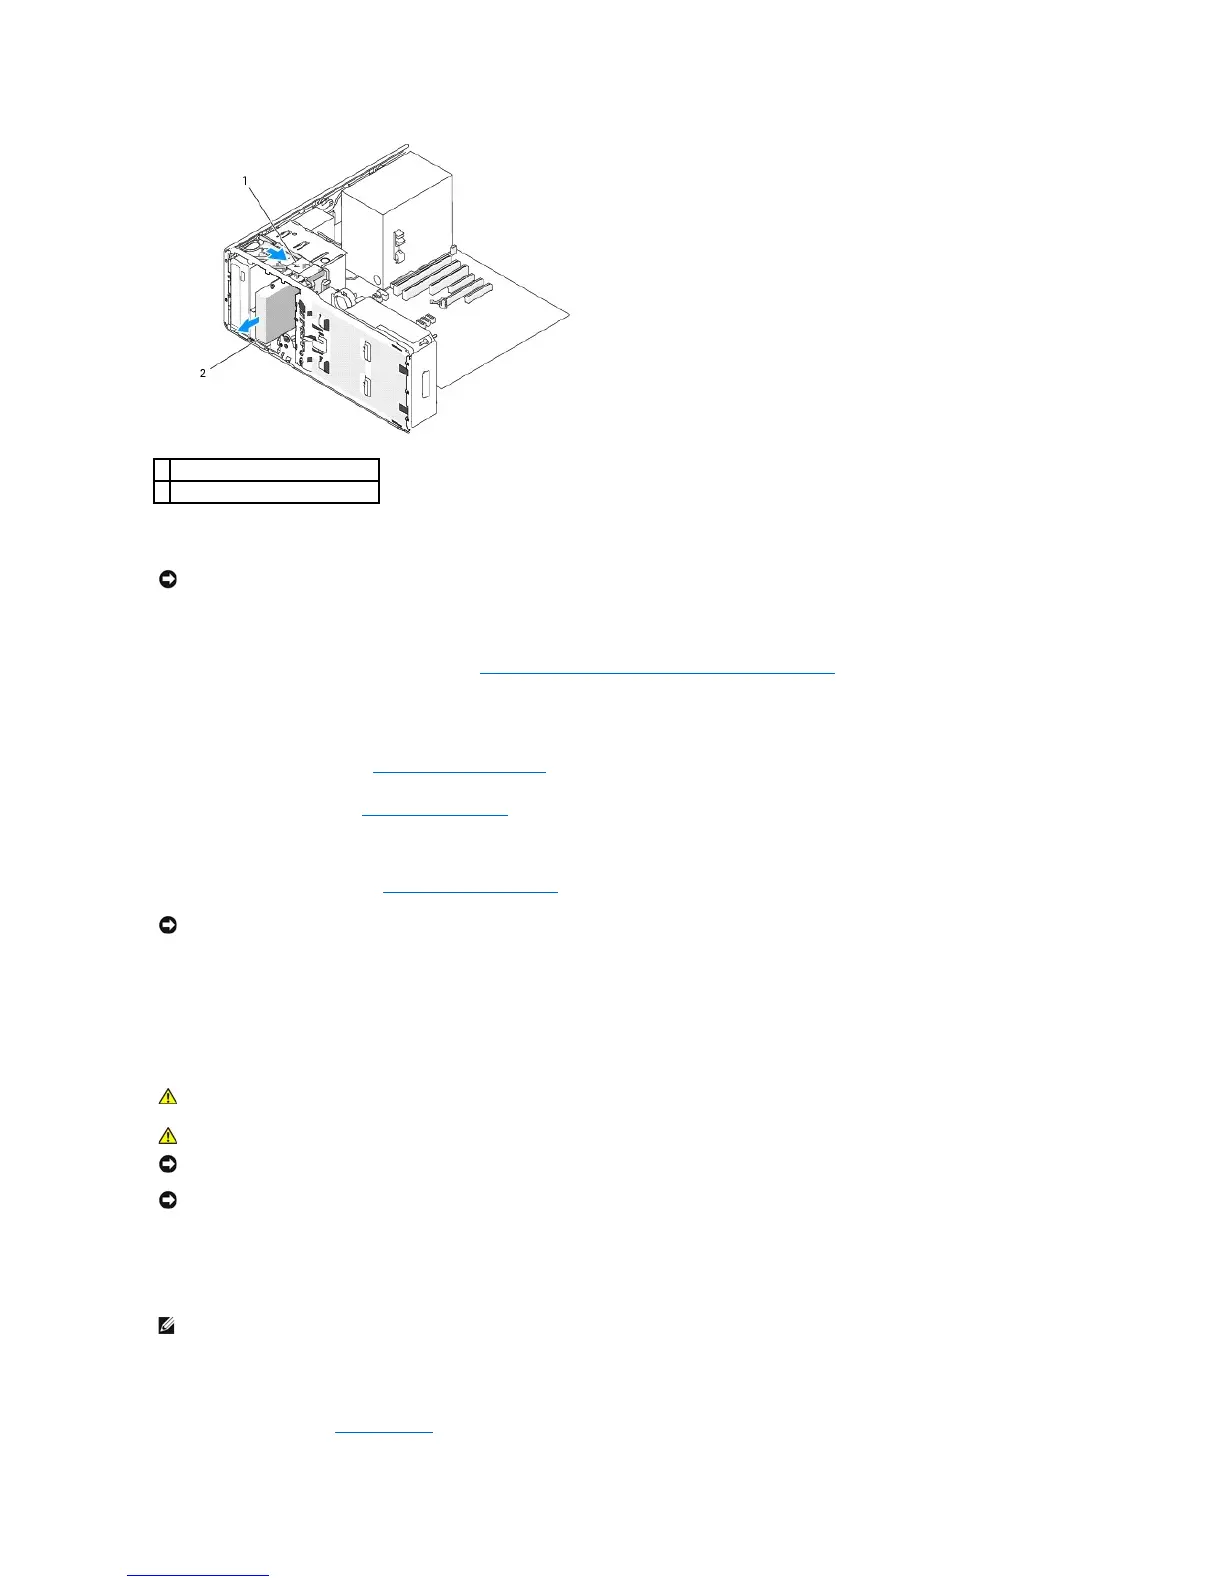
2. Install 4 screws in the front four holes on the sides of the drive, if they are not already installed.
Otherwise, verify that the screws are installed in the front 4 holes.
3. Follow the procedures in Before You Begin.
NOTICE: If metal shields are present in your computer configuration, they must be installed at all times while your computer is in use or your computer
may not function properly.
NOTICE: To prevent static damage to components inside your computer, discharge static electricity from your body before you touch any of your
computer's electronic components. You can do so by touching an unpainted metal surface on the computer.
NOTICE: To avoid damage to the hard drive, do not set it on a hard surface. Instead, set the drive on a surface, such as a foam pad, that will
sufficiently cushion it.