41
S
2M
Connector Module
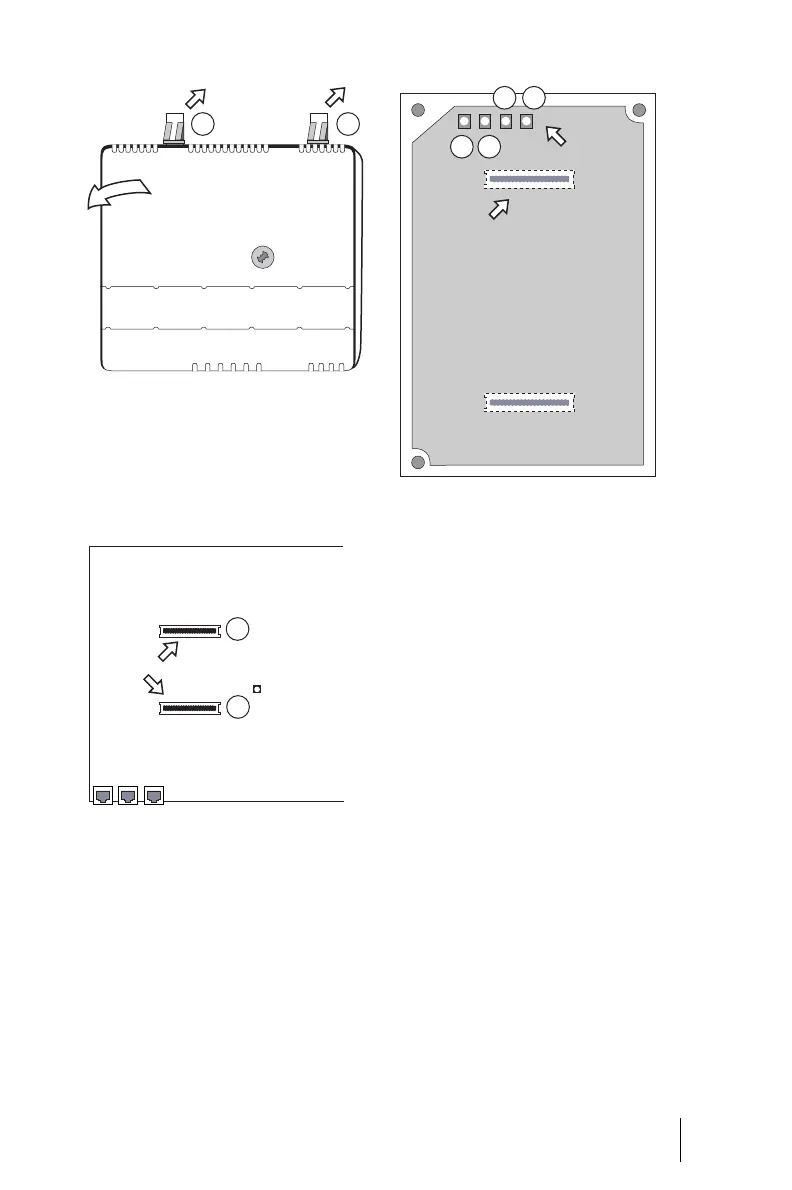
Removing the module cover
4. On the module board, remove
the protective covers of the two
S
2M
slots (3) and (4).
Position of the S
2M
slots on the mod-
ule board
5. Insert the S
2M
module into the
slots, making sure you insert the
LED side of the module into the
upper slot (4).
Position of the LEDs on the
S
2M
module
6. Replace the module cover. To do
this, insert the locking hooks at
the lower end of the cover into
the recesses on the connection
module. Press the module cover
until the upper locking levers
engage.
7. Wire the S
2M
port of the connec-
tor module to the NT or the
other PBX according to the fol-
lowing drawing. Make sure the
RX and TX lines are crossed over
(connect the RX lines of the
OpenCom 120 to the TX lines of
the other PBX).
1
2
LAN 1PCM LAN 2
Activity LED
4
3
S
2M
slots
4
3
1 2
S
2M
LEDs
S
2M
slot
(Underside of the module board)