LT-2320
17
SERVICE
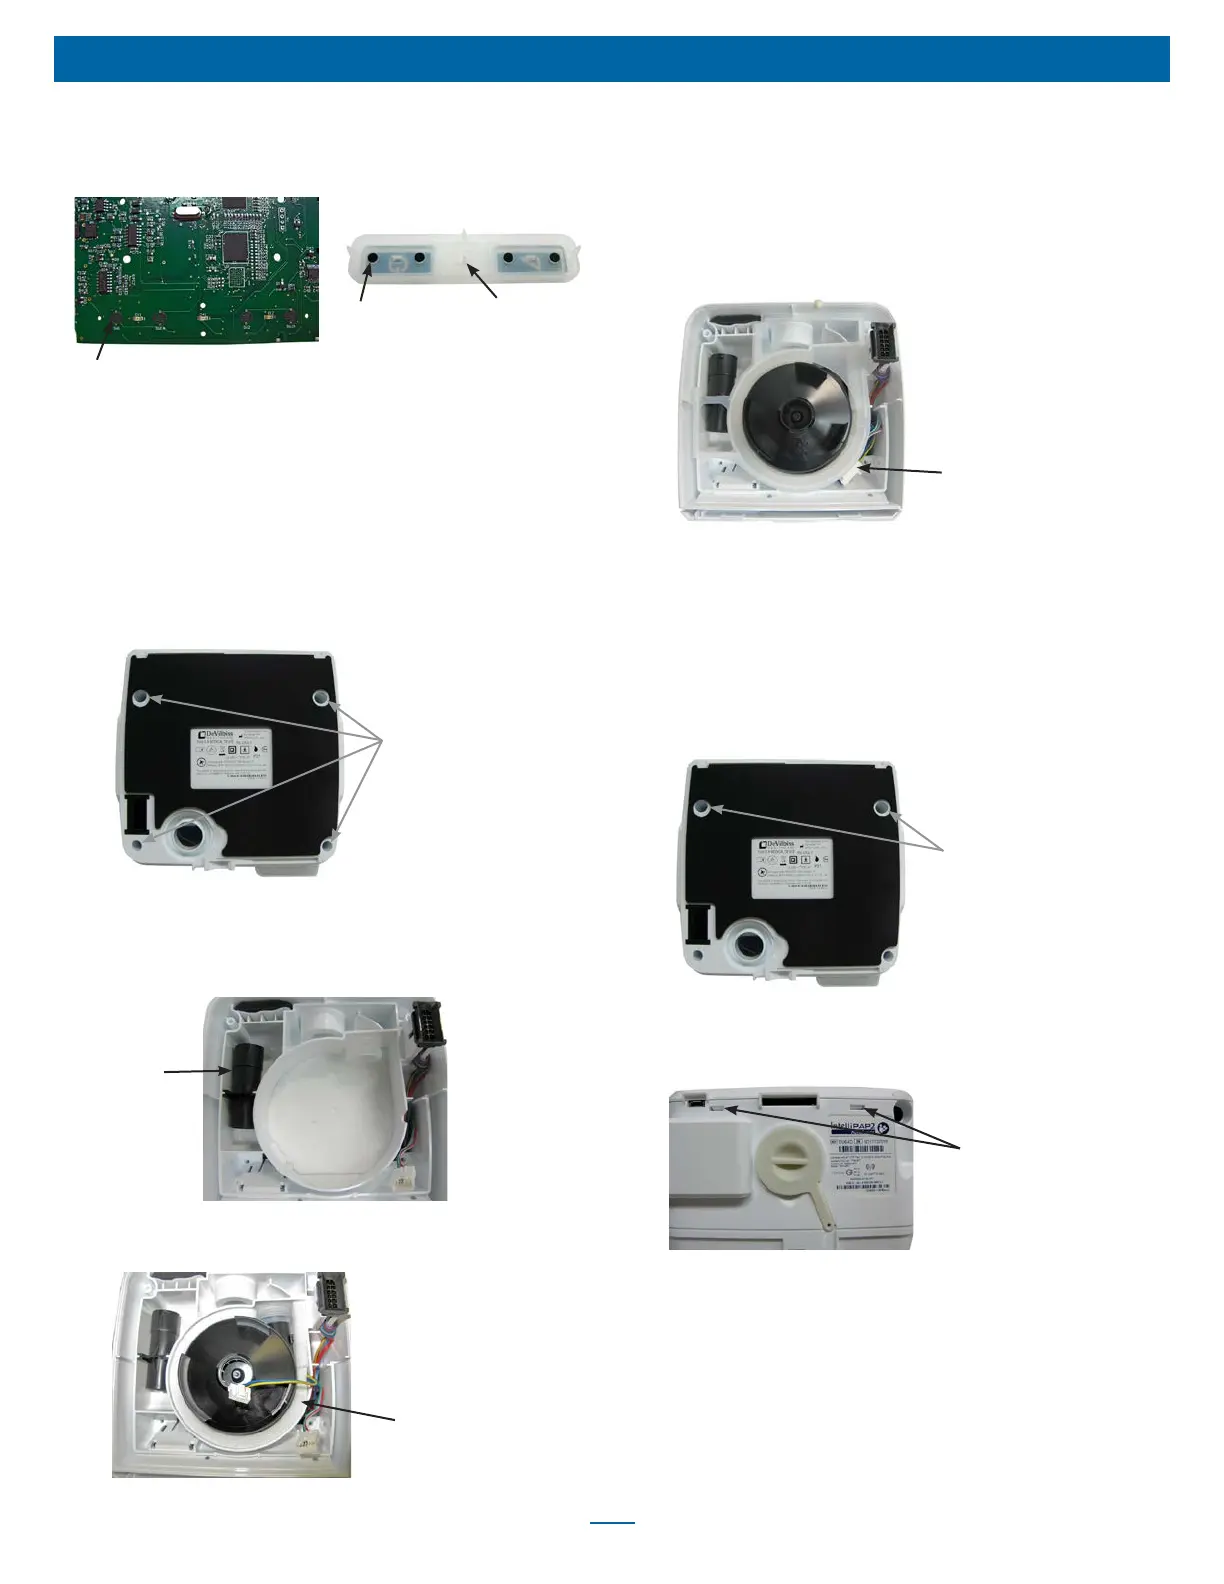
8. Inspect the keypad to be sure all the carbon pills are in place.
Also inspect the carbon traces on the PC board for any breakage
or dirt.
Carbon Traces
X4
Carbon Pills
X4
Rat Tails
X4
9. Replace the keypad by inserting the ‘rat tails’ in the mounting
holes and then pulling them through the PC board with needle
nose pliers.
10. Replace PC board. See ‘to remove and replace PC board’
section.
11. Replace top cover using instructions listed below.
To Remove Bottom Cover – Access the Blower,
Flow Element, Foam and Chassis Manifold
1. Remove the four T-10 screws from the bottom cover.
Case Screws
X4
2. Lift bottom cover off CPAP device.
To Replace Bottom Cover
1. Ensure that the ow element is fully seated in the ow sensor
manifold.
Flow Element
2. Ensure that the foam under and around the blower is properly
placed and free from tears.
Blower Foam
3. Ensure that the blower is securely placed in the blower isolator.
4. Ensure that the blue, green and yellow wire harness is properly
positioned in the chassis manifold, and the manifold is secured to
the main chassis frame.
5. Fold the blue, green and yellow wire harness under its connector
and insert harness wires under the connector when placing into
the connector restraint molded into the main chassis.
Blower Wire Harness in
Connector Restraint
6. Ensure that the heater wire harness connector is in place and all
wires are pushed deep into the cavity.
7. Replace bottom cover and secure using four T-10 screws.
To Remove Top Cover – Access PC Board,
Keypad, Speaker, LCD Display, Encoder PC
Board
1. Remove the two front T-10 screws from the bottom cover, found
under the Display and Rotary Knob.
Case Screws
X2
2. Pull/ Pry off the Rotary Knob.
3. Use a at-head driver to push up on the top cover latches on the
back of the unit.
Latches
4. Lift cover off the main chassis.
To Replace Top Cover
1. Place top cover onto chassis.
2. Snap latches into place on back of unit.
3. Ensure that the Display is positioned properly within the window
while replacing two front T-10 screws into bottom cover.
4. Push Rotary Knob onto stem.