LT-2320
28
SERVICE - DV6HH
HEATER SERVICING AND PARTS
REPLACEMENT
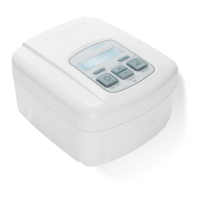
To Remove and Replace Chamber Sealing
Gasket
1. Remove the chamber from the heater base (cradle) and open it.
See Cleaning the Humidier Water Chamber under the
Maintenance and Testing section of this manual.
2. Release the defective gasket from the ribs that hold it to the
chamber top and discard.
3. Align the replacement gasket onto the chamber top and carefully
ensure that the gasket is secured under each of the 12 ribs.
Locating Ribs
4. Close the chamber and return it to the base (cradle).
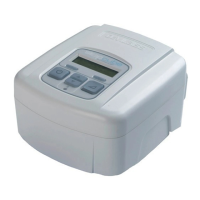
To Remove and Replace Heater Plate
1. Remove the humidier chamber from the DV6HH base (cradle).
2. Disconnect the humidier module from the top of the heater.
Humidifier Module
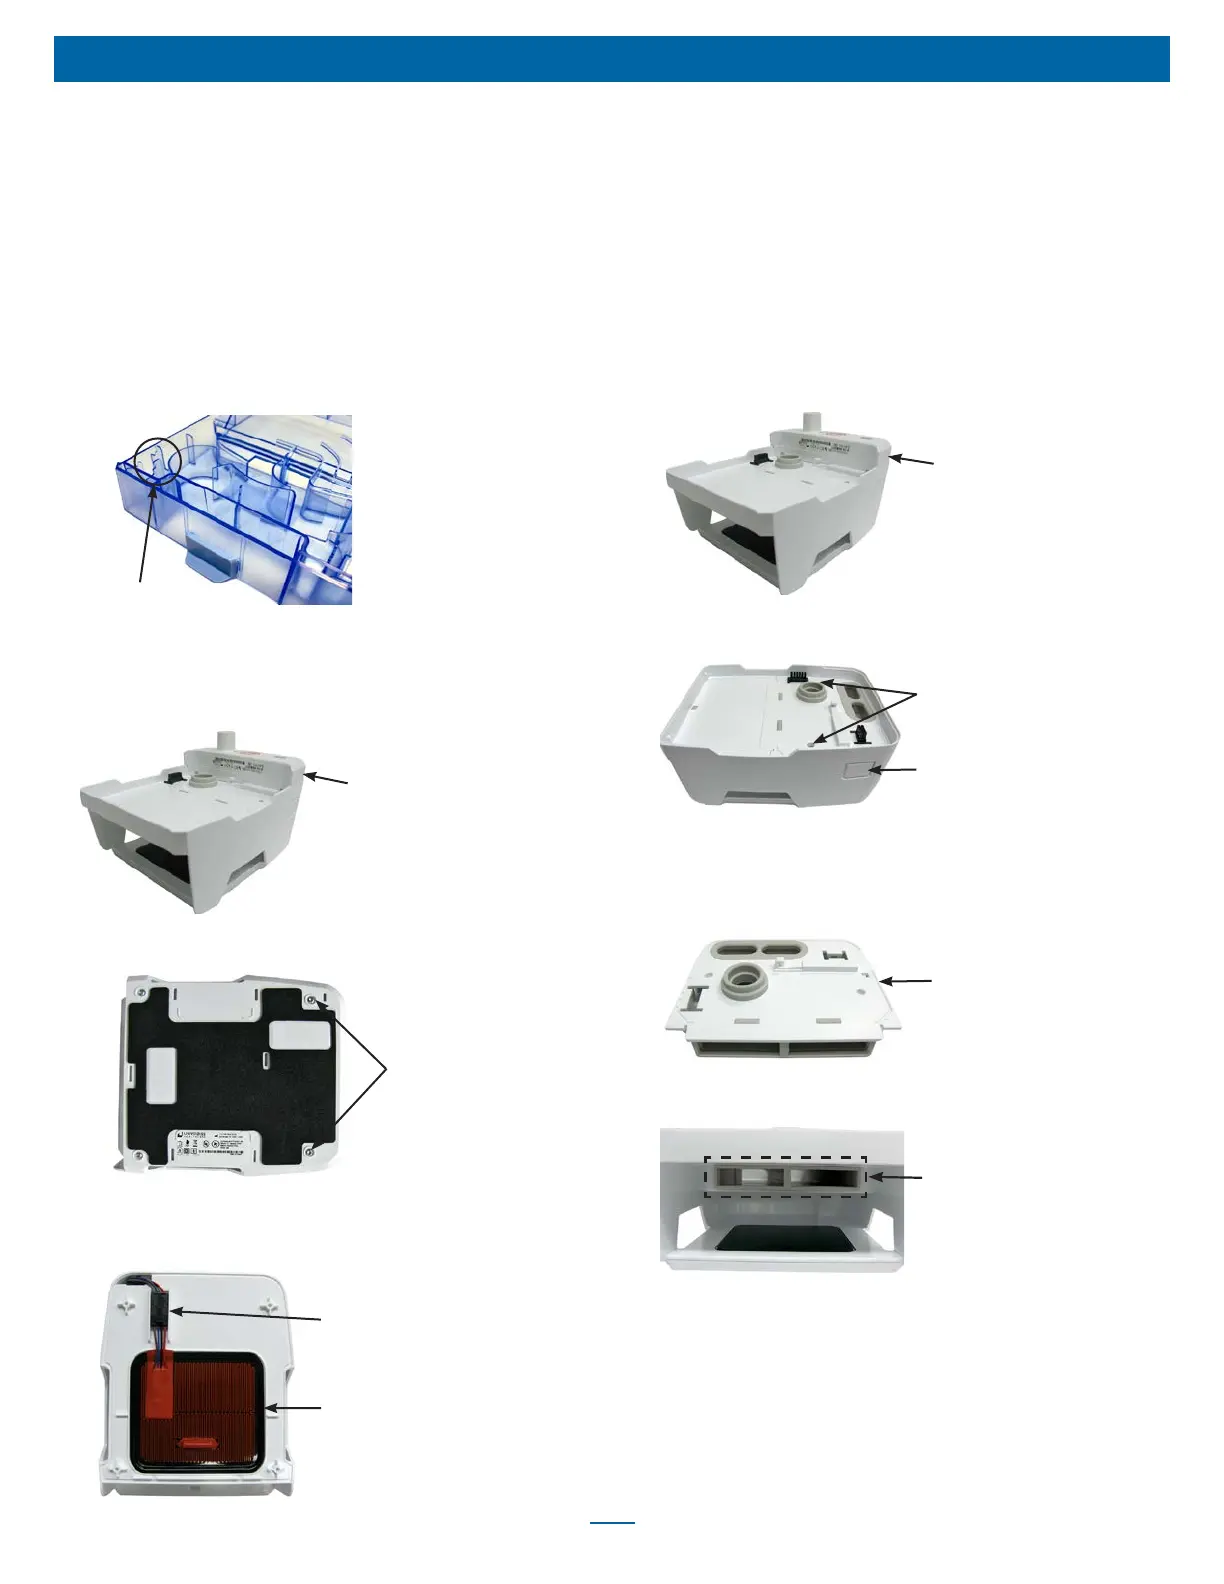
3. Turn the base (cradle) over so that the bottom of the unit faces up
and remove four T-10 screws.
Humidifier Base
Screws X4
4. Lift the bottom cover off the unit.
5. Disconnect heater plate wire harness connector and remove heater
plate.
Wire Harness Connector
Heater Plate
6. Insert new heater plate and reconnect wire harness connector.
Then, insert connector into connector restraint ensuring wires are
not twisted.
7. Replace bottom cover and secure using four T-10 screws.
8. Reconnect the humidier module to the top of the heater
9. Slide the humidier chamber into the heater base (cradle) until it
clicks into place.
To Remove and Replace Top Cover (includes
manifold and latch w/ spring)
1. Remove the humidier chamber from the DV6HH base (cradle).
2. Disconnect the humidier module from the top of the heater.
Humidifier Module
3. Remove two T-10 screws from the top cover of heater base
(cradle).
Top Cover Screws
Latch Release Button
4. While holding latch release button in, carefully lift top cover off
heater base (cradle).
5. Position new top cover on base (cradle). and push down until it
snaps into place.
Top Cover
6. Ensure that the silicone manifold is oriented properly and not
twisted.
Silicone manifold
7. Replace two T-10 screws.
8. Reconnect the humidier module to the top of the heater
9. Slide the humidier chamber into the heater base (cradle) until it
clicks into place.