D-Control Guide24
Installing the Units on the Stand
After the D-Control Main Unit and Fader Modules are pre-
pared for installation, the units are placed on the stand in the
appropriate order for your configuration. Install the units
from left to right on the stand.
To install the D-Control units on the stand:
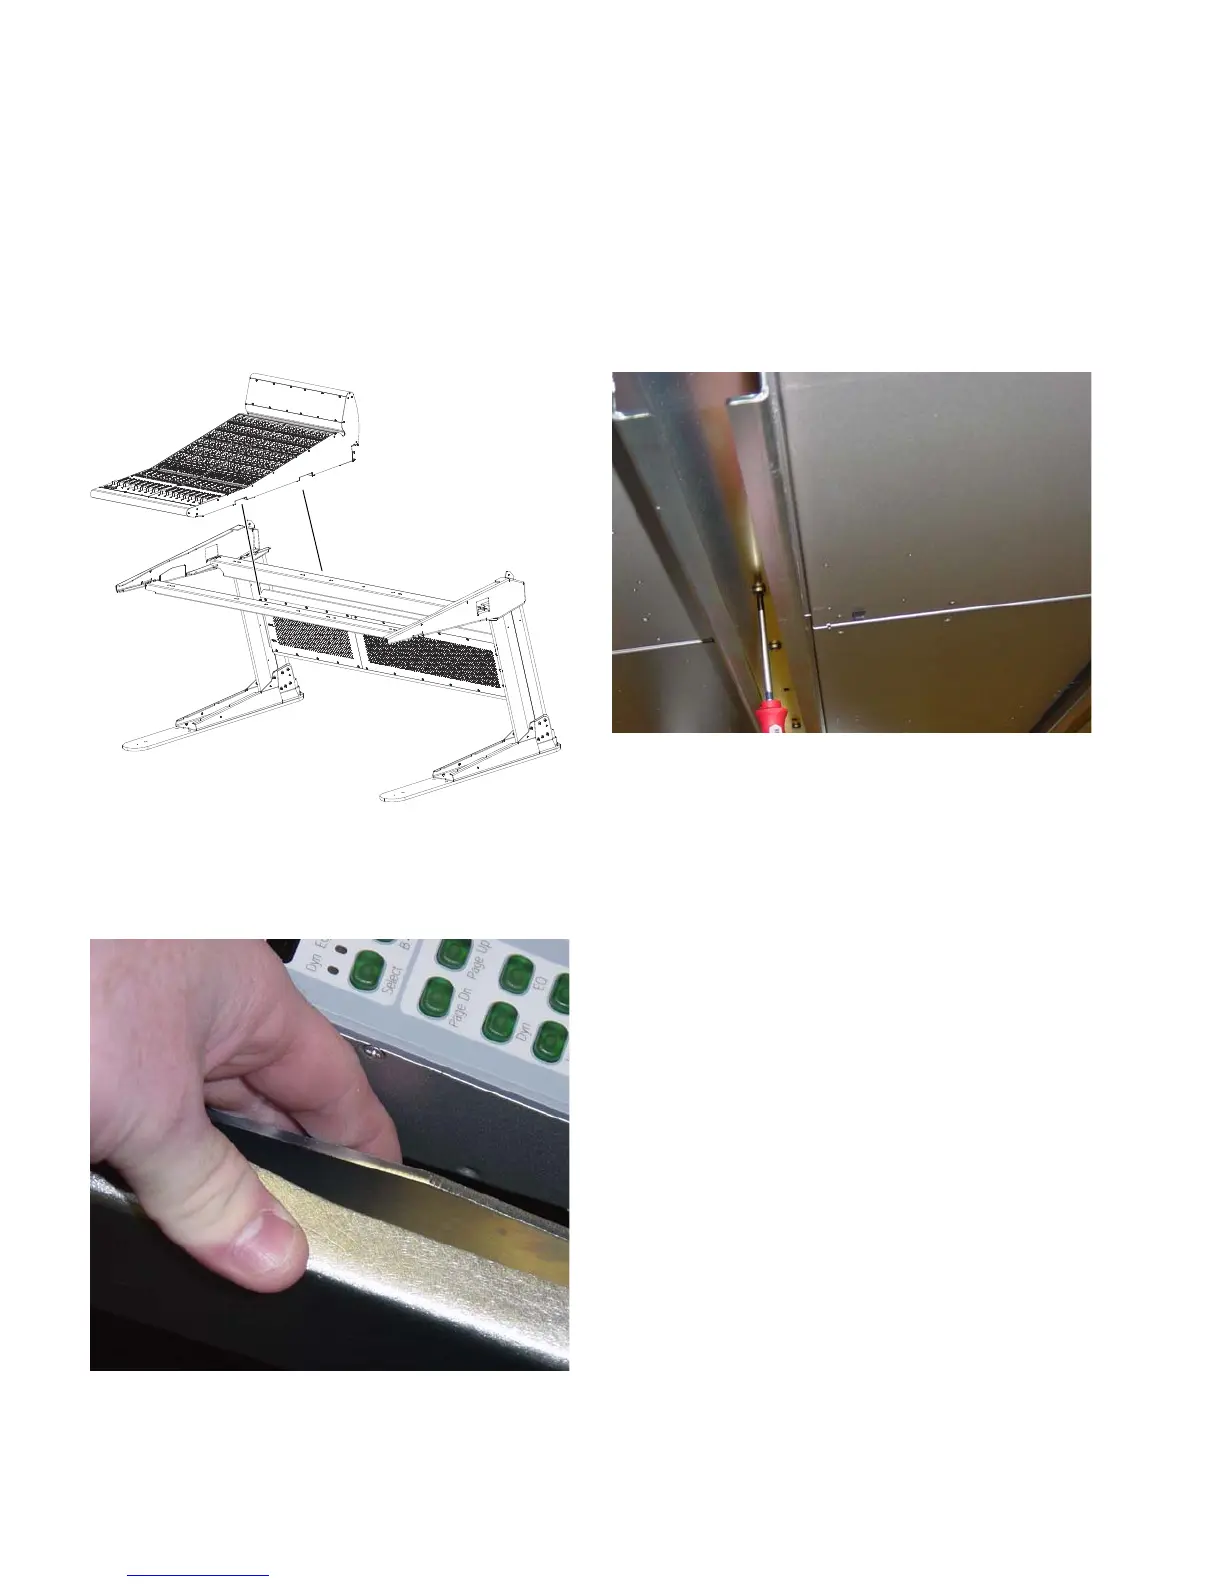
1 Lift the first unit into place on the stand so the channels in
the bottom of the unit go over the rear and front rails of the
stand.
2 Slide the unit to the left side of the stand, leaving a gap of
about an inch (2 cm) between the side of the unit and the
flange on the inside of the stand.
3 Lift successive units into place on the stand, being careful
not to bend the pins in the units you installed previously.
4 Slide the units together, guiding the pins in each unit into
the corresponding holes in the side of the next unit.
5 Attach the units to the front and rear rails from below with
M6 x 8mm Phillips pan head screws, using a total of 6 screws
for the Main Unit (3 each in the front and rear rails) and a total
of 4 screws for the Fader Module (2 each in the front and rear
rails). Make sure to leave these screws loose enough so that the
units can still move side-to-side relative to the rails.
Figure 23. Placing a Fader Module on the stand
Figure 24. Leaving a gap between the unit and stand
Figure 25. Attaching a unit to the rails from below