Chapter 3: Setting Up D-Control 25
Closing Up the Stand
Next, you will close up the stand and finish attaching the
units.
To close up the stand:
1 Move the stand legs together to completely close the gap be-
tween the stand and the outer units. (You may want to tap the
base of the legs with a rubber mallet to help move them into
place.)
2 Use a ratcheting nylon strap to compress the stand legs to-
gether.
3 If there is still any gap between the rear crossbar assembly
and either of the legs, position the crossbar so that the gap is
equal on both sides.
4 Tighten the 6 button cap screws on each side of the rear
crossbar.
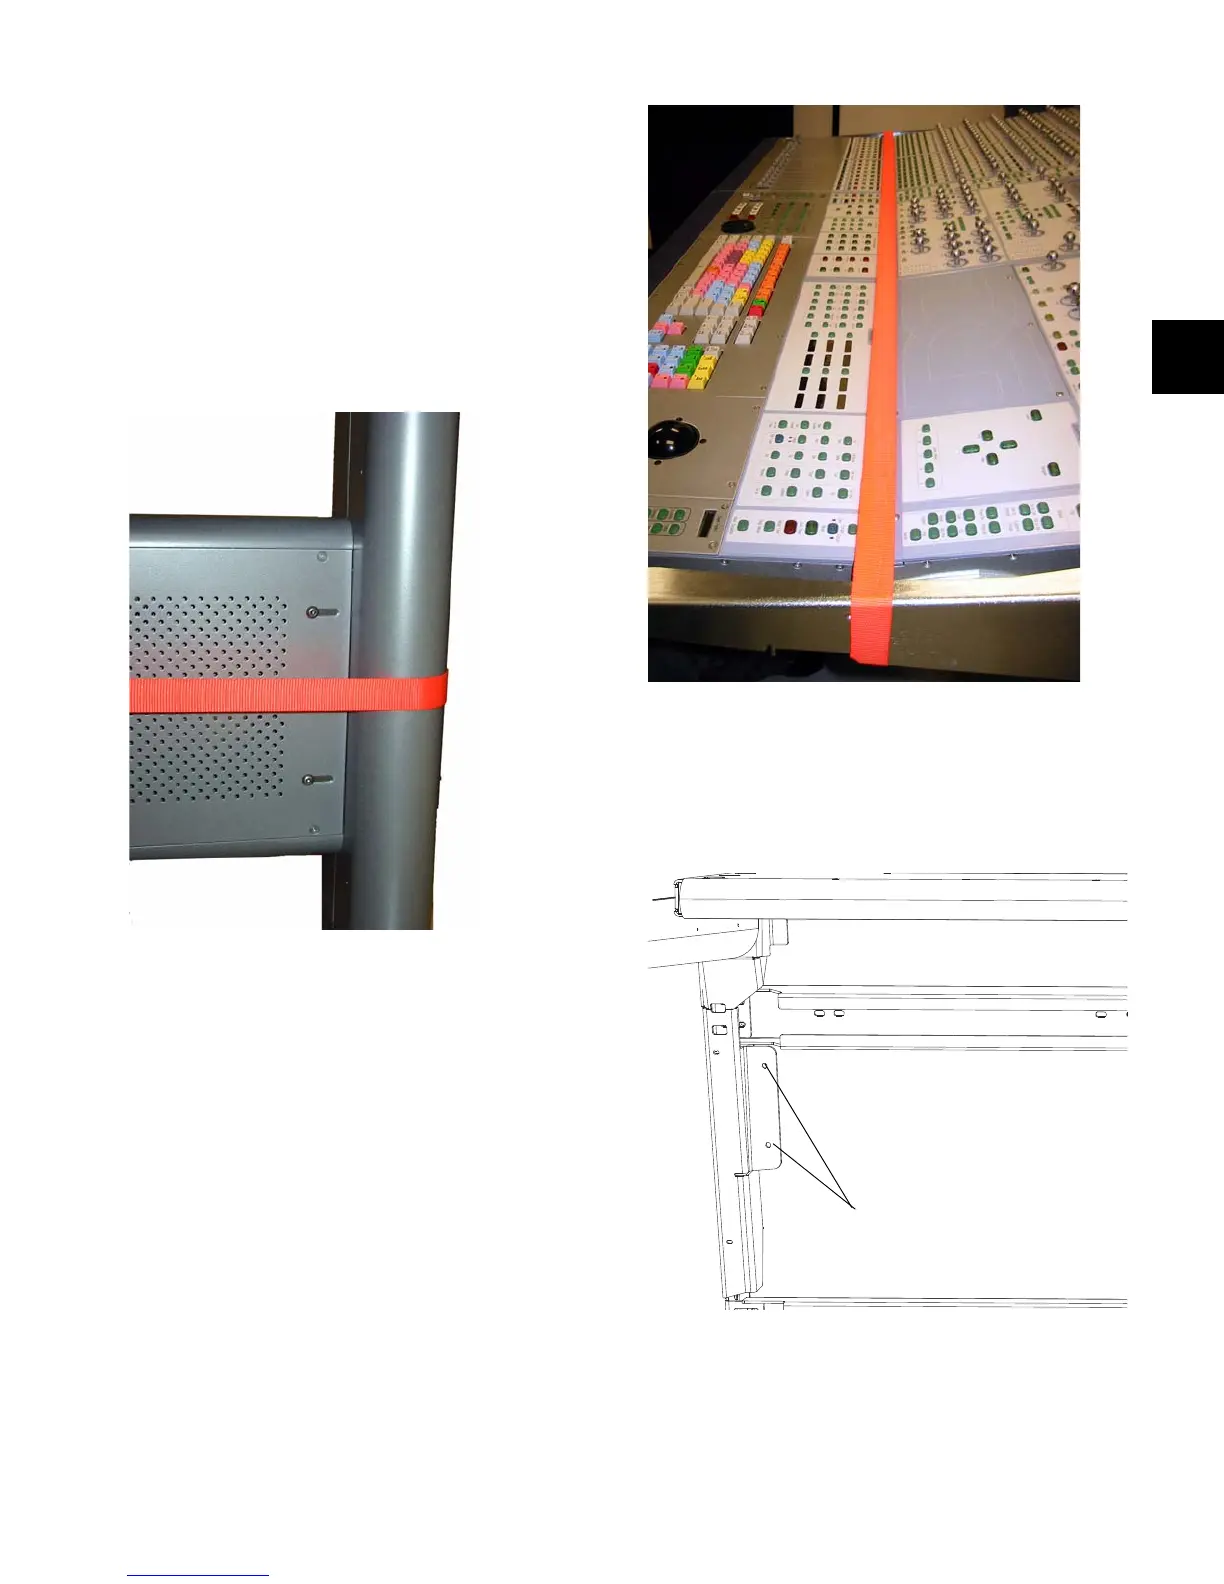
5 If necessary, use the ratcheting nylon strap to compress the
D-Control units together by running the strap around the top
part of the legs and across the D-Control units as shown in
Figure 27. Make sure the nylon strap does not contact any
switches or encoders on the surface.
6 Tighten the 2 socket head cap screws on each side of the
front and rear rails from below.
7 Attach the outside (rightmost and leftmost) units to the
flanges on the legs from below with M6 x 8mm Phillips pan
head screws. Tighten these screws.
8 Tighten the Phillips pan head screws that attach the D-Con-
trol units to the front and rear rails from below.
9 Remove the nylon strap.
Figure 26. Using a nylon strap on the stand legs
Figure 27. Using a nylon strap on the D-Control units
Figure 28. Attaching a unit to the leg flanges (view from below)
(2) M6 x 8mm Phillips pan head screws