LOCAL MINE, EXPLOSIVES OR STATUTORY REGULATIONS, PROCEDURES, OR CODES OF PRACTISE
REGARDING SAFETY TAKE PRECEDENCE OVER ANY OF THE TIPS AND HINTS DESCRIBED IN THIS DOCUMENT.
THE MINE, EXPLOSIVES OR LOCAL REGULATIONS, PROCEDURES OR CODES OF PRACTISE MUST BE
FOLLOWED AT ALL TIMES.
The DigiShot
®
Plus 4G Commander can be used for Local Blasting, Remote Blasting and Synchronized blasting.
The description below provides a high-level overview of the steps required to operate the DigiShot
®
Plus 4G
Commander during each of the blasting processes.
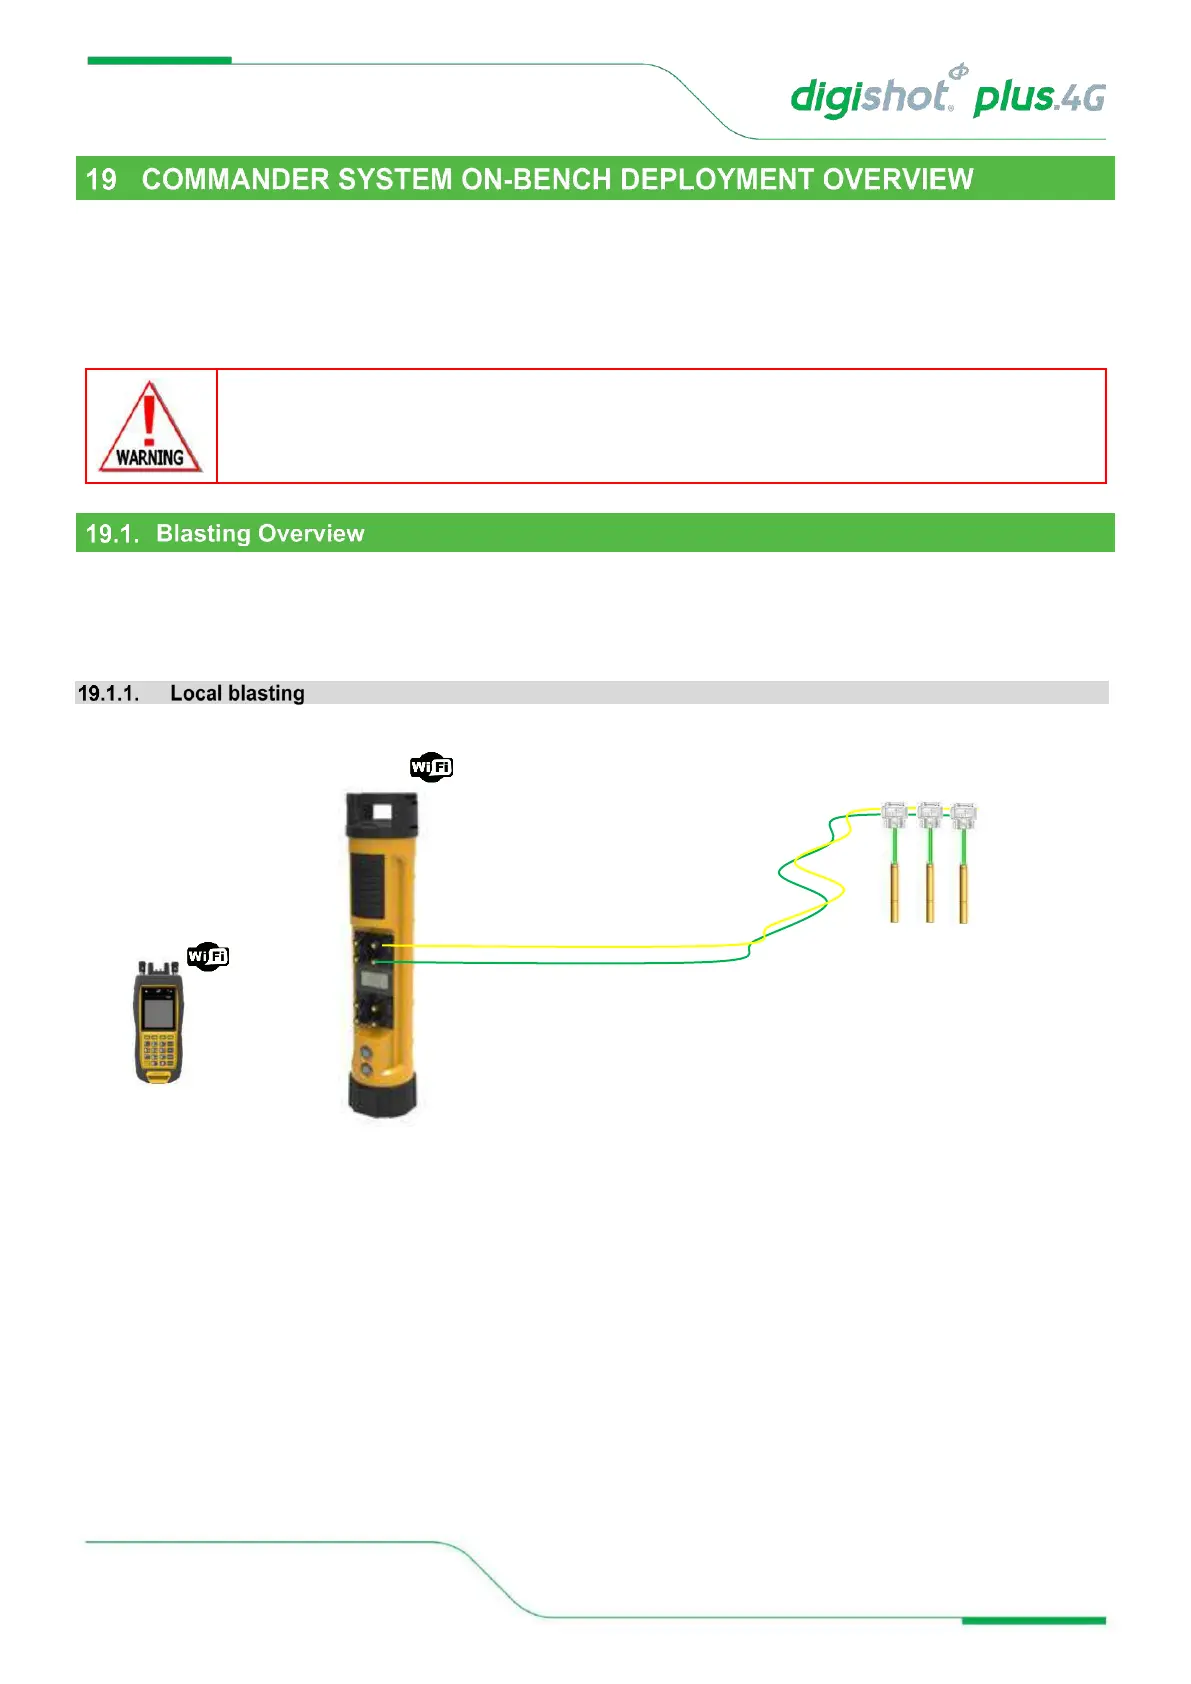
Figure 13: Local Blasting
a. Connect detonator lead-in wires to the detonator channel(s) on the front panel of the DigiShot
®
Plus 4G
Commander. Channels are clearly marked 1 – 4.
b. Switch ON both the CE4 Tagger and DigiShot
®
Plus 4G Commander.
c. Establish a Wi-Fi link between the CE4 Tagger and appropriate DigiShot
®
Plus 4G Commander. Both devices
will confirm connected status on the respective displays.
d. Initiate the necessary tests using the CE4 Tagger as a ‘remote control’. All associated results will be displayed
in detail on the CE4 Tagger screen while a summarized result will be displayed on the DigiShot
®
Plus 4G
Commander.
e. Initiate the program functions to ensure all detonators are timed appropriately.
f. Select ARM and scan the RED BlastCard to the designated NFC Sensor area on the back of the DigiShot
®
Plus 4G Commander.