3 - 22 Operating Instructions
DigiGate-700
for Windows
™ ®
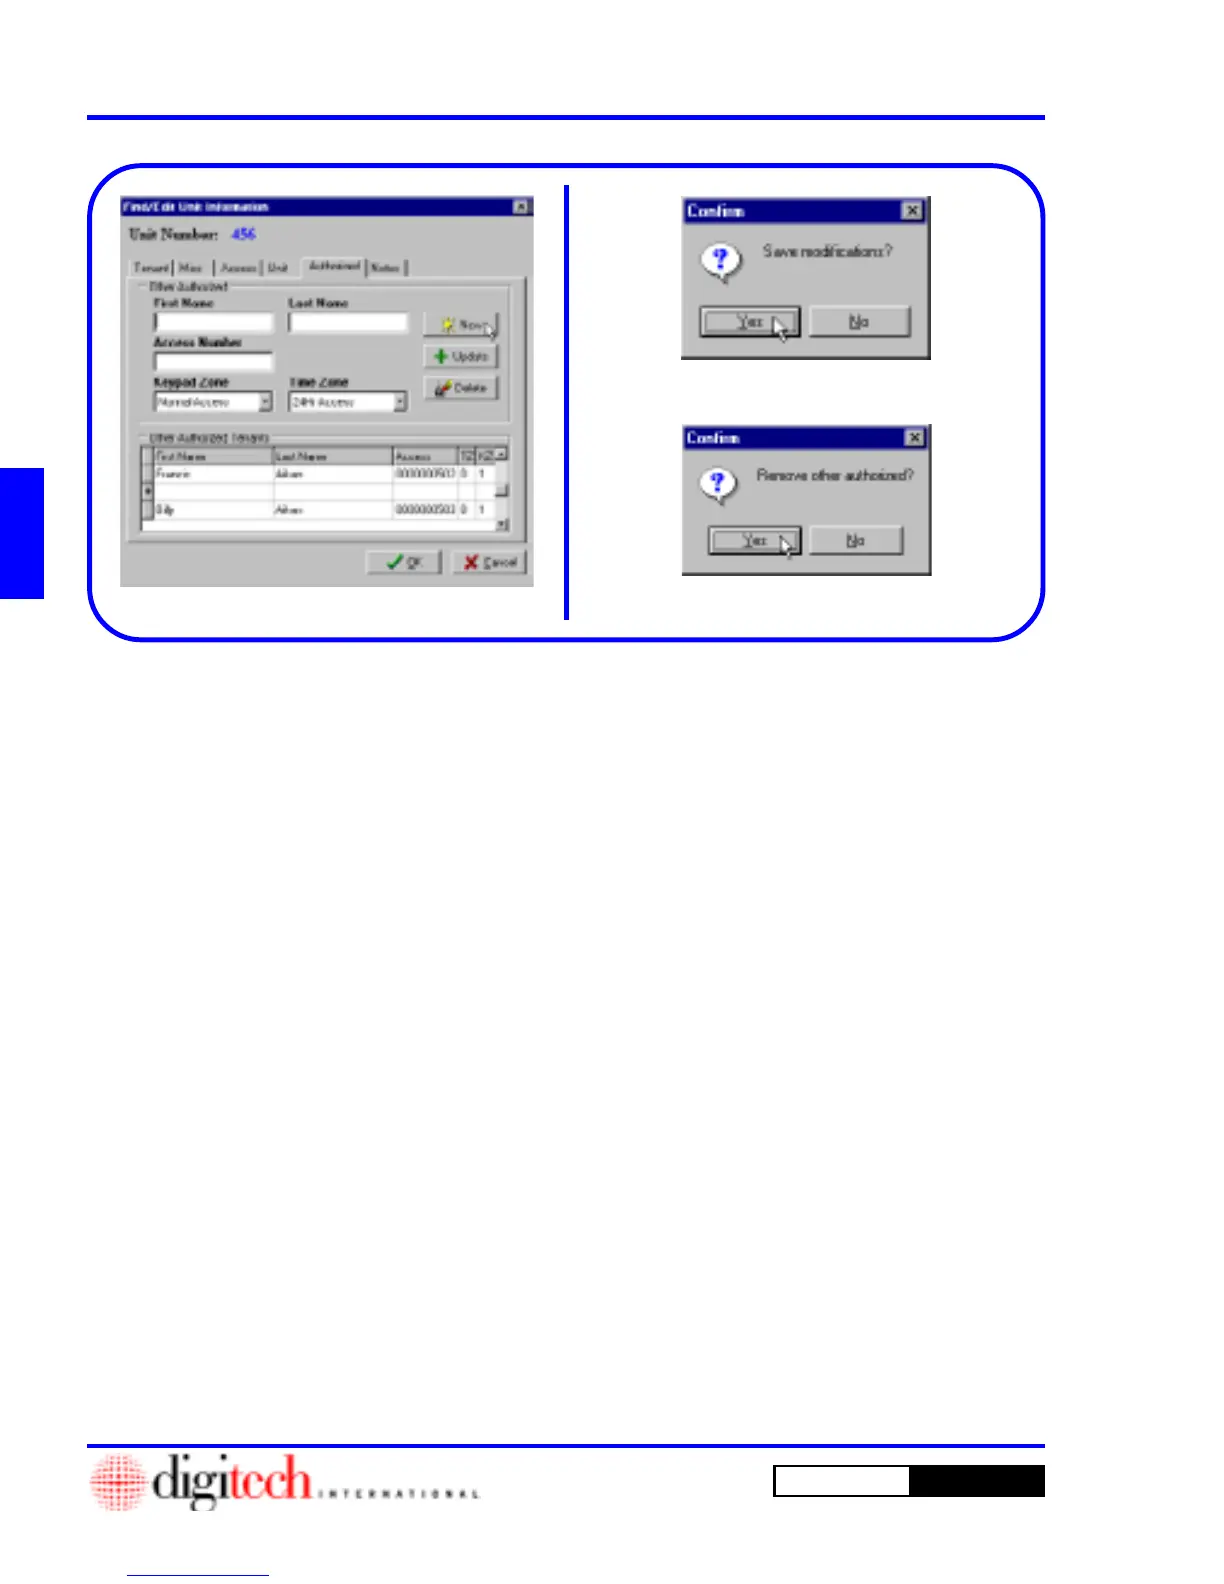
28. The
Confirm
window, Figure 3-42, will open
with a “Save Modifications” prompt.
29. Click on the
Yes
button to update the data or
the
No
button to cancel the update.
30. To delete an Authorized tenant, select the tenant
from the
Other Authorized Tenants
list box.
Figure 3-41
31. Click on the
Delete
button.
32. The
Confirm
window, Figure 3-43, will open
with a “Remove other authorized”
prompt.
33. Click on the
Yes
button to delete the tenant or
the
No
button to cancel the operation.
34. When you are done, Click on the
Notes
tab.
23. To add a new Authorized Tenant to the list
Click on the
New
button. Figure 3-41.
24. This will add a new record to the
Other
Authorized Tenants
list box and blank the
fields in the
Other Authorized
area of the
screen.
25. Enter the
First Name
and
Last Name
in the
appropriate fields and a unique
Access Code
.
26. Select a
Keypad Zone
and a
Time Zone
from
the list boxes.
NOTE: The same system required fields also
apply to
Other Authorized Tenants
. These
are
Last Name
,
Keypad Zone
,
Time Zone
,
and a unique
Access Code
.
27. Click the
Update
button to add the new tenant
to the list at the bottom of the screen. You can
add as many tenants as you choose to the unit.
Figure 3-41
Figure 3-42
Figure 3-43