3 - 23DigiGate-700
™
for Windows
®
- User’s Guide
DigiGate-700
for Windows
™ ®
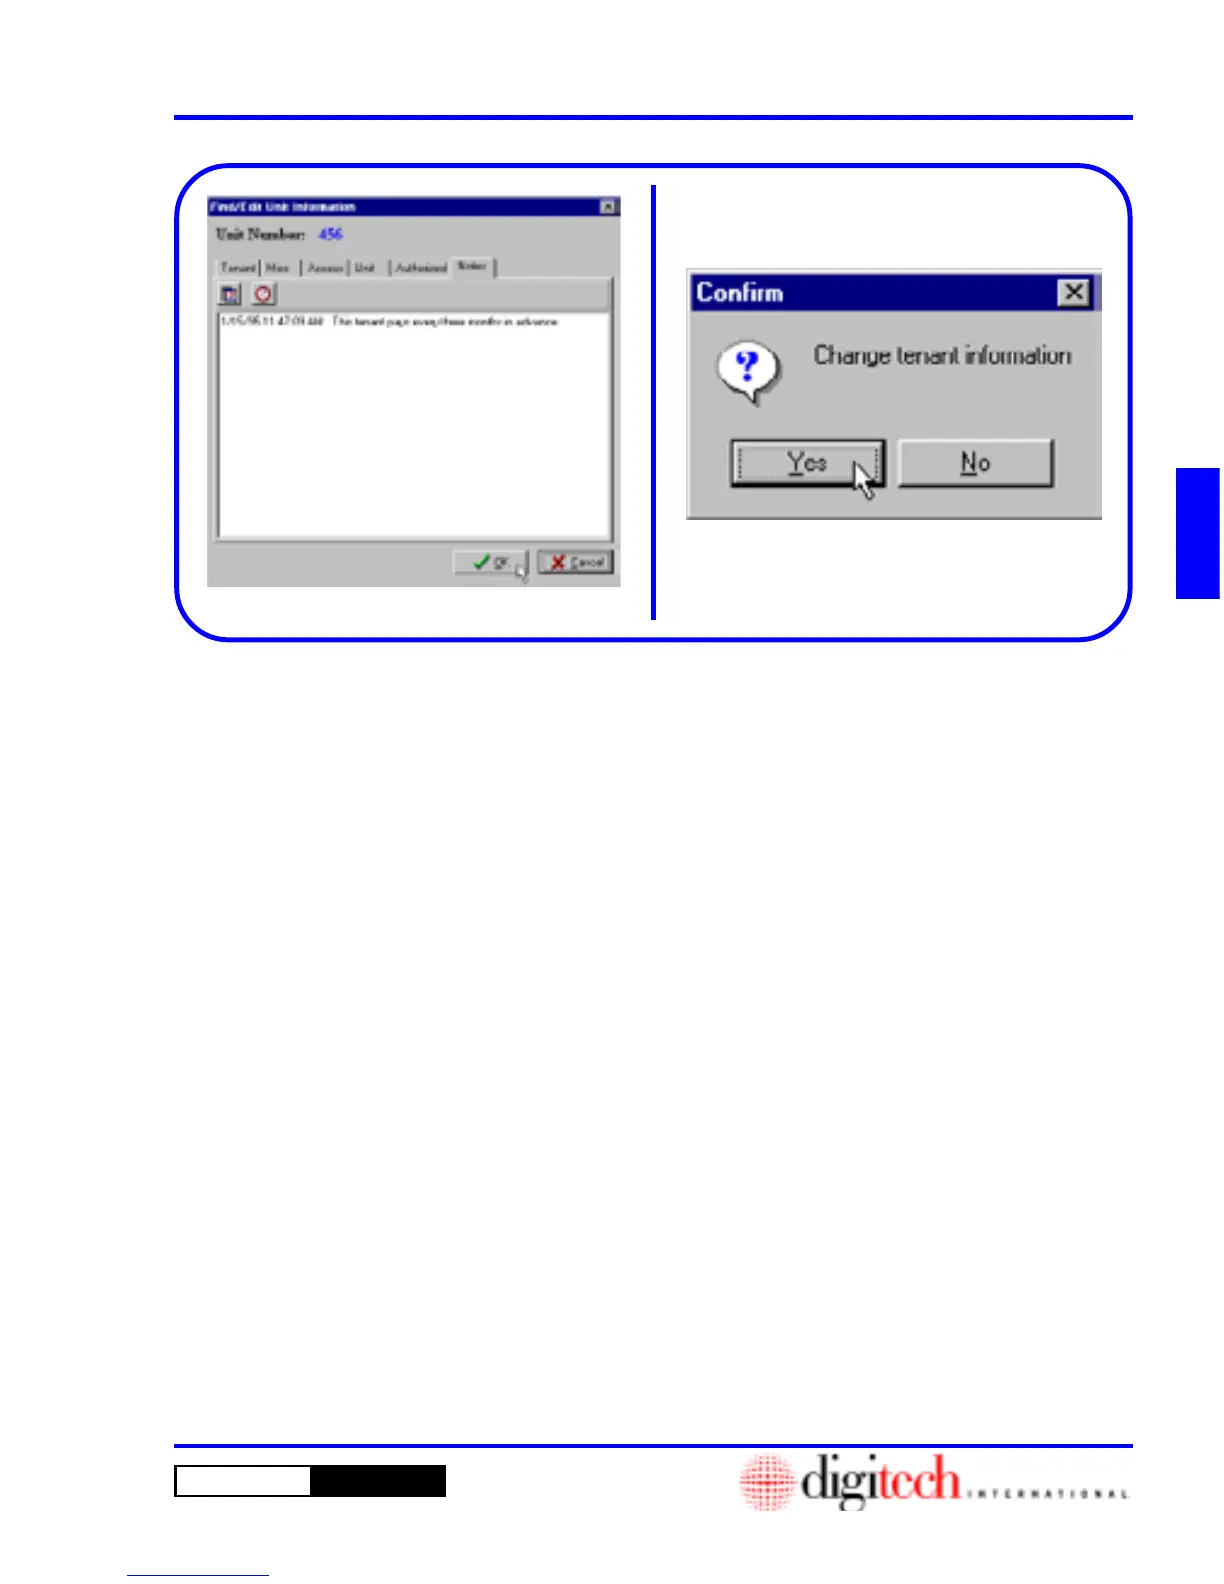
38. The
Confirm
window, Figure 3-45, will open
with a “Change tenant information”
prompt.
39. Click on the
Yes
button to change the data or
the
No
button to return to the
Find/Edit
screen.
Figure 3-44.
NOTE: Changes, {
Add
|
Edit
|
Delete
},
made in the
Authorized
tab section, cause an
immediate update to the AUTHORIZED
database and are not affected by the
{
OK
|
Cancel
} selection, Figure 3-44, or the
{
Yes
|
No
} selection, Figure 3-45.
All other modifications done in the other five
tabbed sections are updated or discarded based
on the selections made in these two choices.
35. This activates the text area where you can add
to or edit any of the information there.
Figure 3-44.
36. To edit the Notes in the text area, Click in the
text area and type freely.
NOTE: There are two buttons just above the
text area. One appears as a calendar and will
insert the date at the cursor when Clicked. The
second is a clock and will insert the current time
at the cursor when Clicked.
37. When all the information has been entered,
Click on the
OK
button to update the tenant’s
information and send it to the DigiGate-700 for
Windows System Controller.
OR
Click on the
Cancel
button to return to the
Find Unit
screen. Figure 3-35, Page 3-19.
Figure 3-44
Figure 3-45