EC-BOS-9 Install and Startup Guide Chapter 2 Commissioning
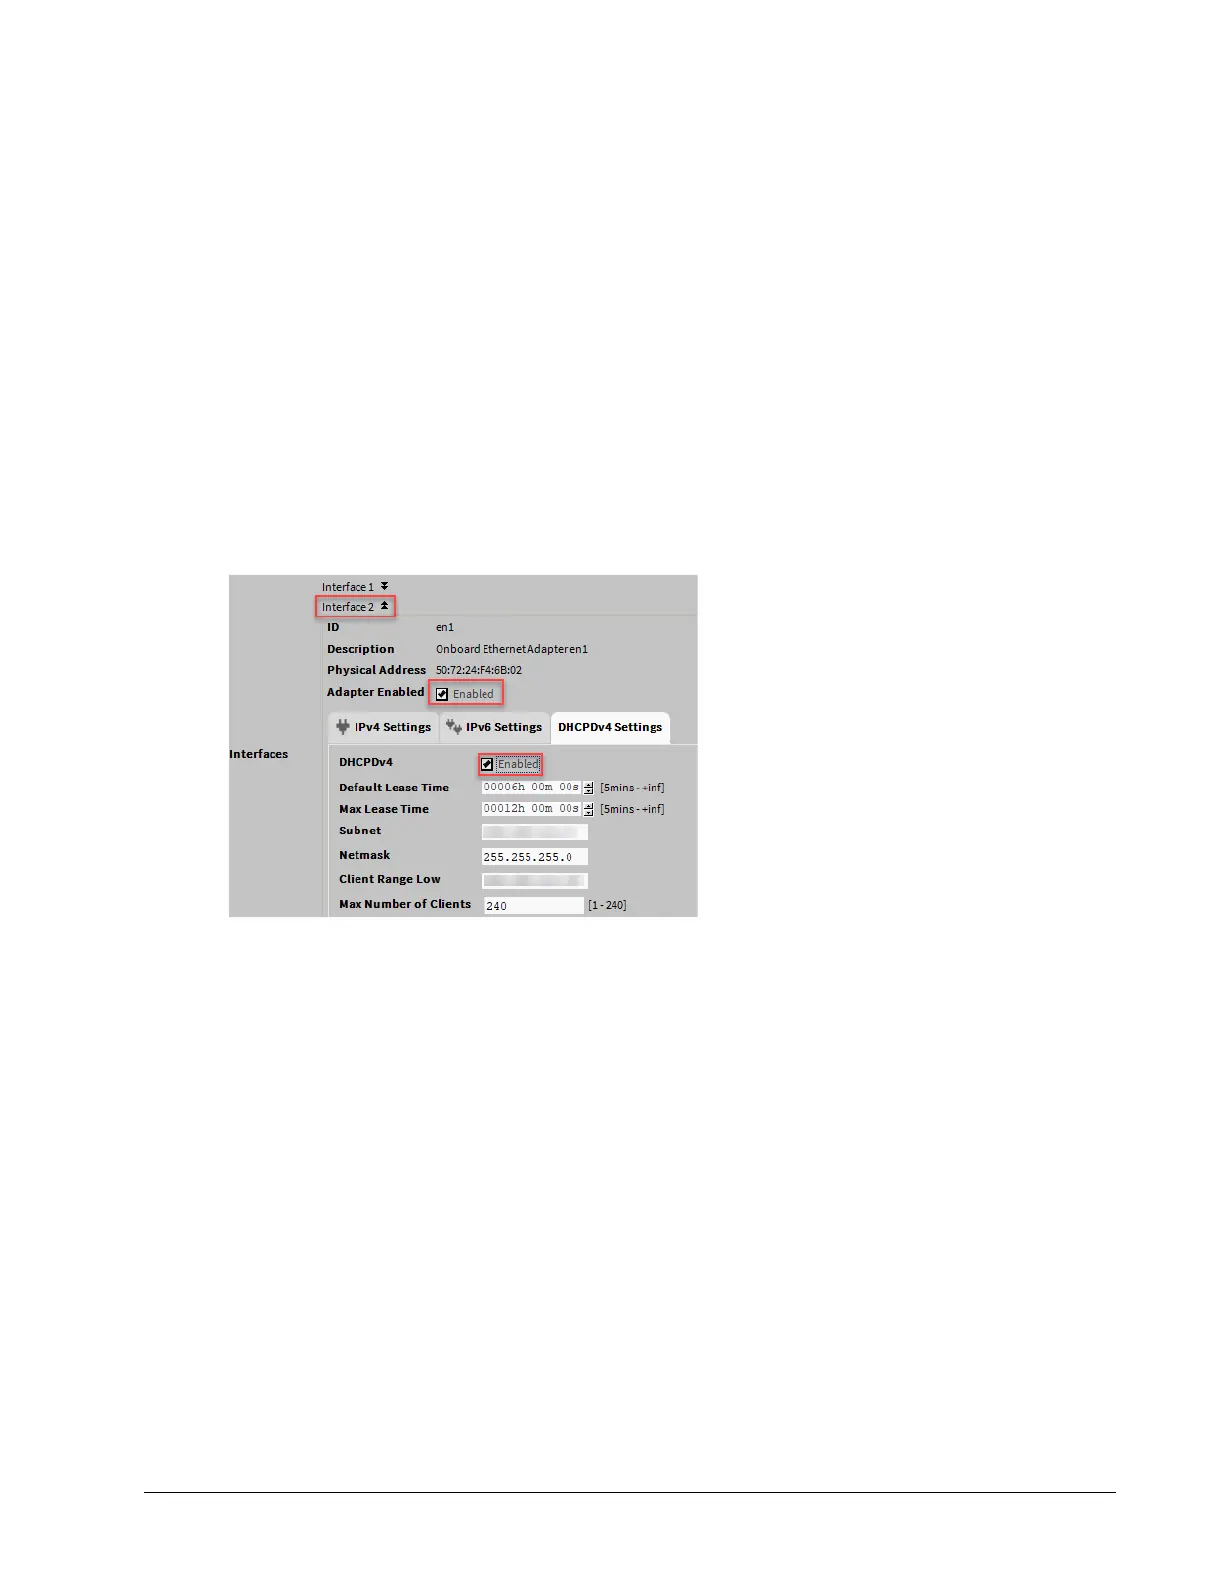
Step 7 To enable the secondary Ethernet port Interface 2, expand Interface 2 and select the Adapter En-
abled check box.
Step 8 To set up the secondary Ethernet port (Interface 2) as a DHCP client, select the Enabled check box
on the IPv4Settings tab.
Make sure that the DHCPDv4 is not enabled on the DHCPDv4 Settings tab.
Step 9 To set up the secondary Ethernet port (Interface 2) as a DHCP server, make sure that the DHCP
check box is not selected on the IPv4 Settings tab, configure the port with a static IP address, and
configure the properties in DHCPDv4 Settings.
For example:
• Subnet: 192.168.111.0
• Netmask: 255.255.255.0
• Client range low: 192.168.111.15
• Max. number of clients: 10
Based on the example above, client IP pool is 192.168.111.15 to 192.168.111.24
• Default Lease Time (in hours, minutes, and seconds) configures the a DHCPIP address lease.
Before it expires, the lease must be renewed.
• Max Lease Time (in hours, minutes, and seconds), configures a DHCPIP address lease.
• Subnet defines the subnet of IP addresses assigned by the DHCP server. Configure this to as-
sign addresses on a different subnet than that used in other LAN or Access Point configurations,
otherwise the ports will not function correctly.
• Netmask defines the IP addresses assigned by the DHCP Server.
• Client Range Low defines the lowest IP address for the range. The order of assigning IPs from
the Access Point DHCP is indeterminate.
The adapter IP should be in the same subnet, but not in the range of addresses defined here.
• Max Number of Clients defines the maximum number of clients that can attach at a given time.
Step 10 Under IPv4 Settings tab, enter the IPv4 address and subnet mask.
For example,
• IPv4 Address: 192.168.111.1
• IPv4 subnet mask: 255.255.255.0
Make sure that the secondary Ethernet port’s (Interface 2) IP address is outside the DHCP server’s
client IP pool.
August 14, 2023 25