31
NESTINGFIXTURE(Continued…)
Controls
1. GototheMODESELECTscreen.
2. UnderESCAPE,choosehowtheindexviseresponds
afteronecutiscompleted.
DO allow the index vise to move back 2mm
(standardsetting)toavoidthesawbandfrom
touchingthematerialasthesawbandisraised.
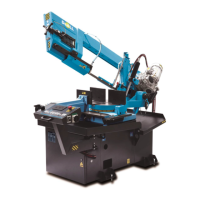
Itisdesignedforbundlecutting.
NONEkeepstheindexvisestationarywhilethe
saw band is raised. It is designed for single
cutting.
Forbestnestingcuttingresults
1. Stackthesamenumberofstockpiecesineachrow.
2. Thestackshouldalwaysbehigherthanitiswide.
3. Increasing the nesting vise clamping pressure will
increasetheholdingloadperpiece.
4. Applyasmuchcoolantaspossiblewhilecutting.
5. Replacewearplatesonthemovablevisejawwhen
theybecomeworn.
6. Adjust the index table’s vertical guide rollers to
keepthestockfromcollapsingwhenthevisesare
unclamped.
7. Generally,reducedbandspeedandfeedforceare
necessary when sawing stacked material. This
resultsin alower cuttingrate thanpossible when
sawingsolidstock.
8. Insomeinstances,increasedproductionandblade
lifemaybeobtainedbynestingfewerpiecesthan
themaximumcapacitypermits.
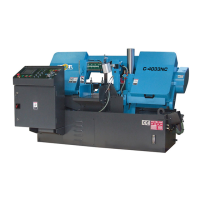
TYPICALOPERATINGPROCEDURES
Preparation
1. These operation procedures assume that the
machineispreparedasfollows:(a)thebanddrive
motorisOFF;(b)thesawbandisproperlyinstalled
and tensioned; (c) both band wheel doors are
closed;(d)allguardsareinplaceand/orsecured;(e)
thecoolantreservoirisfullandalllubricationpoints
are properly serviced and if necessary press the
COOLANTkeywiththedesireddeliverymode;(f)
thebandbrushisproperlypositioned.
Manualoperation
1. Turnthehydraulicson,risethesawheadandopen
boththefrontandrearvisetoaccommodatethe
materialtobecut.
2. Adjusttheviselocationpinsperthesizeofthe
materialtobecut.
3. Remove or add the fixed vise filler plates per the
sizeofthematerialtobecut.
4. Verifyoradjustvisepressureforthetypeof
materialtobecut.
5. Placematerialontheindexvisebed.
6. Loosenthesawguideadjustmentscrewsandadjust
left moveable saw guide arm to the size of the
materialtobecut.Tightenthesawguidearmand
thentightenthesawguideadjustmentscrews.
7. Clampbothfrontandrearvises.
8. Checkthebandbrushforcorrectpositioning,verify
that thechip conveyor is operatingand choice of
coolantflowhasbeenselected.
9. PresstheBANDCYCLESTARTbutton.
10. Sawheadwilllower,andcutthroughthematerial,
energize head down limit switch, saw head rises
abovethematerialandthebladewillshutoff.
11. Theoperatormayadjustbandspeed,coolantflow,
feedrateandfeedforceatanytimeduringthe
sawingprocess.
Automaticoperation
1. Starttheoperationbyfollowingsteps1through8
fromaboveManualoperation.
2. Ifnecessary,HOMEtheindexingvise.Afterhoming,
make sure the index vise is not at the HOME
position. This is done in Manual mode and only
whenthefrontviseisclampedandtherearviseis
opened.
3. PresstheMODESETontheViewscreenandenter
datafortheJOB,LENGTH,QTYandsetbladespeed
for the jobs. Double check your data. Make any
changesbeforestarting.
4. PressF1togototheViewscreen.SelectAUTO,
COOLANT AUTO or “I” and choose between CUT
NOTCOUNTEDorCUTCOUNTED.
5. Pressthe greenBandDrive buttononthe control
panel or the Band “I“ on the Run screen of the
workstation.
6. The saw head will lower and cut through the
material,energizetheheaddownlimitswitch,saw
head rises above the material, vise will transfer
materialforthenextcut,viseswillclampandsaw
headwillmakethenextcut.
7. Whenalljobsenteredhavebeencompleted,the
sawbandshutsoff.