4302-067-G-2-21
27
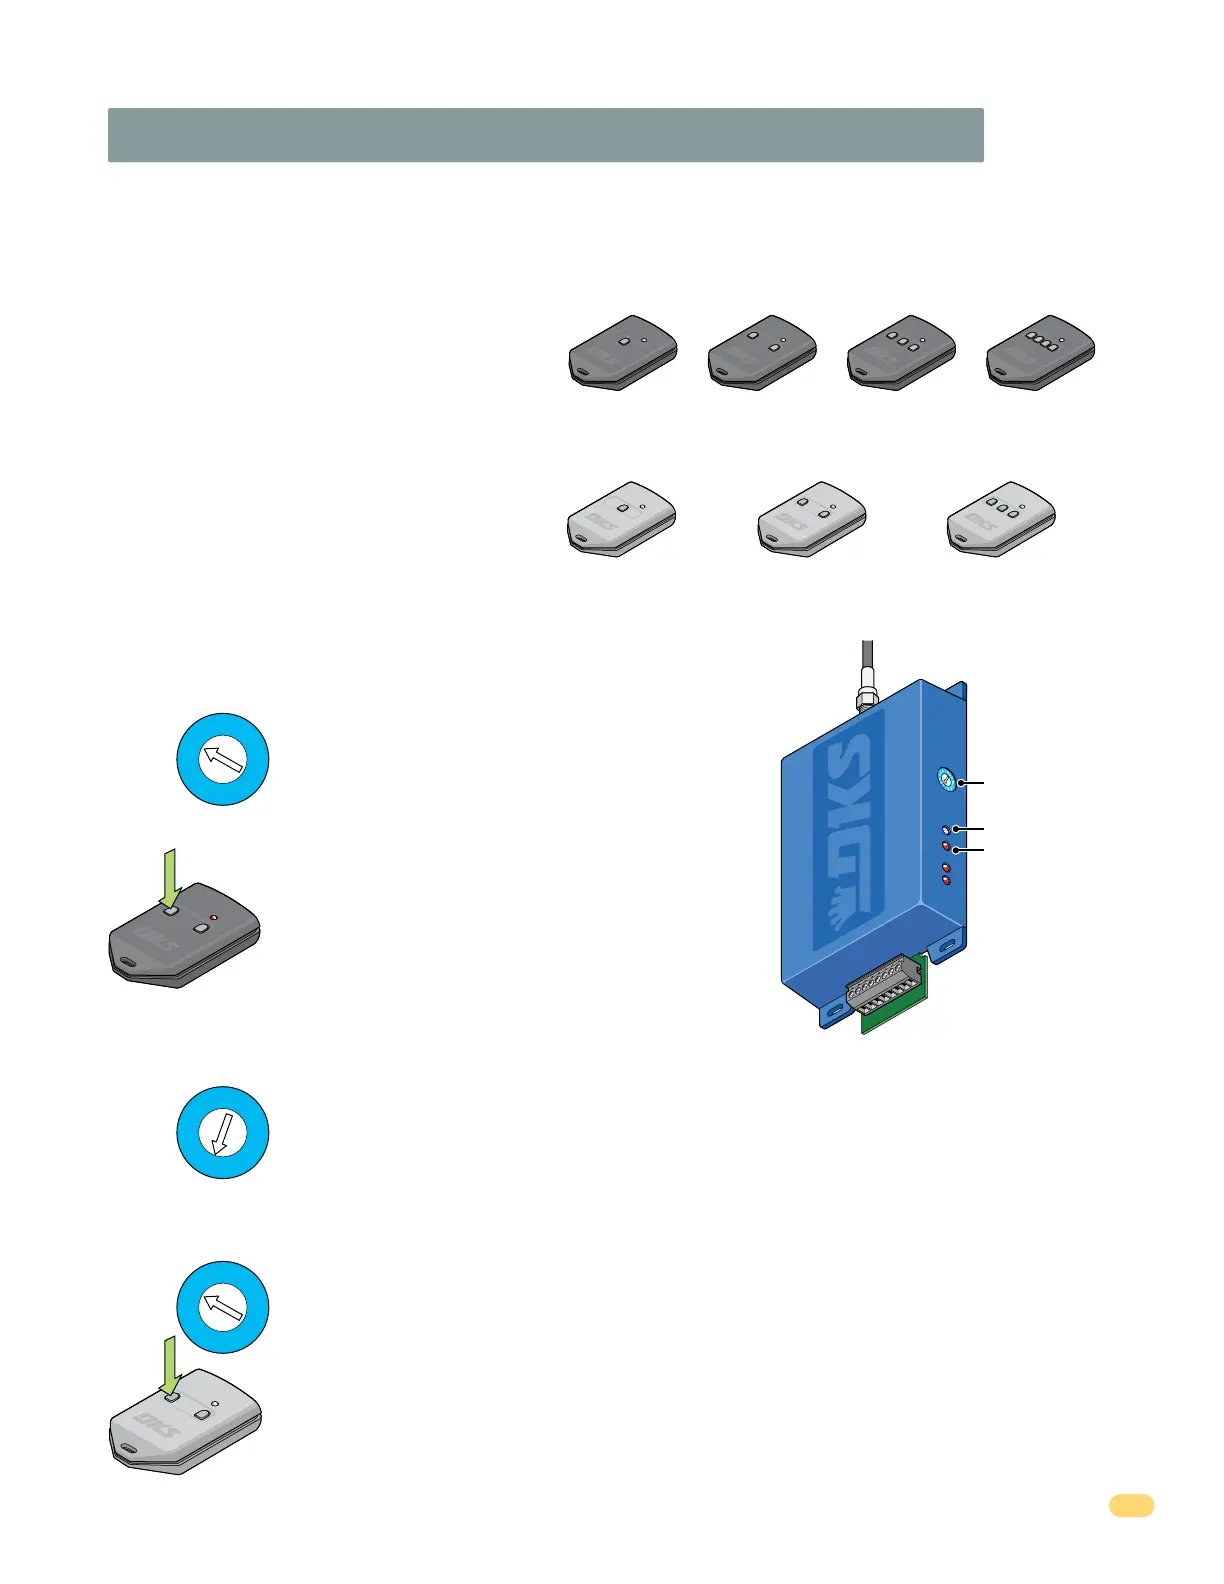
3.5 “Optional” Radio Receiver Model (8040-080)
The 8040-080 receiver operates at 318 MHz and MUST be used with either the DoorKing MicroPlus
®
OR MicroClik
®
transmitters (Sold
Separately).
The DoorKing MicroPlus
®
transmitter can be quickly learned if desired. The MicroPlus
®
type
transmitter is the factory default setting for this receiver and can be quickly setup with
minimal programming.
MicroPlus
®
Transmitters (Sold Separately)
Quick Setup for a MicroPlus
®
Transmitter (Sold Separately)
The 8040-080 receiver MUST be changed to MicroClik
®
mode before learning a MicroClik
®
transmitter.
Setup for a MicroClik
®
Transmitter (Sold Separately)
MicroClik
®
Transmitters (Sold Separately)
Over 286,000,000 transmitter codes available plus an encrypted sync code (often called a “rolling code”) that changes every time the
transmitter is used. Available in 1 – 2 – 3 – 4 button versions. MicroPlus
®
transmitter codes cannot be copied assuring that only the original
intended transmitters will activate the access control system.
As such, MicroPlus
®
transmitters are NOT compatible with
the HomeLink
®
system found in many automobiles.
Over 1,000,000 transmitter codes available. Available in 1 – 2 – 3 button versions. MicroClik
®
transmitters ARE compatible with the
HomeLink
®
system found in many automobiles.
1 Button
2
B
utton
3
B
utton
P/N 8069
1
B
utton
P/N 8070
2 Button
P/N 8071
3 Button
P/N 8096
4 Button
MicroPlus
®
Transmitters
P/N 8066 P/N 8067 P/N 8068
MicroClik
®
Transmitters
Program Button
Program LED
DoorKing Model 8040-080
Radio Receiver
Program Selector
1
2
3
4
5
6
7
8
1
2
3
4
5
6
7
8
9
A
B
C
D
E
F
2. Press and HOLD Program Button until the Program LED
flashes ONCE and receiver will BEEP once. Receiver is now in
“Learn Mode” and will flash and beep for 10 seconds.
5. Press and HOLD Program Button until the Program LED flashes ONCE and receiver will BEEP once. Receiver is now
in “Learn Mode” and will flash and beep for 10 seconds.
2. Press and HOLD Program Button until the Program LED flashes ONCE and receiver will BEEP once. Press and hold
button again, LED will flash and receiver will beep. Press and hold button a third time until LED continually flashes
and beeps.
Note: If receiver does not emit a continuous beep after pressing the button 3 times, try repeating this step faster
or slower until it does.
3. Press a specific button on the MicroPlus
®
transmitter to be
“Learned” within 10 seconds, wait for the receiver to time-out.
MicroPlus
®
transmitter can now operate the gate.
6. Press a specific button on the MicroClik
®
transmitter to be “Learned” within 10 seconds, wait for the receiver to
time-out. MicroClik
®
transmitter can now operate the gate.
3. Turn power OFF, then back ON. Receiver will BEEP TWICE for MicroClik
®
mode. (Three times for MicroPlus
®
mode)
1. Turn the Program Selector to Position 1.
1
2
3
4
5
6
7
8
9
A
B
C
D
E
F
4. Turn the Program Selector to Position 1.
1
2
3
4
5
6
7
8
9
A
B
C
D
E
F
1. Turn the Program Selector to Position C.
See next page to check receiver
mode.
Coaxial Cable Antenna
Connection