Vigor2620 Series User’s Guide
106
Info
To configure a subnet, select its Detials Page button to bring up the LAN
Details Page.
I
I
I
I
-
-
3
3
-
-
1
1
-
-
1
1
D
D
e
e
t
t
a
a
i
i
l
l
s
s
P
P
a
a
g
g
e
e
f
f
o
o
r
r
L
L
A
A
N
N
1
1
–
–
E
E
t
t
h
h
e
e
r
r
n
n
e
e
t
t
T
T
C
C
P
P
/
/
I
I
P
P
a
a
n
n
d
d
D
D
H
H
C
C
P
P
S
S
e
e
t
t
u
u
p
p
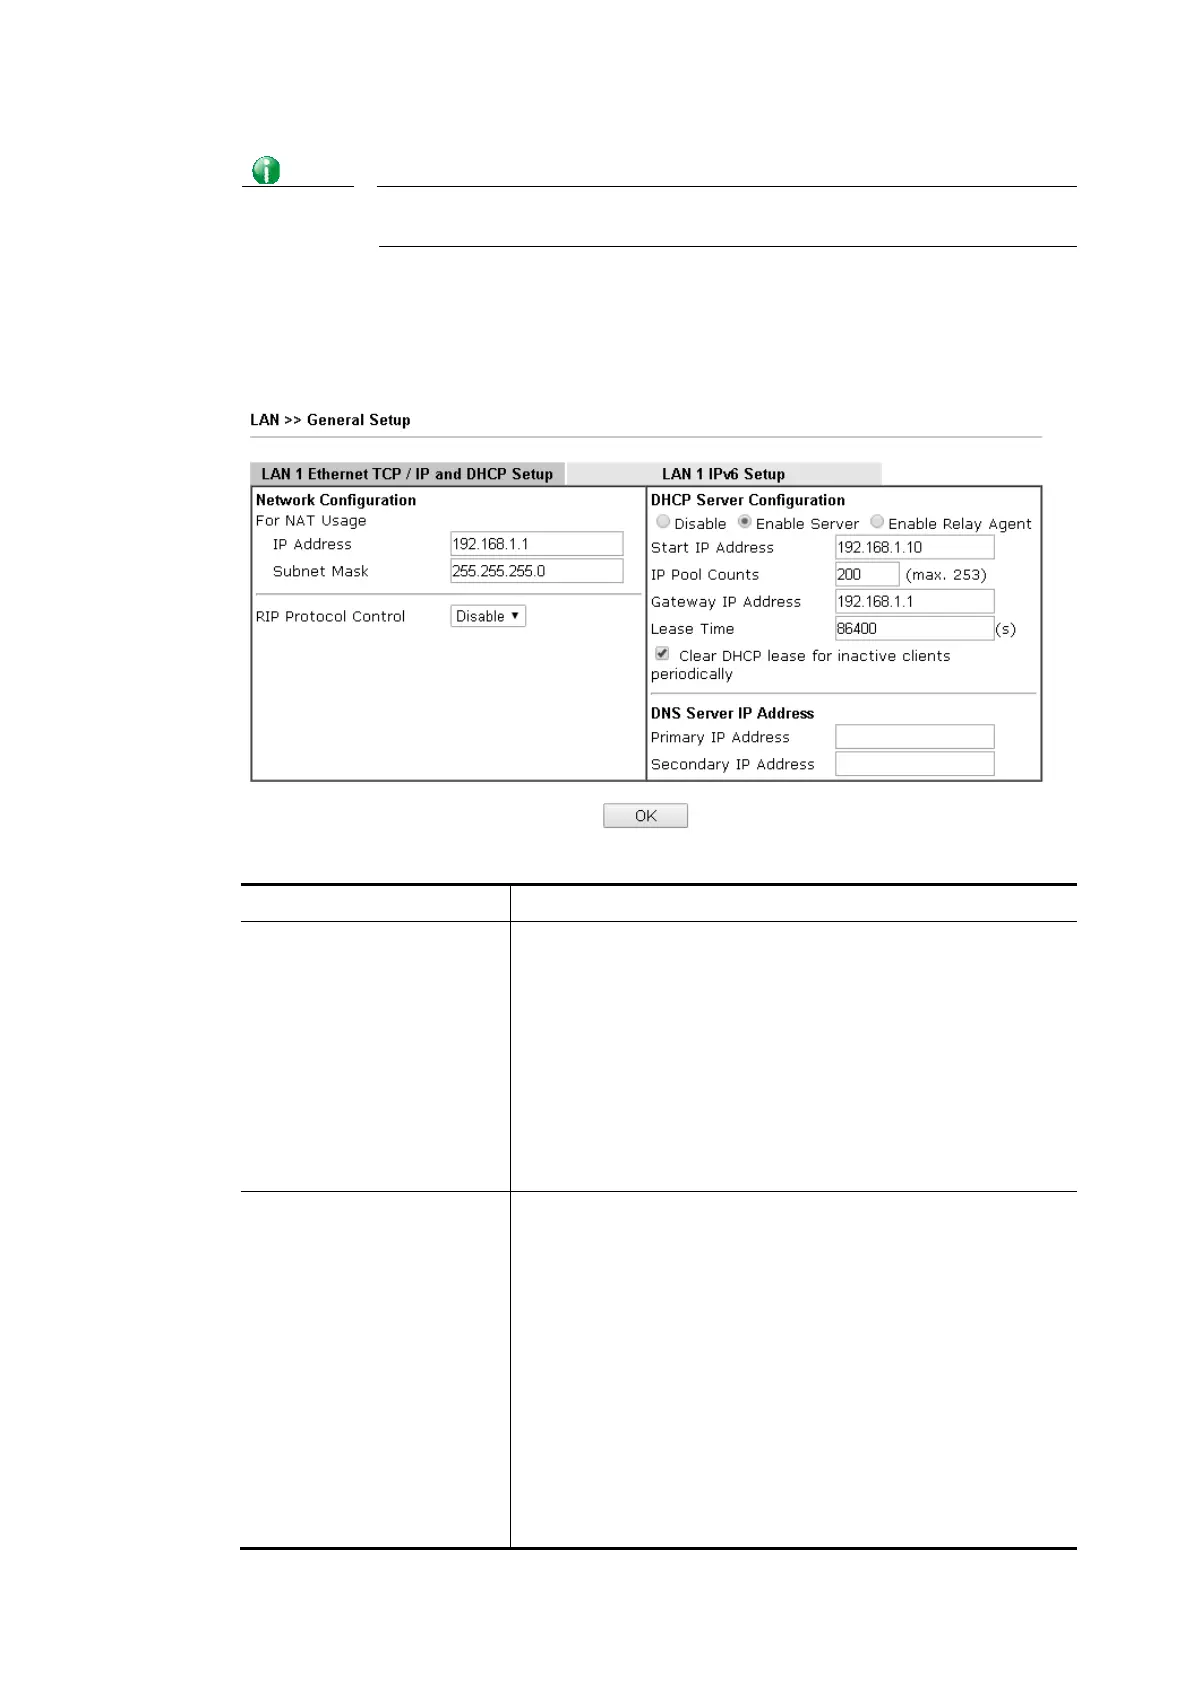
There are two configuration pages for LAN1, Ethernet TCP/IP and DHCP Setup (based on IPv4)
and IPv6 Setup. Click the tab for each type and refer to the following explanations for
detailed information.
Available settings are explained as follows:
Item Description
Network Configuration For NAT Usage,
IP Address - This is the IP address of the router. (Default:
192.168.1.1).
Subnet Mask - The subnet mask, together with the IP Address
field, indicates the maximum number of clients allowed on
the subnet. (Default: 255.255.255.0/ 24).
RIP Protocol Control,
Enable – When Enabled, the router will attempt to exchange
routing information with neighbouring routers using the
Routing Information Protocol.
DHCP Server
Configuration
DHCP stands for Dynamic Host Configuration Protocol. The
router by factory default acts a DHCP server for your network
so it automatically dispatches related IP settings to any local
user configured as a DHCP client. It is highly recommended
that you leave the router enabled as a DHCP server if you do
not have a DHCP server for your network.
If you want to use another DHCP server in the network other
than the Vigor Router’s, you can let Relay Agent help you to
redirect the DHCP request to the specified location.
Disable – Let you manually assign IP address to every host in
the LAN.
Enable Server - Let the router assign IP address to every host
in the LAN.
Start IP Address - The beginning LAN IP address that is
 Loading...