49
15. STACKING PAPER ON THE PAPER FEEDER A AND ADJUSTING PAPER FEED
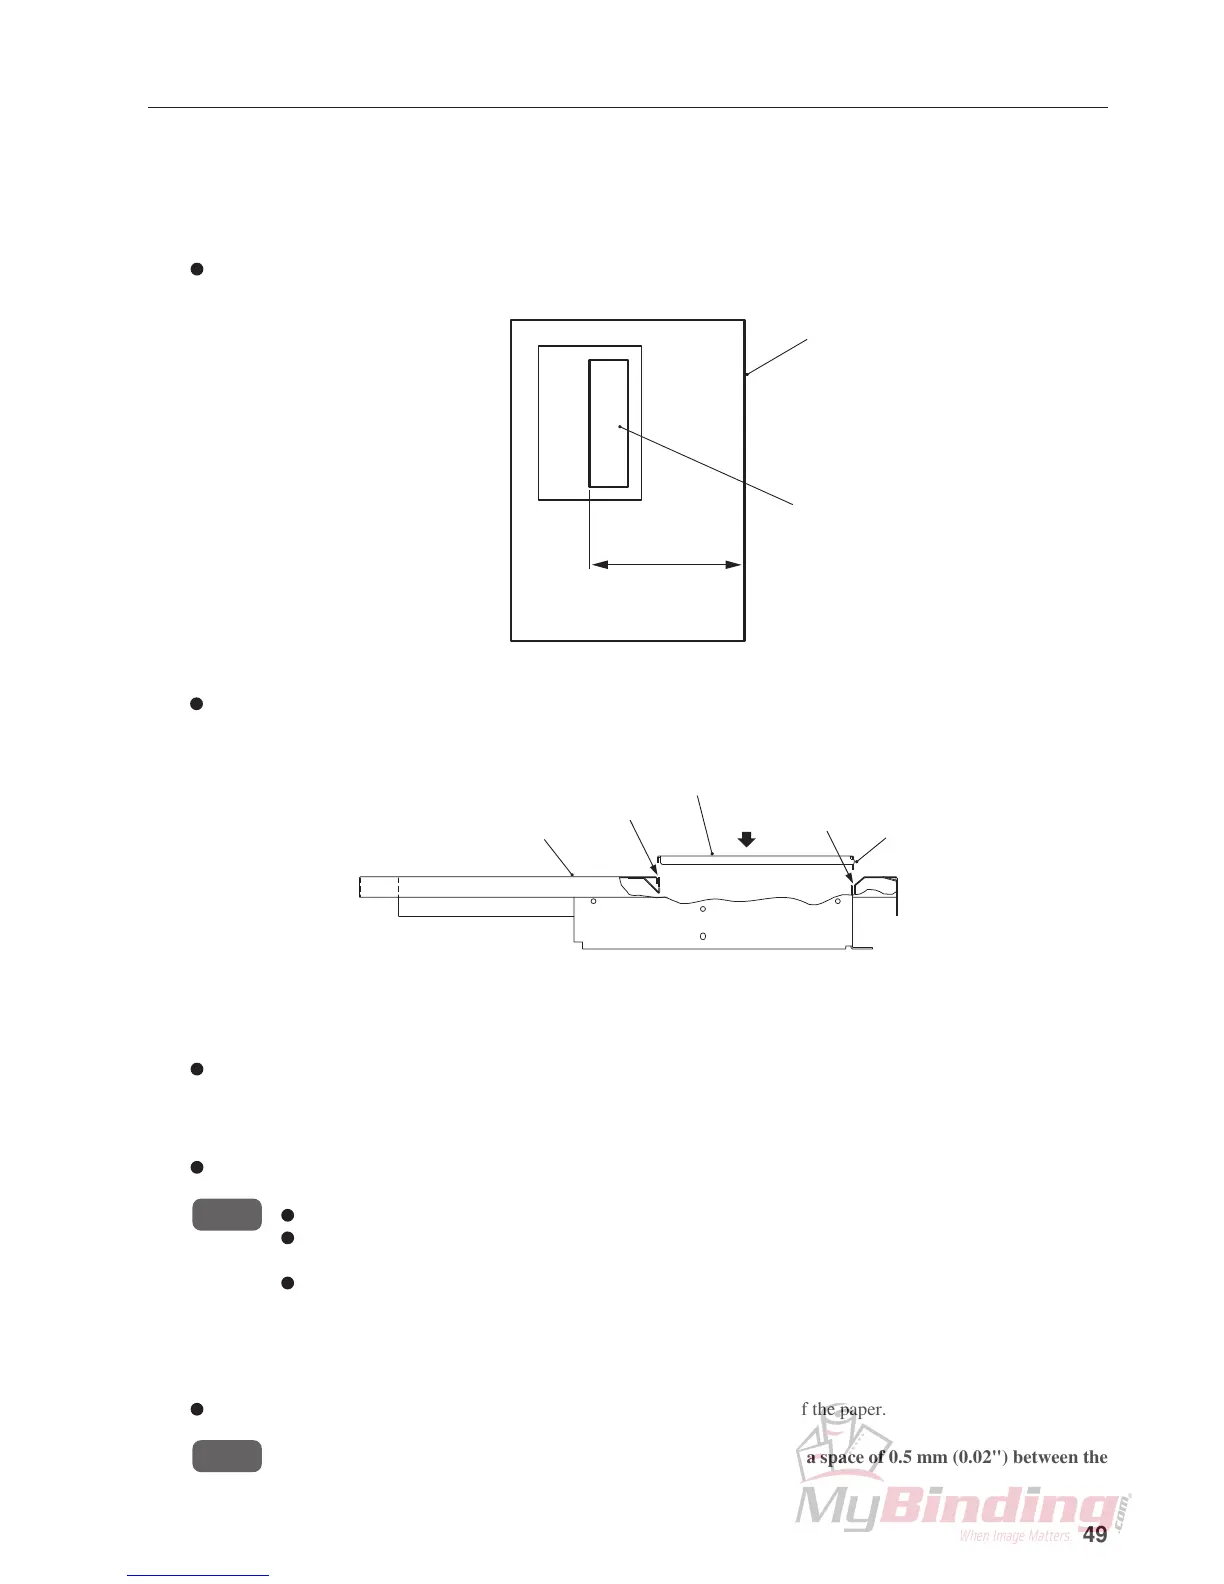
Move the auxiliary paper feed plate A to the appropriate position.
Push and slide the center part of the auxiliary paper feed plate A to the left and right.
1
If the paper width is less than 200 mm (7.87"), remove the auxiliary paper feed plate A. Lift up to remove the auxiliary
paper feed plate A. To reattach, insert into the slit of the paper feed tray A in the direction shown in the figure.
Set 0 to 10 mm (0 to 0.39")
smaller than the paper width.
Auxiliary paper feed plate A
Paper feed tray A
Stack paper on the paper feed tray A.
Raise the rear guide A until it touches the magnet before stacking the paper. Arrange the tip and side of the paper properly,
and stack it gently pressing against two guides so that there is no gap between the tip and right side (level sensor side) of
the paper and each guide.
After stacking the paper, lower the rear guide A, and move to a position in front of the rear of the paper.
For details on the order and direction of the paper stacked, refer to “14-1. Paper Stacked on Paper Feed Tray A”.
NOTE : Separate the paper properly before stacking. Otherwise, problems such as double-feeding may occur.
Flatten curled paper or bent paper before stacking. Otherwise, problems such as paper jamming may
occur.
Do not mix paper of different sizes and paper quality.
2
Move the side guide A until it touches the paper.
Turn the side guide moving dial A until the side guide A touches the left side of the paper.
NOTE : If mis-feeding frequently occurs with paper above 100 g/m
2
, leave a space of 0.5 mm (0.02") between the
paper and side guide A.
3
Auxiliary paper feed plate A
Slit
Slit
Paper feed tray A
Hole