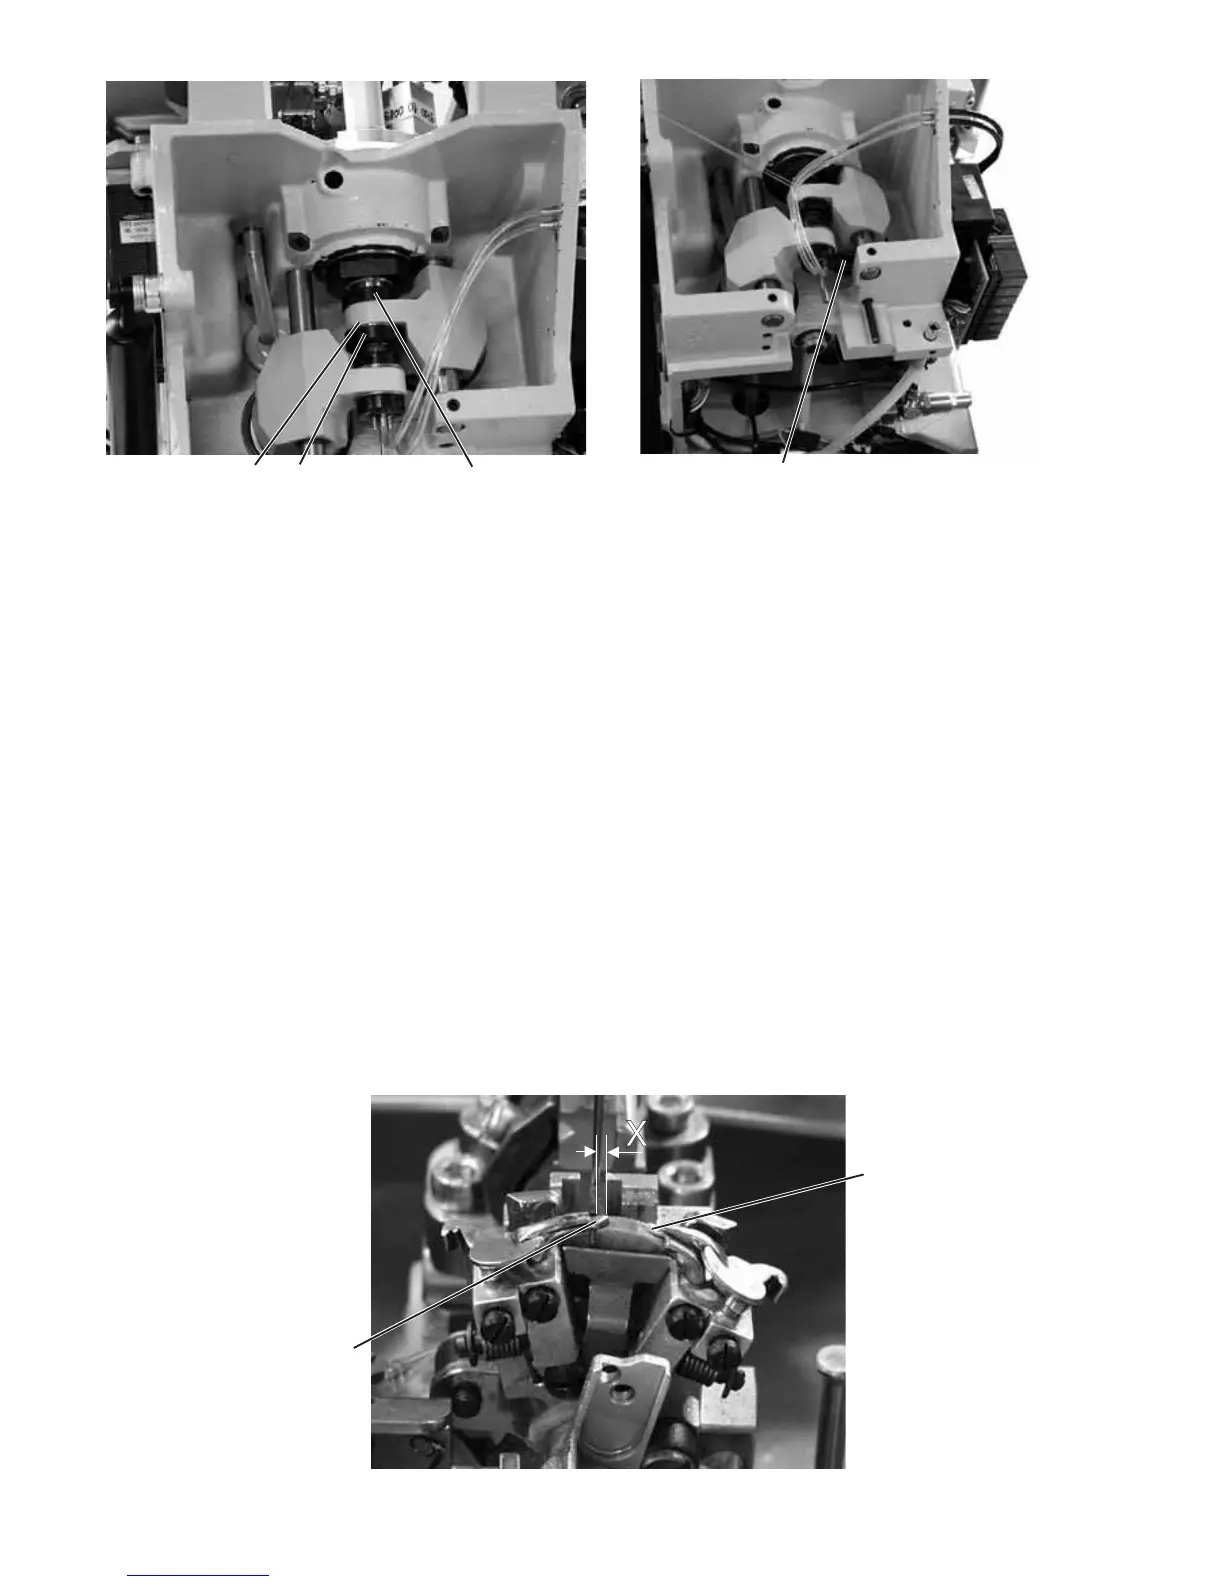
Correction
Shift the clamping rings 3 and 4 in such a way that both hook tips have
the same distance to the needle.
Adjust the left hook 8 and the right hook 7 so that both hook tips in
looping stroke position have the same position (X) to the needle. That
means both hook tips must be at an equal distance either before or
behind the needle.
–
Loosen the screws at the clamping rings 3 and 4.
Adjust the hook position as described by shifting the clamping
rings.
–
Tighten the screws 3 and 4.
It must still be possible to turn the hook support easily after
tightening the screws.
–
If the hook tips are not at the level of the middle of the needle,
loosen the screws at the eccentric 5.
–
Turn the eccentric 5 until the hook tips are at the level of the middle
of the needle.
–
Tighten the screws at the eccentric 5.
Note
The disc 6 must still be freely movable after tightening.
36
5
64 3
7
8
 Loading...