USING THE WEB INTERFACE
EATON Managed ePDUt User’s Guide S 164201xxx Rev 1 DRAFT 10−OCT−2008
40
Enabling the Firewall
To enable the ePDU firewall:
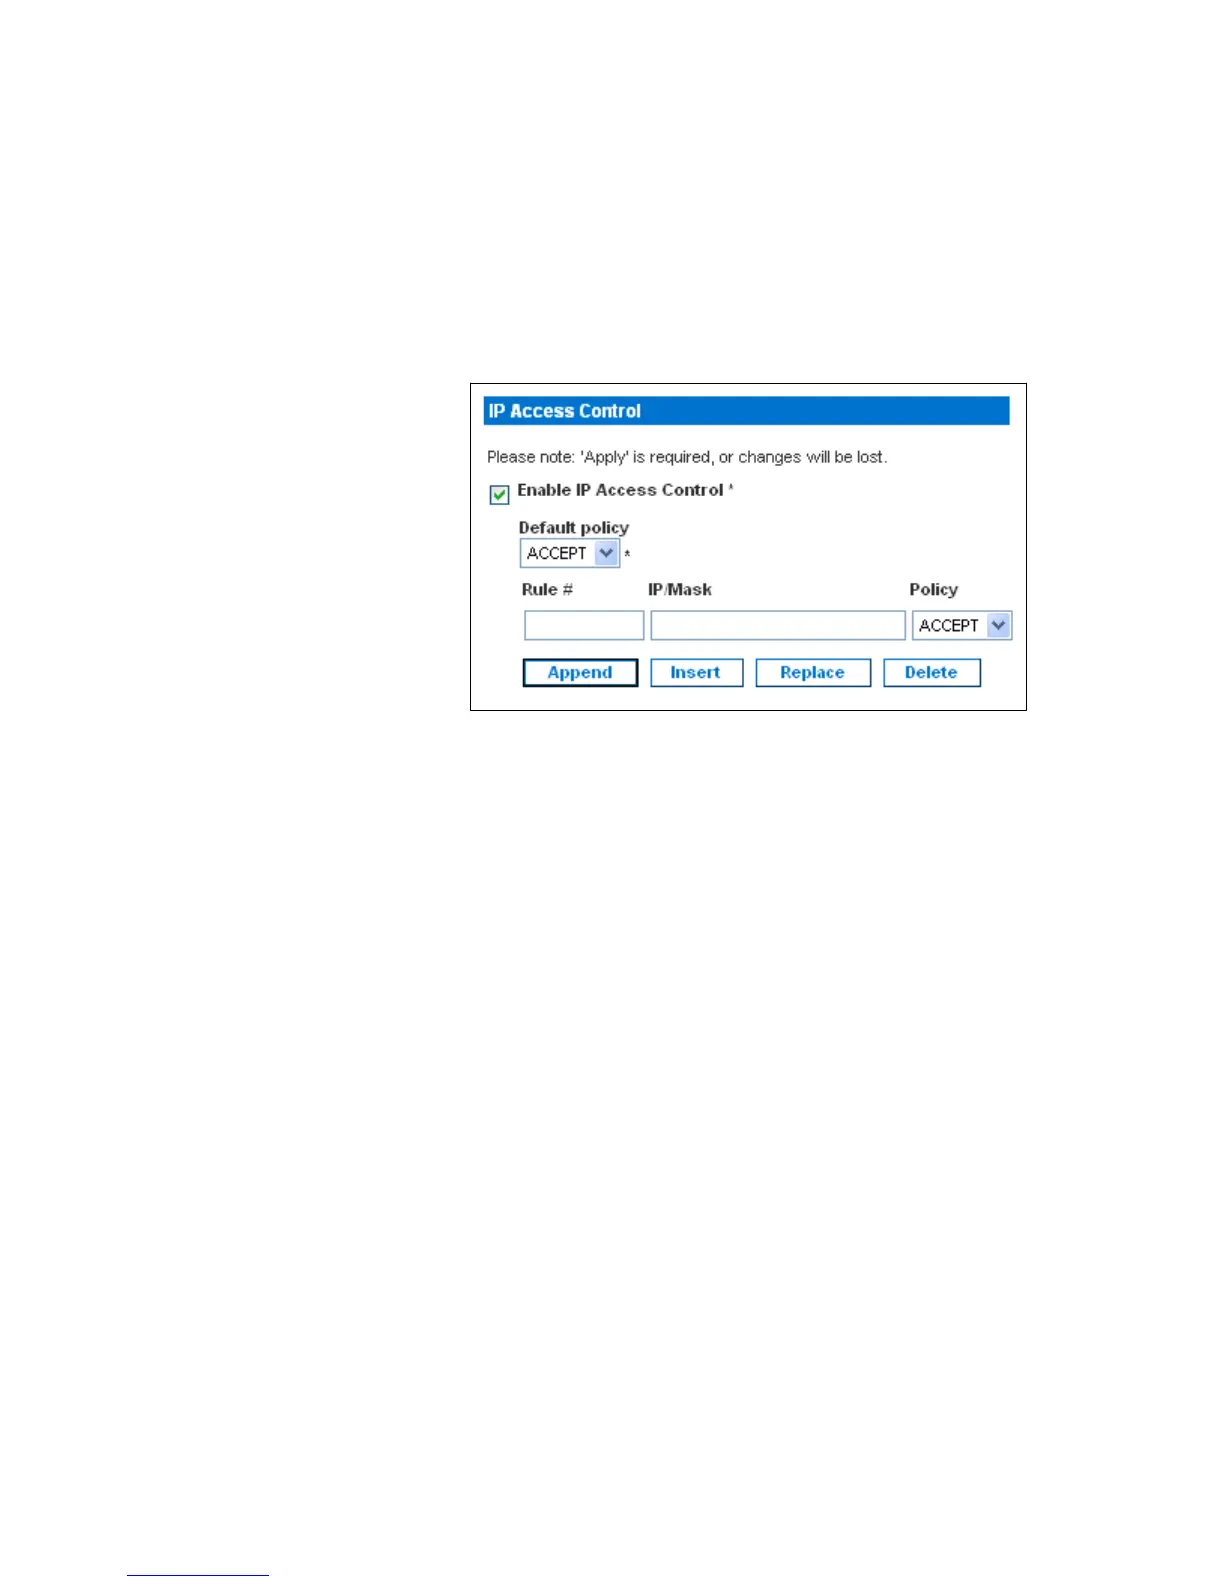
1. Select Device Settings, and then select Security. The Security Settings page
displays. The panel at the upper right is labeled IP Access Control. This controls
the firewall. See Figure 40.
Figure 40. IP Access Control Panel (Firewall Enabled)
2. Select the Enable IP Access Control check box. This enables the firewall.
3. Click Apply. The firewall is enabled.
Changing the Default Policy
Once enabled, the firewall has a default policy built in that accepts traffic from all IP
addresses. This means any IP addresses not dropped by a specific rule will be
permitted to access the ePDU. You can change the default policy to DROP, in which
case traffic from all IP addresses will be dropped except traffic allowed by a specific
ACCEPT rule.
To change the default policy:
1. Select Device Settings, and then select Security. The Security Settings page
displays. The panel at the upper right is labeled IP Access Control. This controls
the firewall.
2. Make sure the Enable IP Access Control check box is selected.
3. The default policy is shown in the Default Policy field (see Figure 40). To change
it, select the policy you want from the drop−down list in the field.
4. Click Apply. The new default policy is applied.