USING THE ETEK5
ETEK5 MANUAL 19
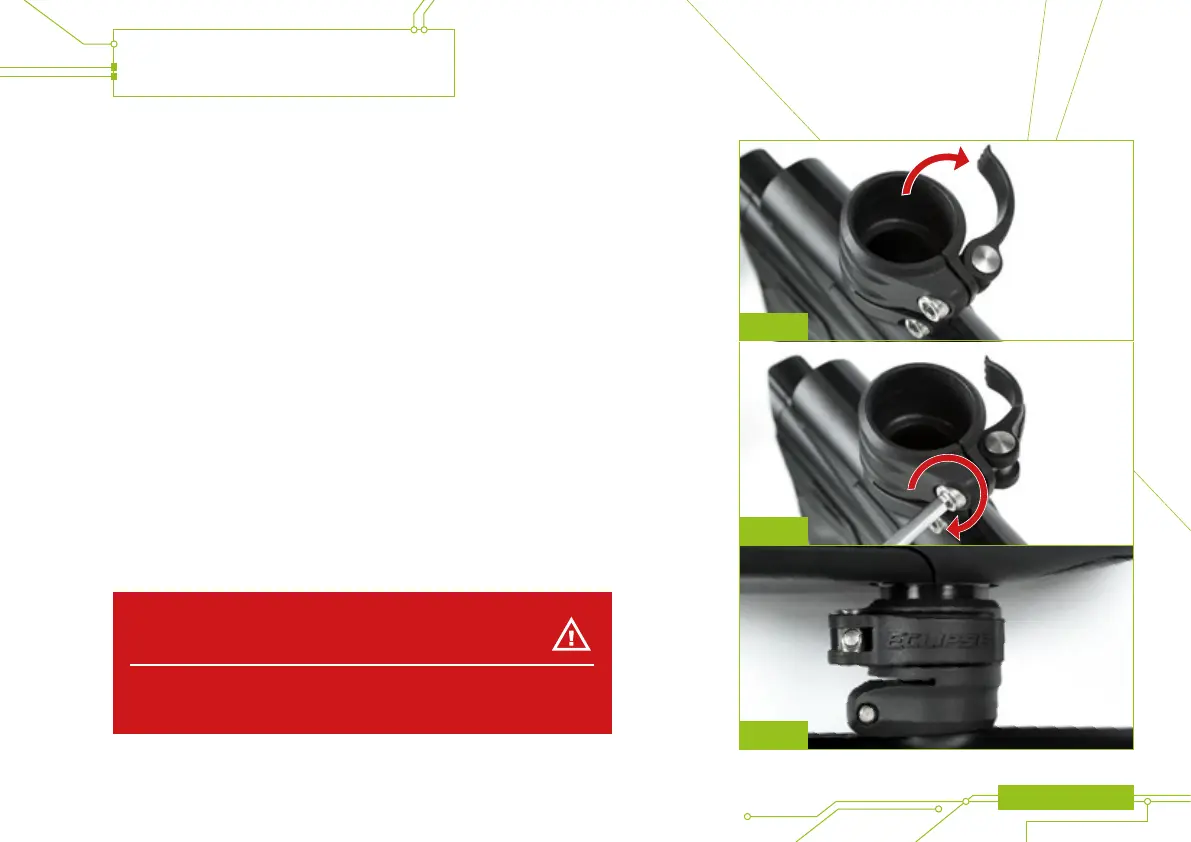
ATTACHING A LOADER
Release the clamping lever on the feed neck (see gure 13A) and test to see
if your loader can easily be pushed into the top of the feed neck. If the loader
cannot easily be pushed into the feed neck, loosen the top screw on the feed
neck by turning it counter-clockwise using a 5/32” hex key (see gure 13B).
When you have managed to push your loader into the feed neck, close the
clamping lever to secure it rmly in place (see gure 13C). If the loader is loose
then you will need to release the clamping lever, tighten the top screw slightly
by turning it clockwise with a 5/32” hex key (see gure 13B), then close the
clamping lever. Repeat this process as necessary to secure your loader in place
You have now attached a loader to your ETEK5. Once you have lled your loader
and air tank you will then be ready to begin using your ETEK5.
WARNING!
Do not over tighten the Clamping Feed Neck as this may damage the
loader or feed neck itself.
FIG 13C
FIG 13B
FIG 13A