Do you have a question about the Eclipse PRA6 Series and is the answer not in the manual?
Details copyright ownership and restrictions on reproduction and distribution of the manual.
Covers product changes, patent non-infringement, and limits Eclipse's liability for damages.
Identifies intended readers and defines the manual's purpose for installation and operation.
Lists companion documents and emphasizes reading, safety, and seeking clarification.
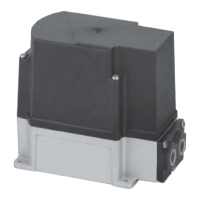
Describes the Eclipse Programmable Rotary Actuator as a keypad-programmable, direct-coupled modulating motor for burner and valve control systems.
Provides installation overview, cautions on codes, and guidelines for handling and storing the actuator.
Specifies wiring compliance with NFPA/EN standards and provides sources for obtaining them.
Details requirements for access, environment (voltage, humidity, air quality) before installing the actuator.
Stresses use with approved control systems and illustrates typical burner control schemes.
Provides guidance on mounting the actuator, including alignment, using M6 screws, and supporting conduit weight.
Details steps for mounting the actuator to a butterfly valve, including determining valve rotation and matching PRA settings.
Explains valve rotation and how PRA settings (LF, HF, LO) must match valve requirements for proper operation.
Instructs on installing the coupling to the PRA shaft, attaching the mounting bracket, and aligning shafts for smooth operation.
Covers making electrical connections, applying power, verifying smooth motion, and setting operating mode.
Explains how to access terminal strips for wiring connections and provides a warning about electrical shock.
Covers power supply, auxiliary contacts, and low fire wiring connections.
Details high fire, control signal, and disable settings wiring procedures.
Explains parameter programming and details setting the minimum shaft travel position (LF).
Details setting the maximum shaft travel position (HF) and position for zero control signal (LO).
Covers setting the points for low fire contact release (LL) and low fire contact sense (LS).
Covers setting the points for high fire contact sense (HS) and high fire contact release (HH).
Details how to select manual positioning mode and automatic signal input.
Explains how to set auxiliary contacts to normally closed (NC) or normally open (NO).
Allows selection of clockwise (CW) or counterclockwise (CCW) shaft rotation based on input signal.
Allows examination of all setpoints by pushing the RESET key twice, displaying parameter codes and values.
Resets all actuator parameters to their factory default settings, listed with specific values.
Describes the display indication and recovery procedure when the motor is stalled for more than 30 seconds.
Presents front, side, and back views with critical dimensions labeled in millimeters and inches.
Shows a detailed view of the actuator shaft, including its diameter and keying features.
Illustrates the four possible keypad orientations: Upright, Inverted, RH-90 degrees, and LH-270 degrees.
Divides the section into maintenance and troubleshooting, emphasizing preventative tasks for reliability.
Provides monthly and yearly tasks for inspection, including checking physical damage, connections, and operation.
A record table showing default and example settings for various actuator parameters like LF, HF, LL, LS, etc.
Details the coding system for configuring model numbers based on voltage, standard, stroke, and connector type.
| Brand | Eclipse |
|---|---|
| Model | PRA6 Series |
| Category | Controller |
| Language | English |