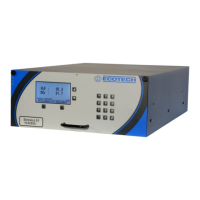
Serinus 51 User manual 1.0
Optional Extras
71
8.3 High pressure zero/span valve
Note: This is NOT intended as a source for calibrating
the instrument. This should only be used as an
operational check of the instrument’s zero point and
single upscale point (recommended as 80% of full scale)
8.3.1 Single pressurized calibration option
The internal pressurized calibration valves are already installed within the analyzer
(Figure 33) as either a zero or span calibration source, thus no other connections need
to be made.
Operation of single calibration option
When using the pressurized calibration option either a high pressure zero or span
bottle should be connected to the “Auxiliary In” port on the back of the analyzer.
1. Ensure gas cylinder is fitted with an appropriate gas regulator with shut off
valve.
2. Connect a line of 1/8” stainless steel tubing between the gas cylinder and the
analyzer “Auxiliary port” inlet.
Note: This connection may need to be
retightened during this operation.
3. Open the cylinder main valve and adjust the regulator to 15 psig or 1 bar
4. Open the regulator shutoff valve and leak test.
5. Temporarily place a flow meter on the calibration port inlet (used as a vent).
6. Enter the calibration menu (Main Menu → Calibration Menu)
7. Change “Set Cal Port” to External
8. Select either Span or Zero under the “Cal Mode” option depending on which
calibration check is being performed. This will initiate the pressurized
calibration.
9. Open the cylinder shutoff valve, adjust the regulator pressure until the flow on
the vent line (Calibration port) is between 0.5 and 1 lpm.
Note: Do not exceed 2 bar of pressure,
if this occurs a leak may exist
Return to normal operation
1. Set Cal. Mode → Measure.
2. Remove the flow meter on the calibration port and connect a ¼” vent line to
port.
3. Reconnect instrument fittings and place in original set up
4. The instrument is now in normal operation mode.

 Loading...