16
support@edgeovens.com Technical Support: +1 (724) 628 3050
INSTALLATION
ASSEMBLING YOUR OVEN WITH APPROVED EDGE LIFTING EQUIPMENT
EDGE ovens has been designed to be easily maneuvered and stacked with the correct lifting equipment. The
use of EDGE approved lifting equipment is recommended. The following instructions can be applied to ovens
supplied on the original shipping skid or the EDGE delivery carts.
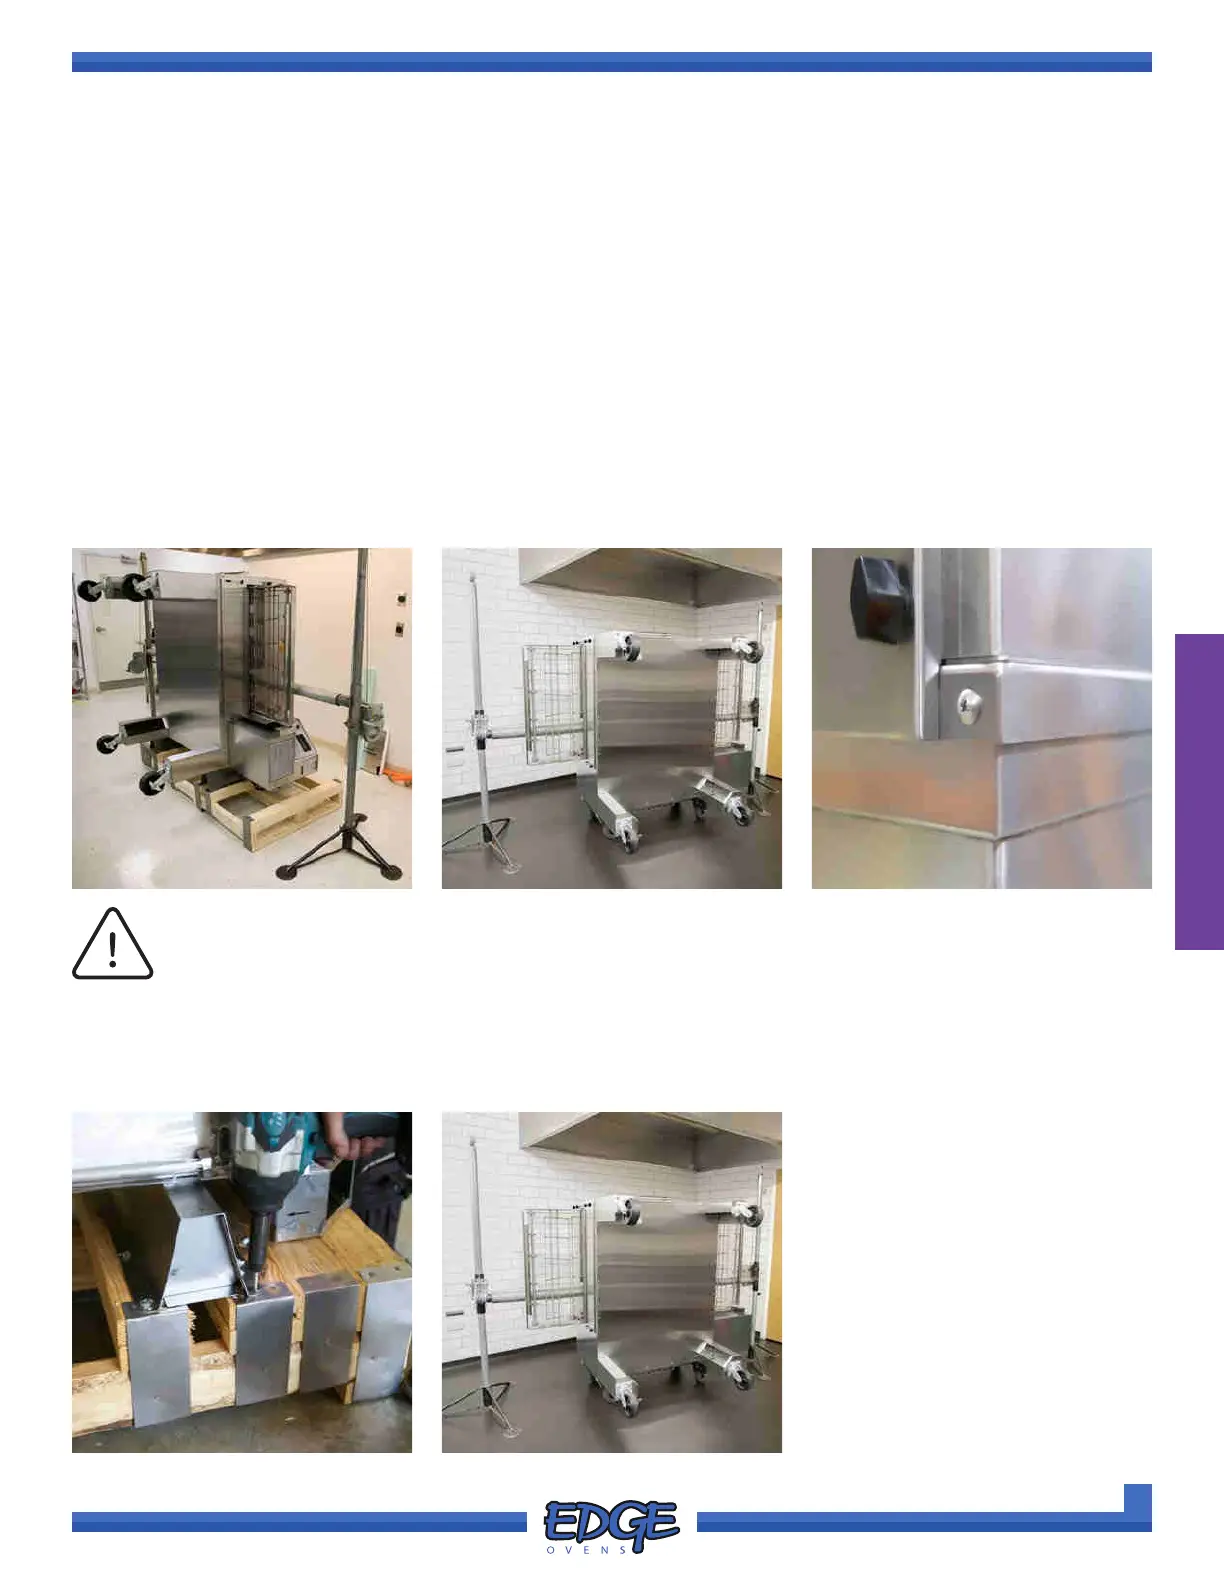
1. Once you are happy that the oven is close to your nal installation position, slide the SCH40 10ft steel pipe
through each end of the provided and installed lifting plates, ensuring an equal amount of the steel pipe
protrudes either end of the oven.
2. Position the EDGE lifting jacks on either side of the lifting pipe, making sure that the shortest leg of the
tripod is in-line with the lifting pipe and facing away from the oven end.
3. Raise each lifting jack winch to the height of the lifting pipe and insert each end of the lifting jack into the
lifting pipe by carefully moving the lifting jacks forward (Figure 2-12 & Figure 2-13)
FIGURE 2-14FIGURE 2-12 - SKID
OVEN ASSEMBLY
NOTICE
Recently manufactured ovens are provided with securing holes and screws on each corner
of the oven bottom, which are designed to secure the oven base to the oven bottom (Figure
2-14). If your oven does not have this feature, the oven base should be secured to the oven by
banding strips or ratchet straps. DO NOT REMOVE these until the oven has been rotated.
SPINNING OVEN FROM DELIVERY SKID OR EDGE DELIVERY CART
FIGURE 2-15
4. If spinning from the original
delivery skid, remove and
discard the eight (8) 1/4” lag
bolts that secure the skid to the
oven support brackets, using
a 7/16” socket and ratchet or
impact driver, repeat
process for each bracket, two }
(2) in total. (Figure 2-15).
If spinning from the delivery
cart, remove all straps securing
the oven to the installation cart.
(Figure 2-16).
FIGURE 2-13 - EDGE CART
FIGURE 2-16