DCP 350
4.1.3 Advanced setup
You can set advanced values.
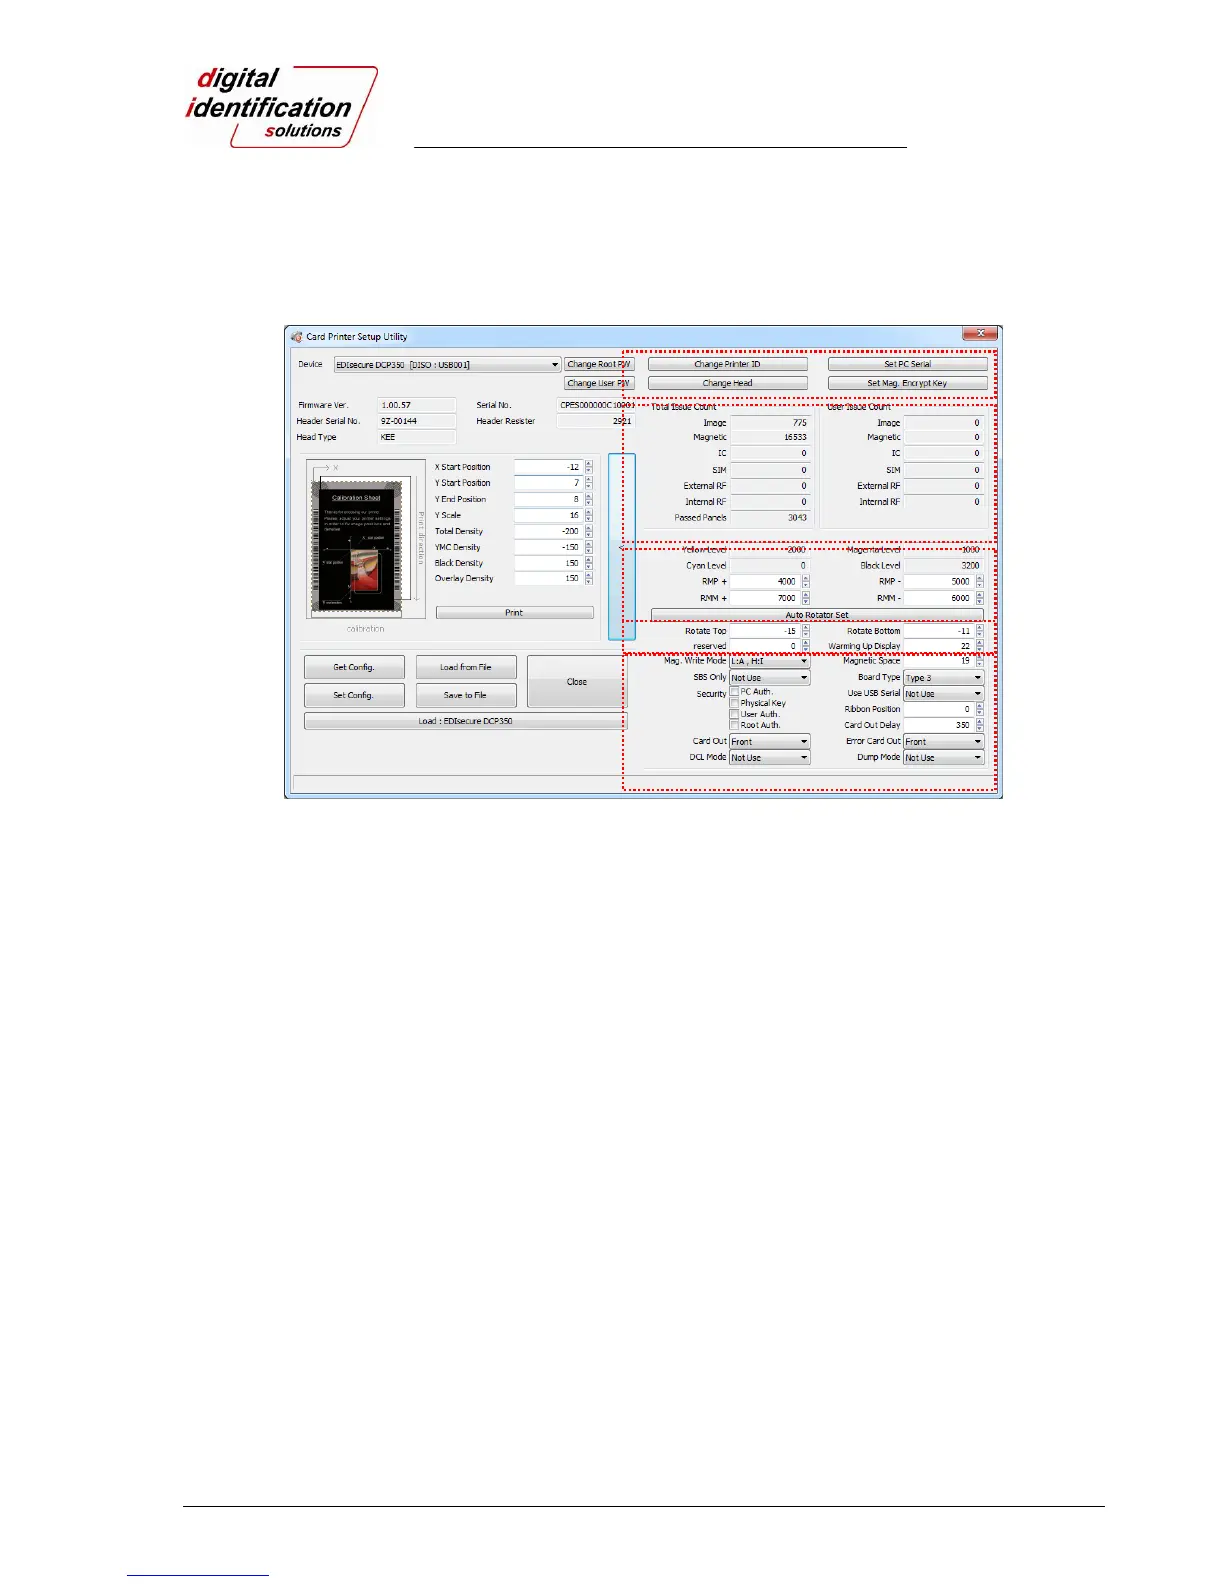
Pic.80 Advanced setup of CardPrinterSetup
① You can set Printer ID, PC serial, Print head and Magnetic encryption key.
Change Printer ID: When the EDIsecure
®
DCP 350 is used by SDK, you can set unique ID for the
EDIsecure
®
DCP 350 printer regardless of whether it is connected by USB or what the IP address
is. It is useful to connect and use several printers. Default is “DCP350”.
Set PC Serial: One of security function. You can use a printer with specific PC.
It is activated when you click “Set PC Serial” after “PC Authentication” of ⑥ is ticked and
rebooted. At this time, the specific information of used PC is saved to the EDIsecure
®
DCP 350
printer.
Change Head: When you replace thermal print head, you must change head information for
optimal quality. Please change head serial number, resistor and type of head in the Change Head
Dialog window after click “Change Head”.
Set Mag. Encrypt Key: One of security function. When you use SDK, you can encrypt magnetic
stripe encoding data transmitted by USB. You can define and save the encryption key to the
EDIsecure
®
DCP 350 using “Set Mag. Encrypt Key”.
② To show how many cards are issued with the EDIsecure
®
DCP 350 printer. “Total Issue Count” is
the number of issued cards from factory shipment, “User Issue Count” is the number of issued
cards from replacing head. When you replace a head, please initialize the number by ticking “Reset
User Issue Count”.
③ To show color and motor management. The EDIsecure
®
DCP 350 recognizes ribbon color
automatically and controls motor by ribbon remaining. “Yellow Level”, “Magenta Level”, “Cyan
Level”, “Black Level” are default value for ribbon and user does not change values. “RMP+”, “RMP-
“, “RMM+”, “RMM-“ are necessary variables to control ribbon motor. Please do not change values
for them as it affects card quality.
①
②
③
⑤
④