INSTALLING HARDWARE 20
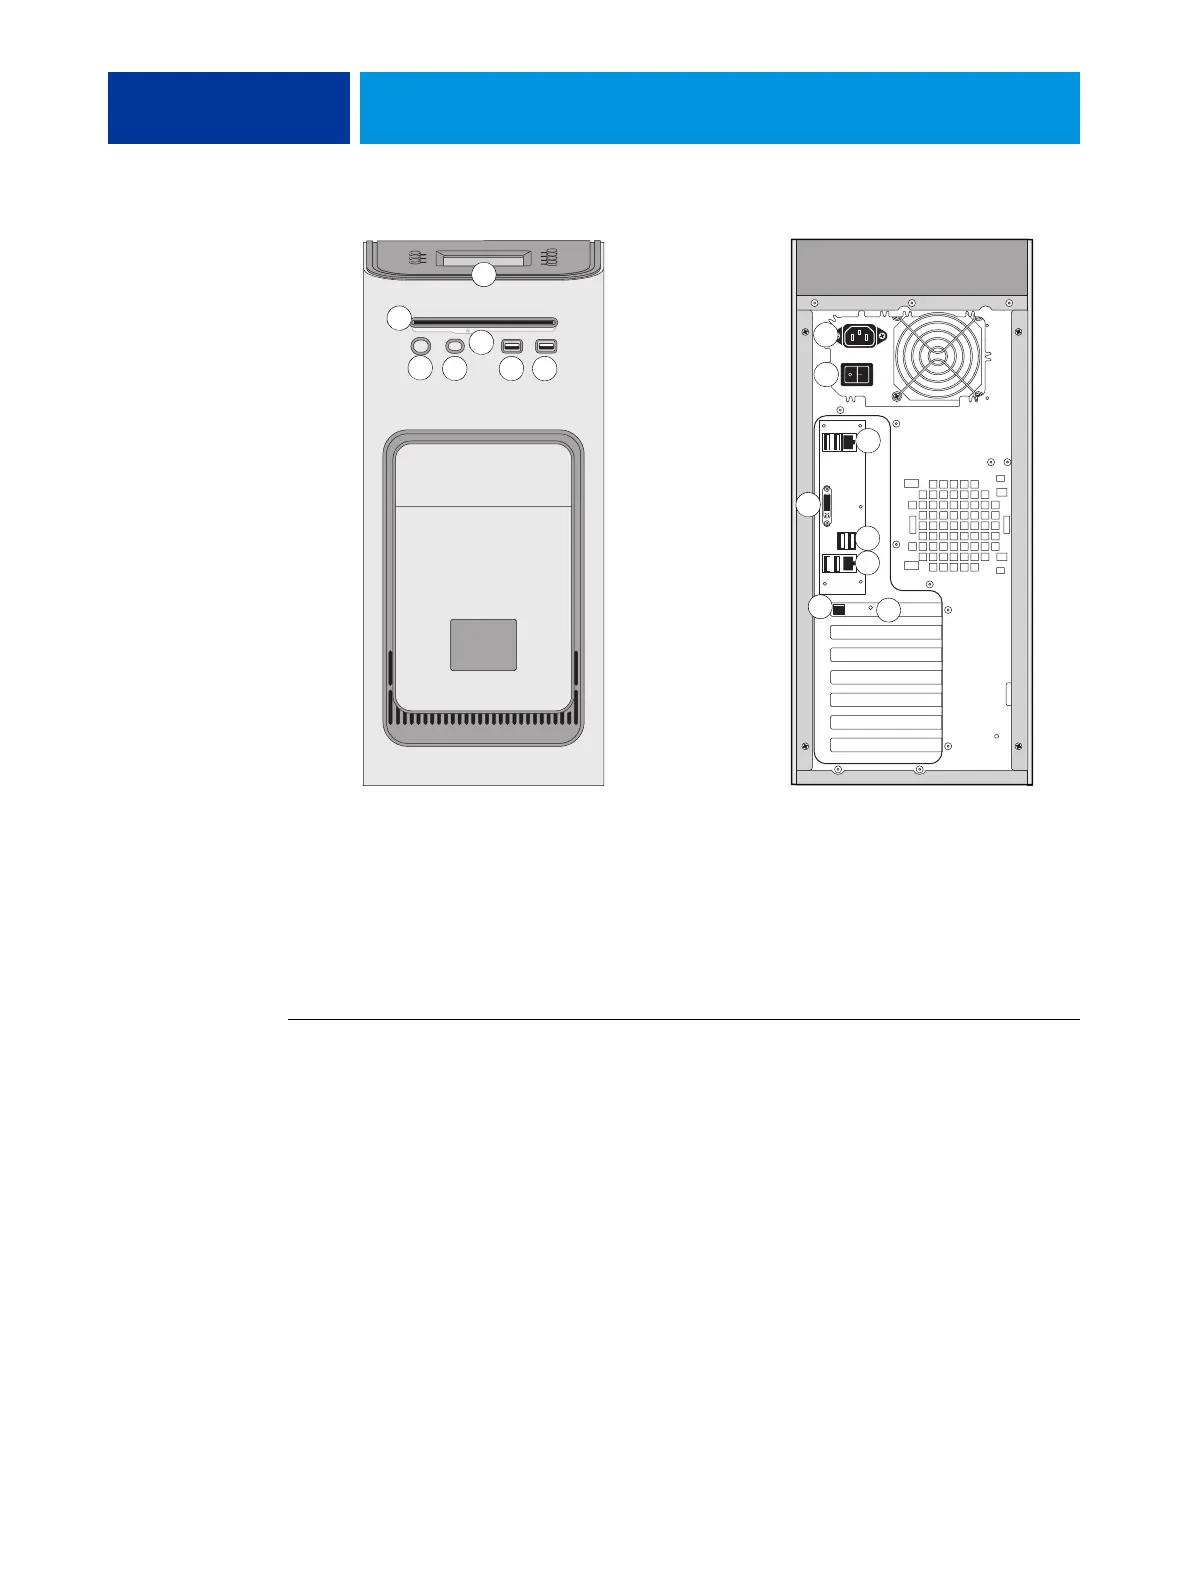
FIGURE 4: Front and connector panel
Connecting the monitor, keyboard, mouse, and power
Before using the E-43A, connect the monitor, keyboard, mouse, and power to the E-43A if
applicable.
TO CONNECT THE MONITOR, KEYBOARD, MOUSE, AND POWER
NOTE: For detailed information about the monitor, keyboard, and mouse, see the
documentation that accompanies those products.
1 Make sure that the E-43A is installed in the furniture and that the monitor is securely
attached to the top of the E-43A.
For more information, see the assembly instructions that accompany the furniture.
2 Place the keyboard in the keyboard tray on the underside of the furniture table top. Place the
mouse on the table top.
3 Connect the keyboard and mouse cables to the USB ports on the E-43A connector panel.
4 If the monitor cable is not already attached to the monitor, attach the cable that matches the
connector on monitor port on the E-43A. If necessary, use the port adapter included in the
furniture kit to connect the monitor cable.
Key
1 Control panel
2DVD drive
3 Eject button
4 Power button
5Reset button
NOTE: Use the reset button
only if the system is
unresponsive to keyboard or
mouse actions.
6 Type A USB port
7 Type A USB port
8 Power connector
9 Power switch
|: Power On
O: Power Off
10 Network port (Upper RJ-45)
11 Monitor (DVI) port
12 Type A USB ports
13 printer interface port
(crossover Ethernet port)
and Type A USB ports
14 Type B USB port on the
printer interface board
15 OFF/ON switch for power
synchronization
Connector panel
Front panel
10
1
2
3
4
5
6 7
8
9
11
12
13
14
15