REPLACING PARTS 47
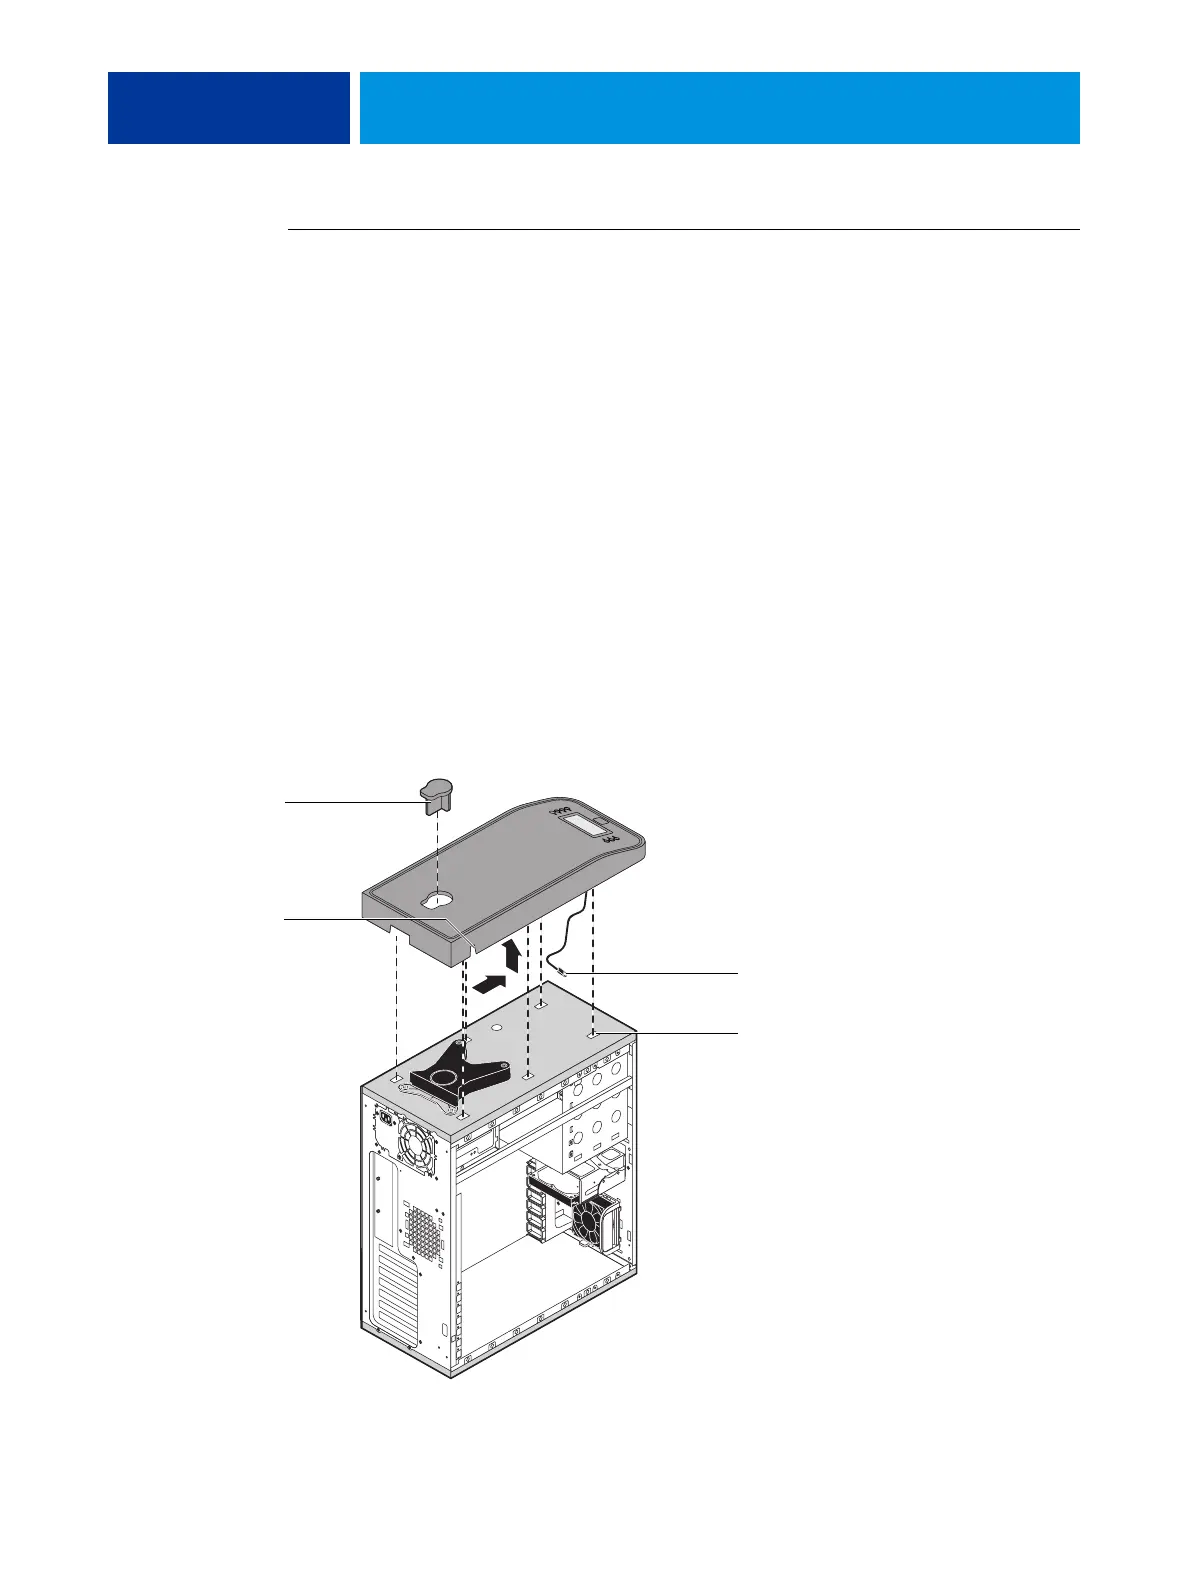
TO REMOVE AND REPLACE THE TOP PANEL
NOTE: To remove the top panel, you must first remove the left, right, and front panels.
1 Remove the plug from the top panel.
From the cutout in left side of the top panel, access and loosen the locking bolt, and then
remove the plug.
NOTE: The locking bolt requires a 3/16 Allen wrench.
2 Loosen the top panel.
Slide the top panel a few inches toward the front of the chassis to disengage the hooks in the
panel from the slots in the top of the chassis.
NOTE: You may need to tap the back edge of the panel toward the front of the chassis to
disengage the panel.
3 Detach the UIB cable from the motherboard.
4 Remove the panel from the chassis.
Carefully route the UIB cable out of the hole in the top of the chassis as you remove the top
panel.
FIGURE 17: Removing/replacing the top panel
Plug
Slot (1 of 4)
Cutout
UIB cable