USING THE E-43A 36
TO ENABLE THE POWER SYNCHRONIZATION FEATURE AT THE E-43A
1 Shut down the E-43A (see page 32) and the copier/printer.
2 Remove the port cover that is attached to the Type B USB port on the printer interface board.
3 Locate the USB cable that shipped with the copier/printer.
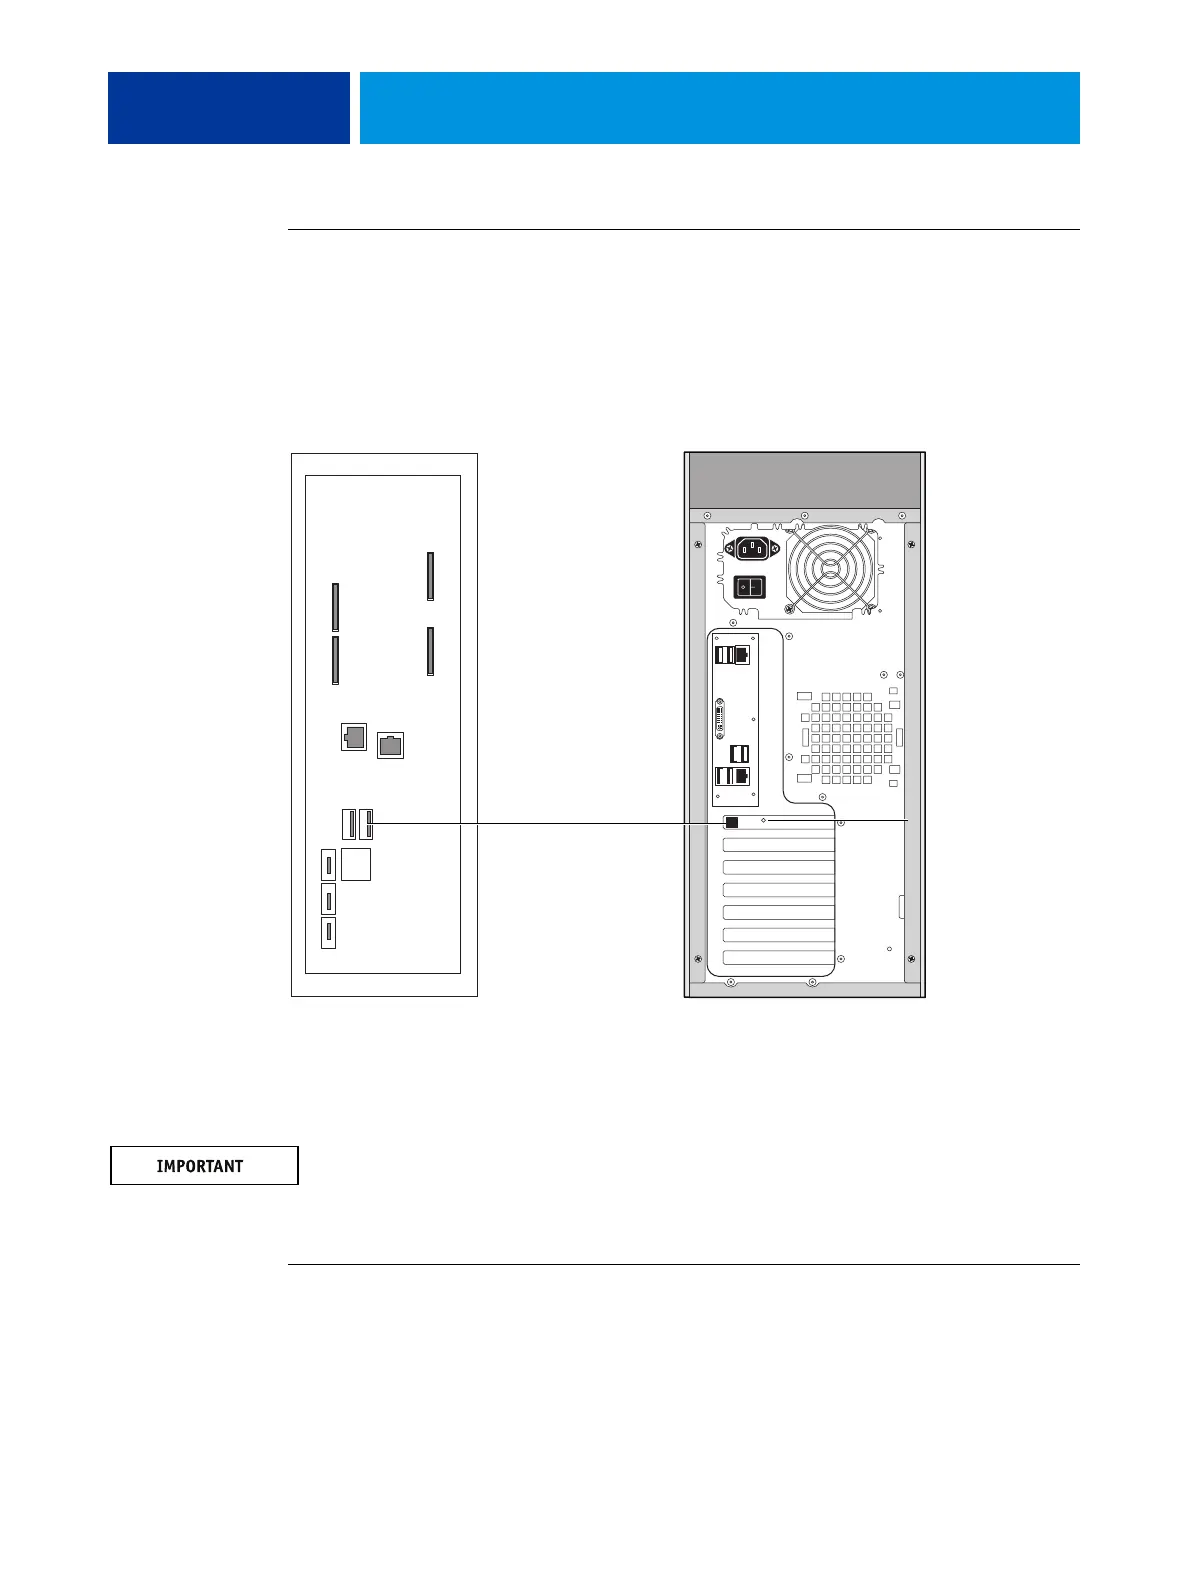
4 Connect one end of the USB cable (Type B) to the port on the printer interface board of the
E-43A. Connect the other end of the cable (Type A) to the USB port on the copier/printer.
FIGURE 10: USB connection between copier/printer and E-43A
5 Set the switch on the printer interface board to the ON position.
Do not change the switch position when the E-43A is powered on.
6 Power on the copier/printer.
The E-43A automatically starts up.
TO DISABLE THE POWER SYNCHRONIZATION
1 Turn off the copier/printer using the main power switch.
Wait until the E-43A shuts down.
2 Make sure that the power switch on the connector panel of the E-43A is OFF position (|).
copier/printer connector panel E-43A connector panel
Switch on the printer
interface board:
ON position
USB cable