9
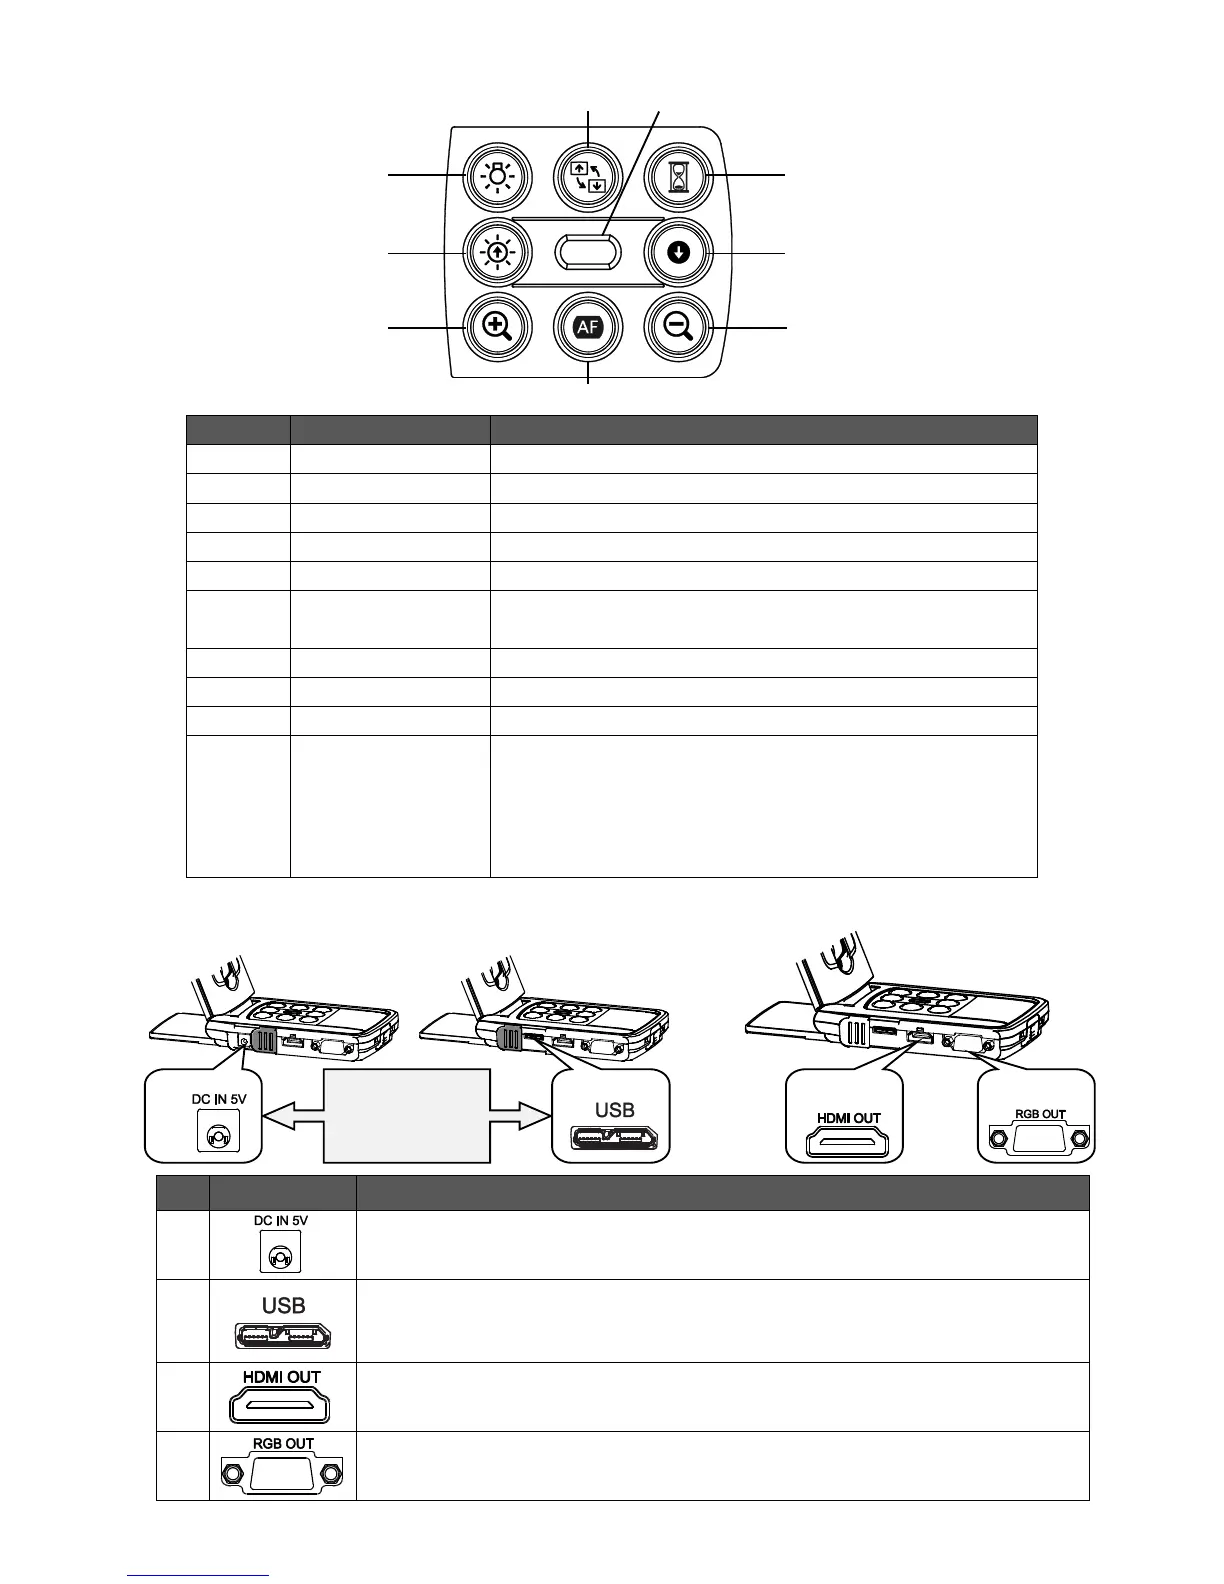
◆OPERATING PANEL
◆CABLE CONNECTION
To connect the supplied DC power cable.
To connect a PC and the MX-P to save images.
(USB3.0 cable is included in the package.)
Max. resolution 4:3=UXGA1600×1200 16:9=1920×1080
To output digital images by connecting to a monitor via the HDMI cable.
(The HDMI cable is not included.)
To output RGB images by connecting to a monitor via the RGB cable.
(The RGB cable is not included.)
Initialization of
the brightness
To initialize the brightness level by pressing ④ and
⑤ together.
To rotate the image.(0°/180°)
To pause or restart the image.
Turns blue: when connecting with USB3.0 or
when connecting the AC adapter
Turns green: when connecting with USB2.0
Flashes yellow: during freeze while supplying power
with the AC adapter
Slide the cover
according to the
terminal used.



 To Next Page