Slide the cover according to the port used.
DC IN 5V ⇔ USB
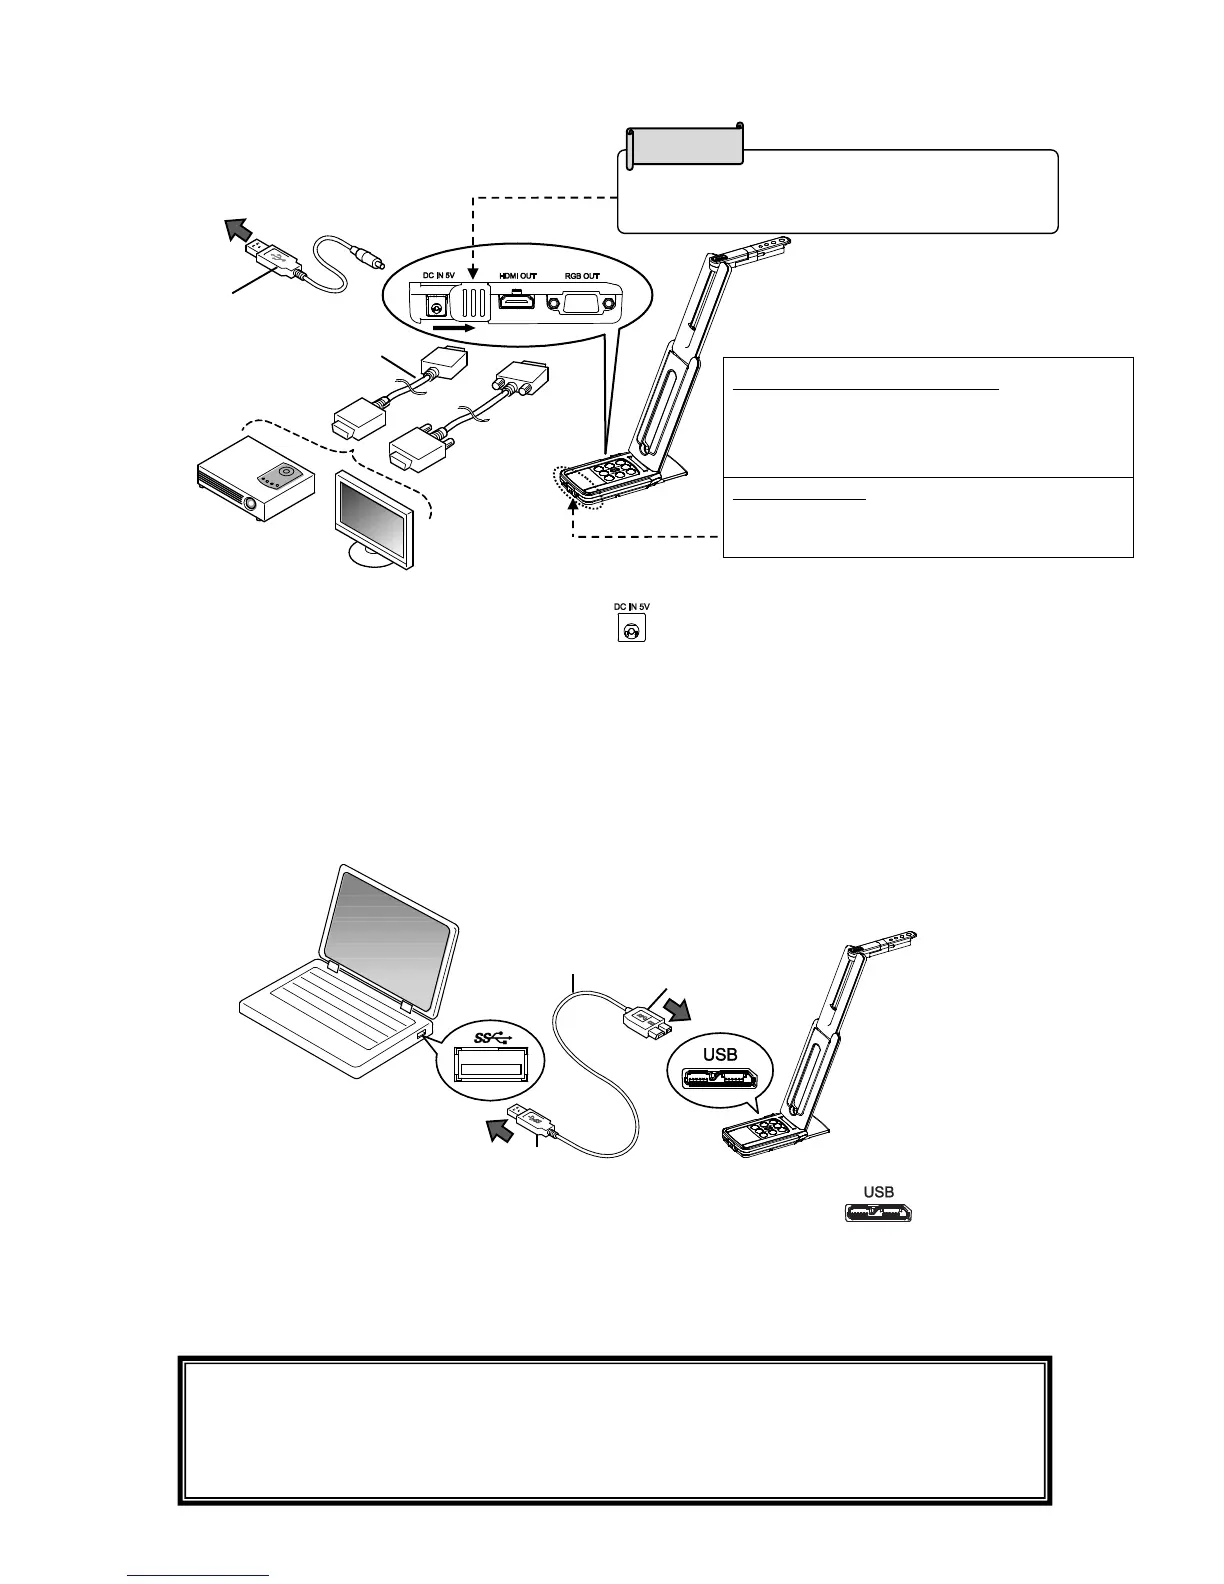
◆CONNECTING TO A PROJECTOR OR MONITOR
1. Connect the MX-P to a projector or monitor with the HDMI cable or RGB cable.
2. Connect the supplied DC power cable to [ ]. Connect the USB plug to the supplied AC
adapter. Then connect it to a wall outlet.
3. The MX-P turns on. (MX-P of LED:blue)
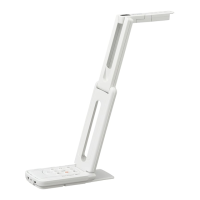
◆CONNECTING TO A COMPUTER
The MX-P is compliant to uvc (video class) standard. You can transfer the image via USB by
connecting the MX-P to a computer using the USB3.0 cable (bus power).
1. Connect the microB connector terminal of the USB3.0 cable to [ ] connector in
the side of the MX-P.
2. Connect the typeA terminal of the USB3.0 cable to the USB port of your running
computer.
3. The MX-P will be turned on after the connection is established.(MX-P of LED:blue)
Resolution/Output mode selection
When connecting RGB only:
select between XGA and UXGA
When connecting HDMI:
select between Full and Normal (angle of view)
Flicker correction
Select the same value as the power supply
frequency of the location where the product is
used. (50Hz/60Hz)
CAUTION
・When using the USB cable, no video is output from the RGB/HDMI ports.
・When connecting to the USB2.0 port (MX-P of LED:green),the frame rate may be decreased
depending on the output resolution.
・The frame rate may be decreased depending on the computer used.