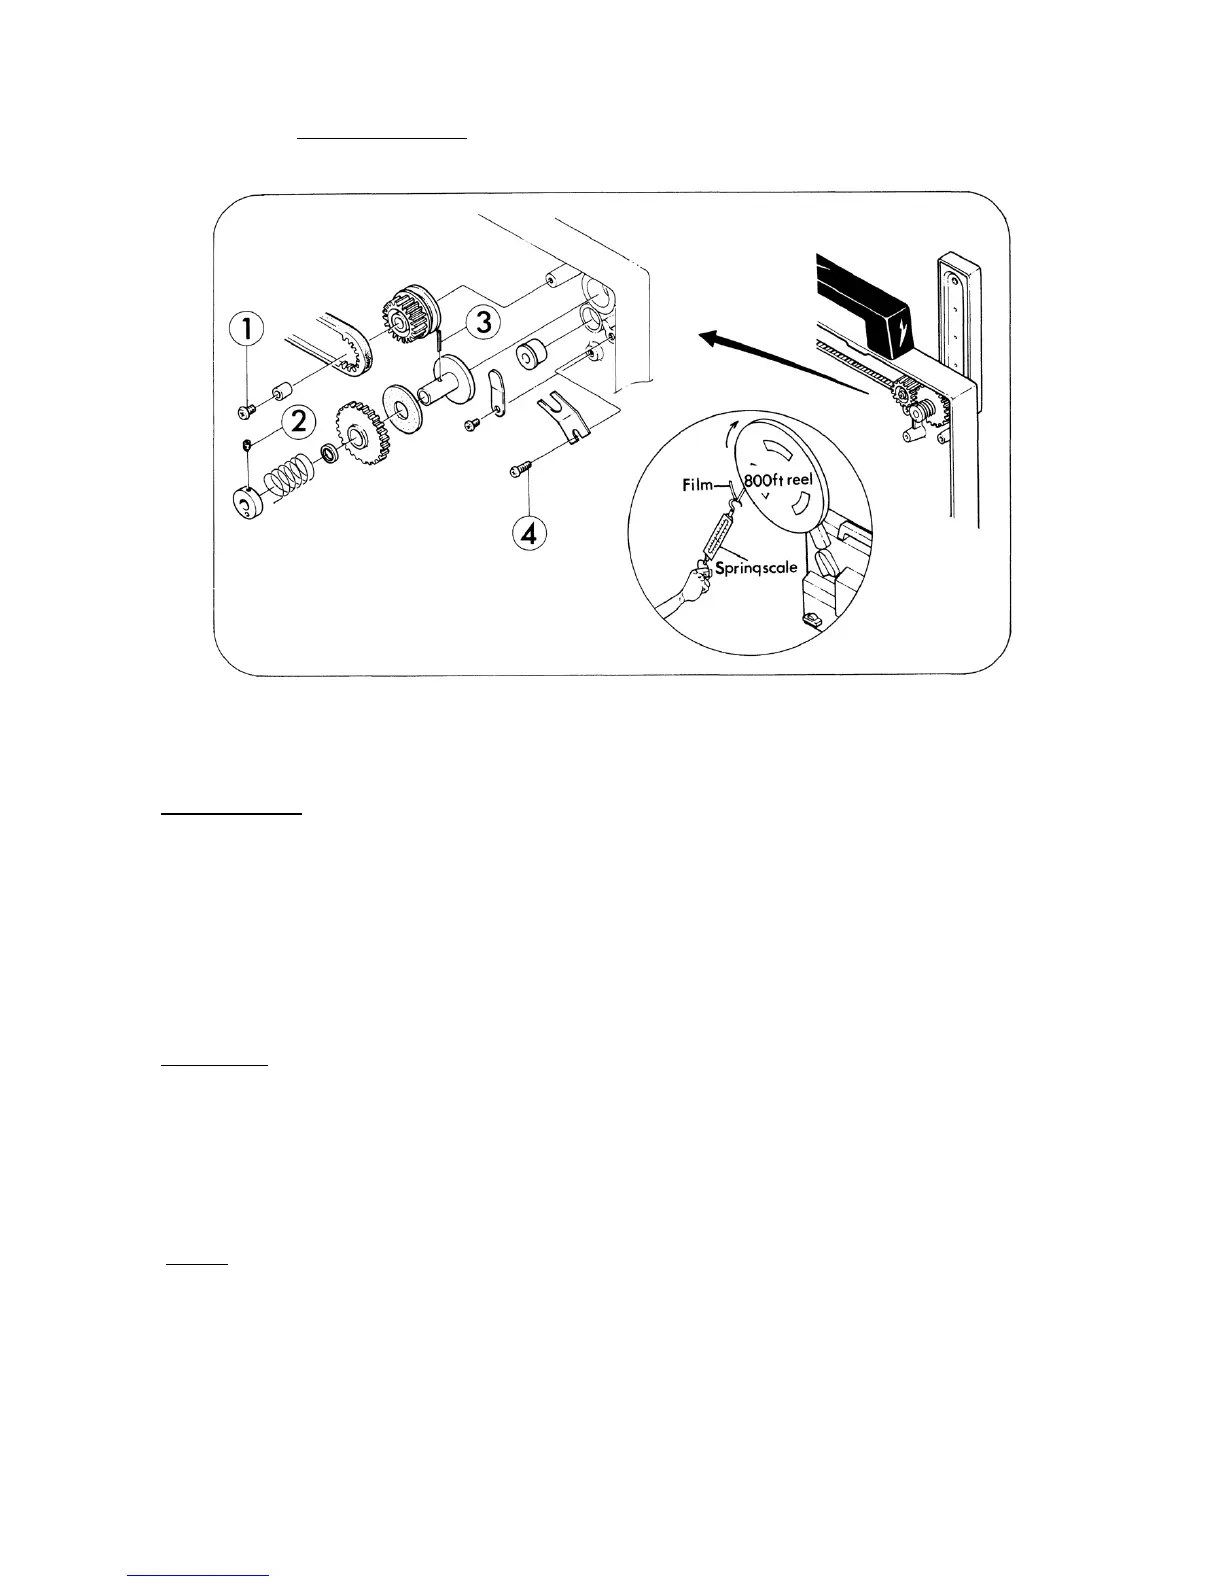
3. REAR ARM (Fig. 3)
Fig. 3
DISASSEMBLY
1. Take out attaching screw (Fig.3-1) and remove Take-up middle pulley 2, Take-up pulley washer
and Take-up belt.
2. Take out attaching screw (Fig.3-2) and remove Spring adjusting collar, Rear pulley shaft spring,
Pulley washer, Rear take-up gear and Friction plate 2.
3. Pullout pin (Fig.3-3) and remove Friction wheel pulley.
4. Take out attaching screw (Fig.3-4) and Arm lock spring, then pullout Rear arm assy.
ASSEMBLY
1. As to the assembling, follow the reverse way of the above steps.
2. Lubricate Take-up pulley washer and the teeth of Take-up middle pulley 2 with Alvania grease.
3. Adjust the take up tension of the rear arm to be 65 gr. by the position of Spring adjusting collar.
Take up tension … Tolerance 55-80 gr.
NOTE: When replace Take-up belt, take out just attaching screw (Fig.3-1).
- 3 -