c) Select Next.
Tip
Enter the calibration gases in order of density, from lowest to highest. This allows heavier gases to
replace lighter gases.
8. Set the low-density calibration point. See Figure 5-2.
a) Connect the lower calibration gas to the calibration gas inlet 1 (H).
b) Set the pressure regulator on the lower calibration gas tank to the appropriate sample pressure
for your installation.
Note
Make sure the process gas inlet valve (D) is closed.
c) Set the process/calibration gas valve (B) to the calibration position.
d) Set the calibration gas selector valve (A) to the calibration gas inlet 1 position and open the
outlet valve (C).
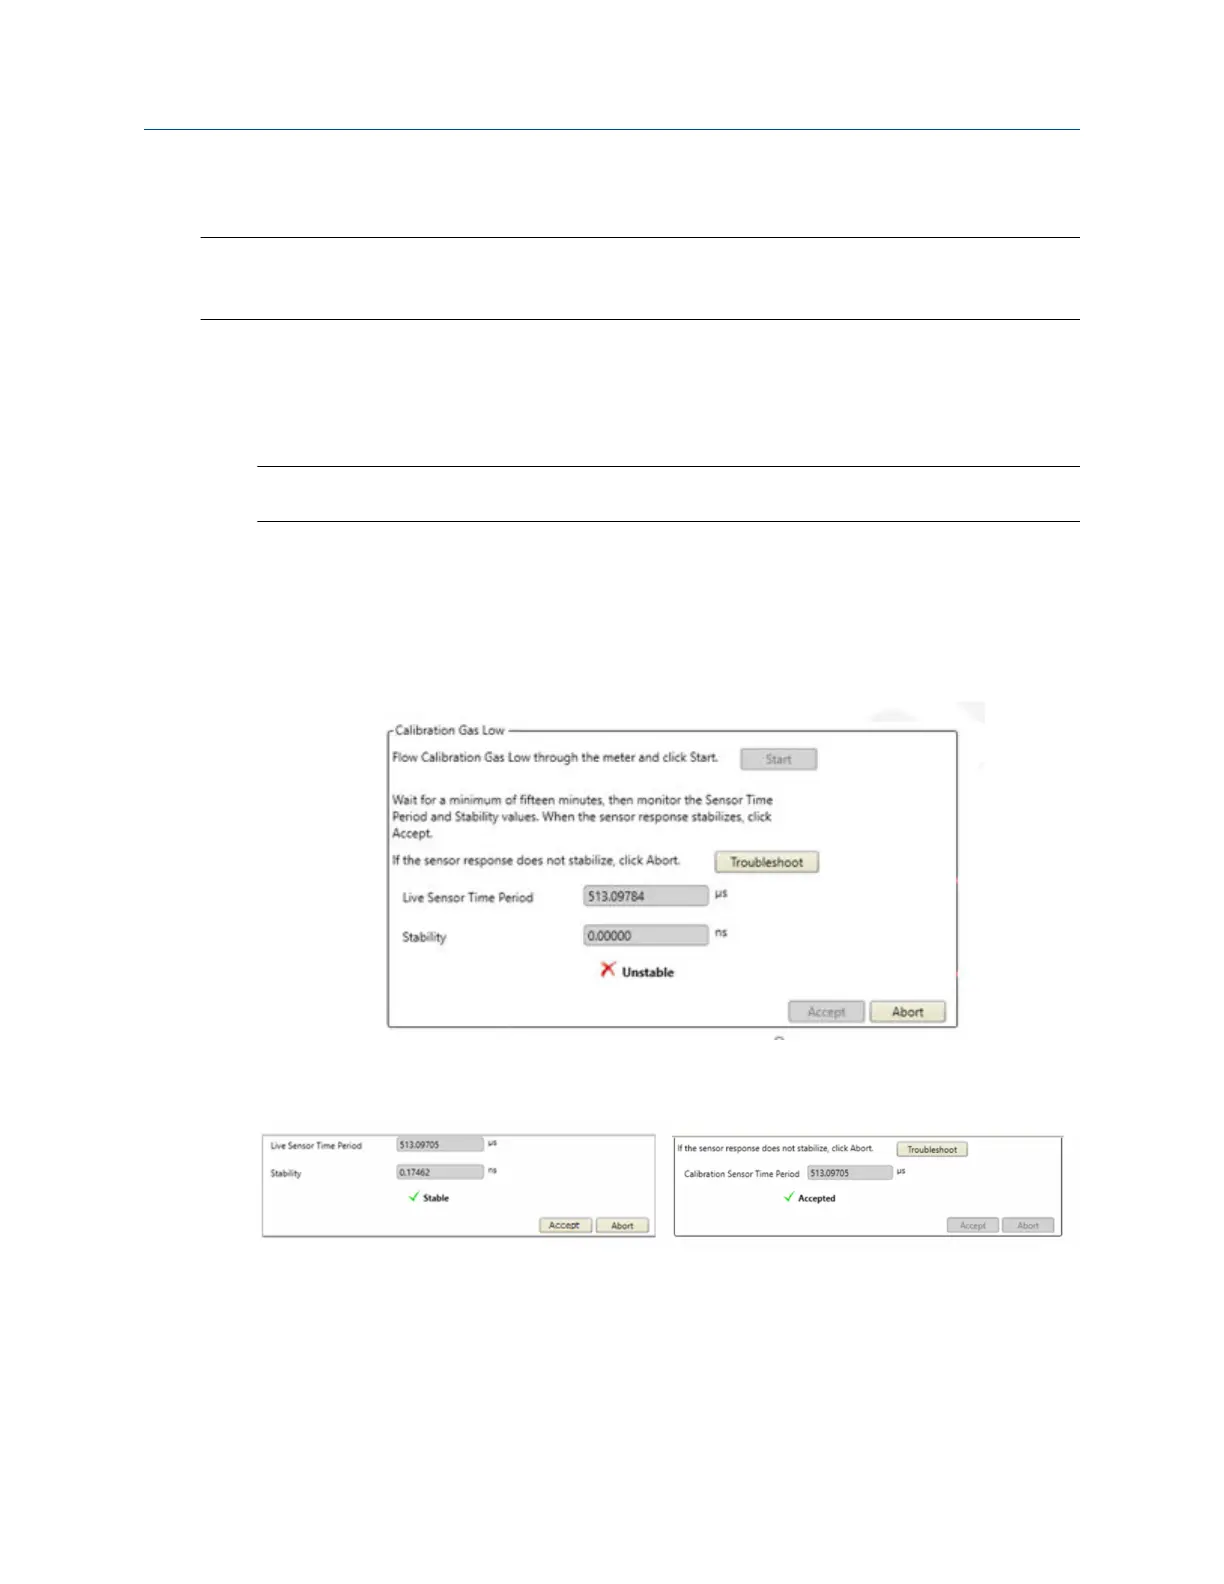
e) As the gas flows, select the Start button and observe the Live Sensor Time Period and Stability
values.
f) Wait between 3 to 15 minutes for the system to stabilize. When Stability is Good, select Accept
or Next.
If measurement does not stabilize after 30 minutes, select Abort and troubleshoot the problem.
g) Disconnect the lower calibration gas.
9. Set the high-density calibration point.
a) Connect the higher calibration gas to the calibration gas 2 inlet (I).
Configuration and Use Manual Purging and calibration
MMI-20020954 March 2021
Configuration and Use Manual 39
 Loading...