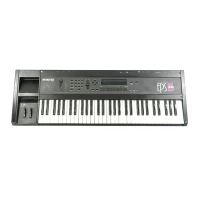
Replacing EPS-16 PLUS Modules (KEYBOARD ONLY)
SECTION
F
Removing
Installing
page 32
Replacing the Transformer
Due to problems
that
may occur with
the
plastic case, all units that need the
Transformer replaced should
be
sent
back
to
the
factory. Contact your distributor
if
you
are located outside the U.S.
Replacing the Pitch/Mod Wheel Assembly
The
Pitch and
Mod
Wheels are replaced
as
an
assembly along with
the
main harness
cables.
1. Remove
all cables connected to
the
EPS-16 PLUS, including
the
Power cord.
2.
Remove the
four
(4) screws that
fasten
the
control panel with a 2.5mm hex
wrench.
NOTE: These
are
machine screws.
3 . Place the unit upside down on a soft surface and remove the
four·
(4) screws that
attach the Wheel Assembly to the case.
See Figure
14
for location
of
screws.
4.
Return the unit
to
an upright position. Raise the control panel and cut the wire
ties that hold
the
wire harness to
the
chassis. .
5. Disconnect the main harness from
the
Main Board, the Power Supply, the
Keypad/Display and the line filter.
Note
that these connectors
are
keyed
and
have connector locks.
6. Carefully
lift
the
Wheel Assembly out
of
the case.
7.
Disconnect the cables
from
the Disk Drive, paying particular attention
to
the
polarity.
8. Remove the Disk Drive and place
it
into
the
new
assembly as described in Section
H Reattach
the
Disk Drive cables.
9.
Connect the
new
wire harness to:
a. the Main Board
(Ill,
J13, J15, and ground lug),
b. the Power
Supply (J1,J2, J3,
and
ground wire to the heat sink),
c. the KeypadlDisplay (left sides), and
d. the line filter ground lug
paying particular attention
to the alignment
of
pins and connectors.
10. Reconnect the
wire harness
to
the
case
using wire ties.
11. Reattach the Wheel Assembly
to
the
case using the four screws.
12. Power up, test
the
unit, and close
the
control panel.
EPS-16 PLUS Service Manual

 Loading...