Section 9: Standard & Optional Machine
Features
147
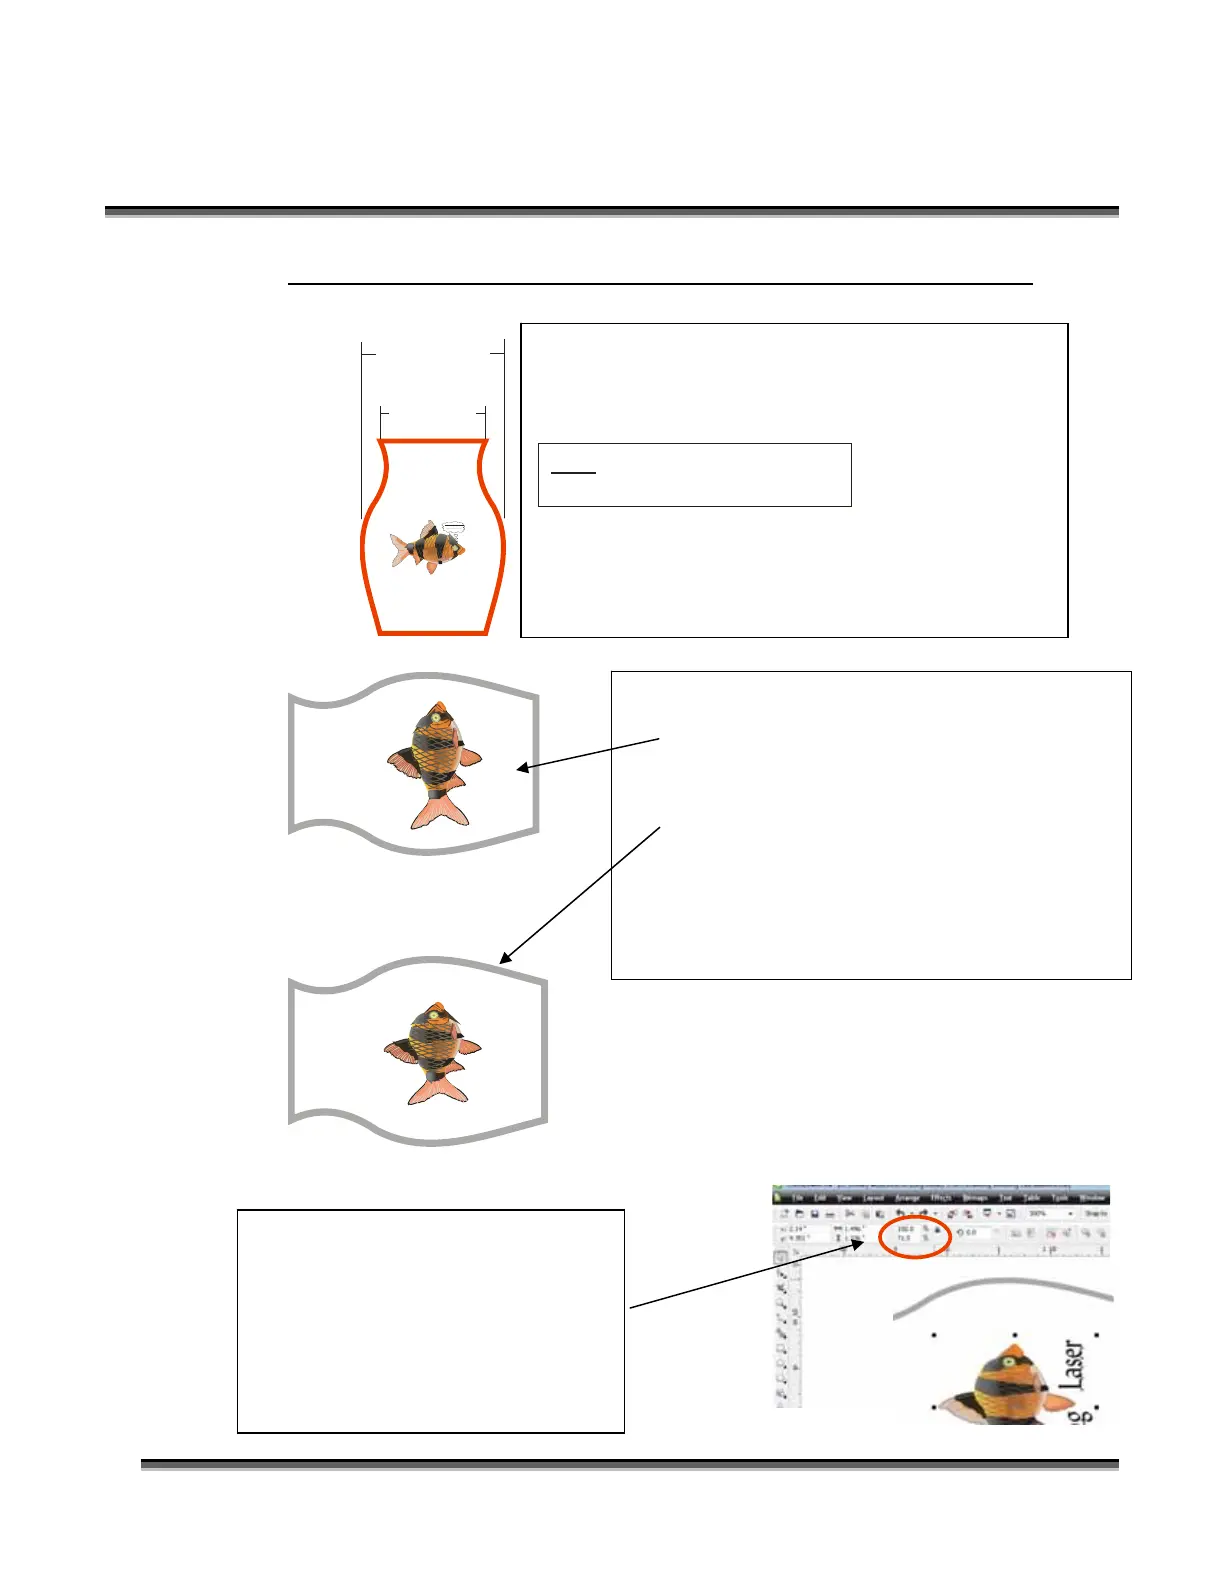
For objects with a larger middle section – shrink artwork:
Middle Sectio
Diameter = 4.2” ( 106.7 mm)
Drive Wheel Side
Diameter = 3” (76.2 mm)
Epilog
Laser
Ep ilog
Laser
Epilog
Laser
Divide the drive wheel side by the middle diameter
and multiply by 100 to calculate the percentage of
adjustment. For our example the calculation is:
=
.715 x 100 = 71.5%
3”
4.2”
Because our calculation percentage is less than 100,
we need to shrink the artwork to 71.5% of its original
size.
Normally, you would set up your artwork
something like the top image.
After shrinking the artwork it appears like the
bottom image. We’re now ready to print.
(The grey outline of the glass is for reference
purposes to show how the glass will be mounted
on the rotary and would not be part of the printed
artwork.
The easiest way to precisely shrink
or expand your artwork in Corel is to
select the artwork and then type in
the amount of adjustment.
Notice that you only want to adjust
the vertical aspect of your artwork.
 Loading...