Section 9: Standard & Optional Machine
Features
155
The previous example is a relatively simple example of how to use the Pin Table.
The following photos show a more complicated Combined Raster/Vector job.
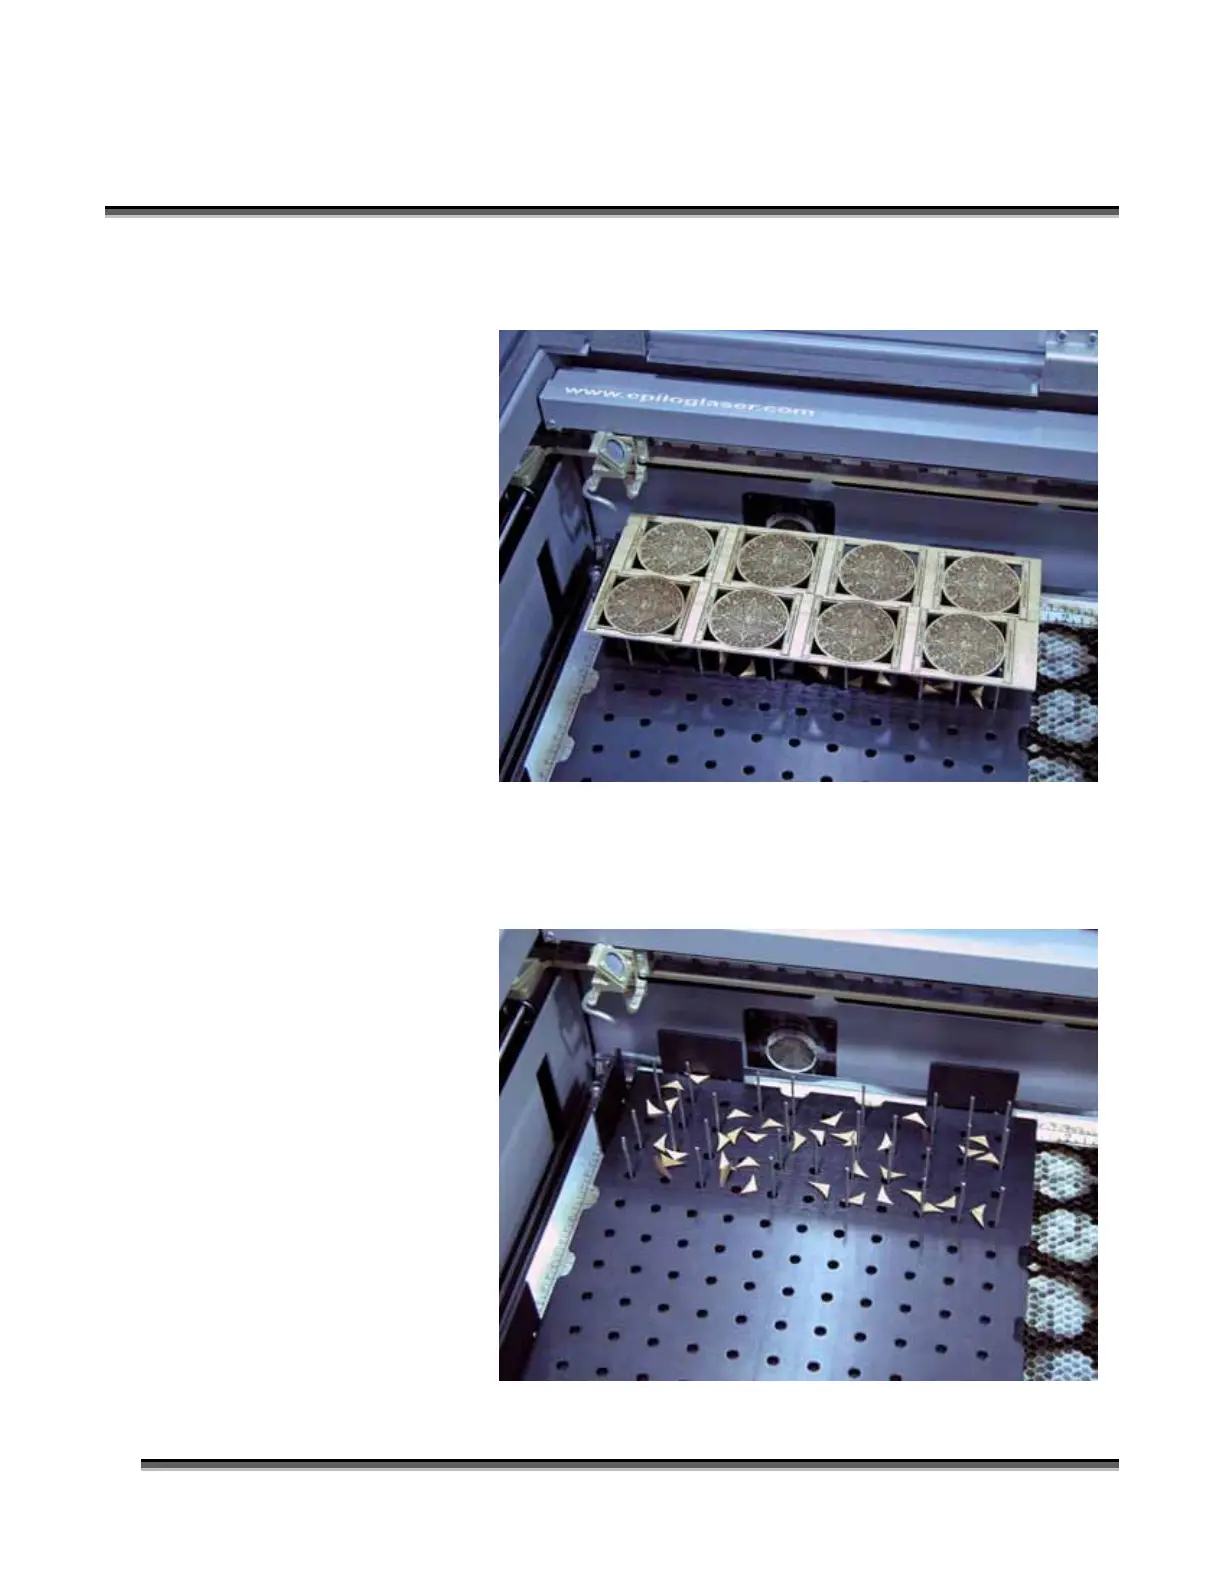
This photo shows a
job that has been
raster engraved and
then vector cut.
You can see that all
of the small pieces
have been
completely cut out
and have separated
from the material.
The photo below shows the small pieces from the previous photo laying on the Parts
Lifter. Simply lift the Parts Lifter from the Pin Table and throw away the pieces.
Cleaning up with the Parts Lifter makes clean up easy because you do not have to
remove the Pin
Table from the
machine, nor do
you have to pick up
each individual
waste piece from
the machine.
Simply clean off all
of the waste pieces
and replace the
Parts Lifter onto
the Pin Table.
 Loading...